Pioneer DV-47A Owner's Manual - Page 47
Video settings
 |
View all Pioneer DV-47A manuals
Add to My Manuals
Save this manual to your list of manuals |
Page 47 highlights
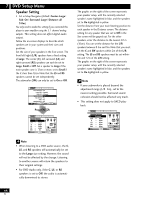
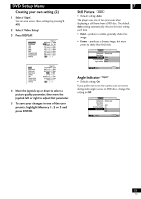
DVD Setup Menu Video settings TV Screen • Set in Setup Navigator (Default: 16:9 (Wide)) If you have a widescreen TV, select the 16:9 (Wide) setting-widescreen DVD software is then shown using the full screen area. When playing software recorded in conventional (4:3) format, the settings on your TV will determine how the material is presented-see the manual that came with your TV for details on what options are available. If your TV does not have settings for how 4:3 sources look, choose the 16:9(Compressed) setting. The picture you see on your TV will be determined by the disc. See page 68 for more information. If you have a conventional TV, choose either 4:3 (Letter Box) or 4:3 (Pan & Scan). In Letter Box mode, widescreen software is shown with black bars at the top and bottom of the screen. Pan & Scan chops the sides off widescreen material to make it fit the 4:3 screen (so even though the picture looks larger on the screen, you're actually seeing less of the movie). Audio1 A2 Video1 V2 Language General TV Screen - 4:3(Letter Box) Video Out 4:3(Pan&Scan) S-Viveo Out 16:9(Wide) Frame Search 16:9(Compressed) Screen Saver - Off Move SETUP Exit Note • You cannot change this setting when a disc is playing. • Some discs will not allow you to change the aspect ratio. 7 S-Video Out • Default setting: S2 You only need to make this setting if you connected this player to your TV using an S-Video cord. If you find that the picture is stretched or distorted on the default S2 setting, try changing it to S1. Audio1 A2 Video1 V2 Language General TV Screen - 16:9(Wide) Video Out - Video S-Video Out - S1 Frame Search S2 Screen Saver - Off Move SETUP Exit Frame Search • Default setting: Off Set this to On if you want to be able to do frame-accurate searching of DVD discs (see page 23 for how to do a time & frame search). On the default setting, the time & frame search is not available. Audio1 A2 Video1 V2 Language General TV Screen - 16:9(Wide) Video Out - Video S-Video Out - S2 Frame Search - On Screen Saver Off Move SETUP Exit Screen Saver • Default setting: Off If a constant image is displayed on a conventional CRT-type TV, it can "burn in" leaving a ghost image on the screen. Switch to On to make sure that a constant image is not displayed for a dangerously long time. If the Screen Saver comes on when the Speaker Setup test tone is playing, the test tone will stop (page 46). Audio1 A2 Video1 V2 Language General TV Screen - 16:9(Wide) Video Out - Video S-Video Out - S2 Frame Search - Off Screen Saver On Off Move SETUP Exit 47 En
-
 1
1 -
2
-
3
-
4
-
5
-
6
-
7
-
8
-
9
-
10
-
11
-
12
-
13
-
14
-
15
-
16
-
17
-
18
-
19
-
20
-
21
-
22
-
23
-
24
-
25
-
26
-
27
-
28
-
29
-
30
-
31
-
32
-
33
-
34
-
35
-
36
-
37
-
38
-
39
-
40
-
41
-
 42
42 -
 43
43 -
 44
44 -
 45
45 -
 46
46 -
 47
47 -
 48
48 -
 49
49 -
 50
50 -
 51
51 -
 52
52 -
53
-
54
-
55
-
56
-
57
-
58
-
59
-
60
-
61
-
62
-
63
-
64
-
65
-
66
-
67
-
68
-
69
-
70
-
71
-
72
 |
 |
