Pioneer P7600DVD Owner's Manual - Page 73
Introduction of audio, adjustments, Audio Adjustments
 |
UPC - 012562745602
View all Pioneer P7600DVD manuals
Add to My Manuals
Save this manual to your list of manuals |
Page 73 highlights
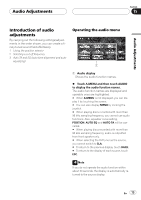
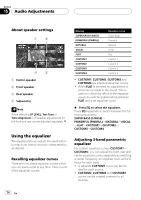
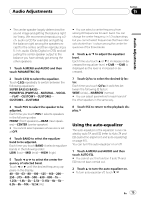
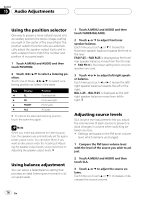
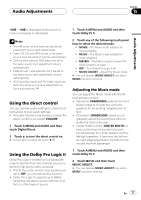
Audio Adjustments Section 15 Audio Adjustments Introduction of audio adjustments By carrying out the following settings/adjustments in the order shown, you can create a finely-tuned sound field effortlessly. 1 Using the position selector 2 Selecting a cut-off frequency 3 Auto TA and EQ (auto-time alignment and auto- equalizing) Operating the audio menu 1 1 Audio display Shows the audio function names. % Touch A.MENU and then touch AUDIO to display the audio function names. The audio function names are displayed and operable ones are highlighted. # When A.MENU is not displayed, you can display it by touching the screen. # You can also display MENU by clicking the joystick. # When playing discs recorded with more than 96 kHz sampling frequency, you cannot use audio functions. Also, equalizer curve setting, POSITION, AUTO EQ and AUTO TA will be cancelled. # When playing discs recorded with more than 96 kHz sampling frequency, audio is outputted from front speaker only. # When selecting the FM tuner as the source, you cannot switch to SLA. # To return to the previous display, touch BACK. # To return to the display of each source, touch ESC. Note If you do not operate the audio function within about 30 seconds, the display is automatically returned to the source display. En 73
-
 1
1 -
2
-
3
-
4
-
5
-
6
-
7
-
8
-
9
-
10
-
11
-
12
-
13
-
14
-
15
-
16
-
17
-
18
-
19
-
20
-
21
-
22
-
23
-
24
-
25
-
26
-
27
-
28
-
29
-
30
-
31
-
32
-
33
-
34
-
35
-
36
-
37
-
38
-
39
-
40
-
41
-
42
-
43
-
44
-
45
-
46
-
47
-
48
-
49
-
50
-
51
-
52
-
53
-
54
-
55
-
56
-
57
-
58
-
59
-
60
-
61
-
62
-
63
-
64
-
65
-
66
-
67
-
 68
68 -
 69
69 -
 70
70 -
 71
71 -
 72
72 -
 73
73 -
 74
74 -
 75
75 -
 76
76 -
 77
77 -
 78
78 -
79
-
80
-
81
-
82
-
83
-
84
-
85
-
86
-
87
-
88
-
89
-
90
-
91
-
92
-
93
-
94
-
95
-
96
-
97
-
98
-
99
-
100
-
101
-
102
-
103
-
104
-
105
-
106
-
107
-
108
-
109
-
110
-
111
-
112
 |
 |
