Pioneer PRO-1540HD Owner's Manual - Page 22
Attaching/detaching the PIONEER stand, for PRO-940HD only
 |
View all Pioneer PRO-1540HD manuals
Add to My Manuals
Save this manual to your list of manuals |
Page 22 highlights
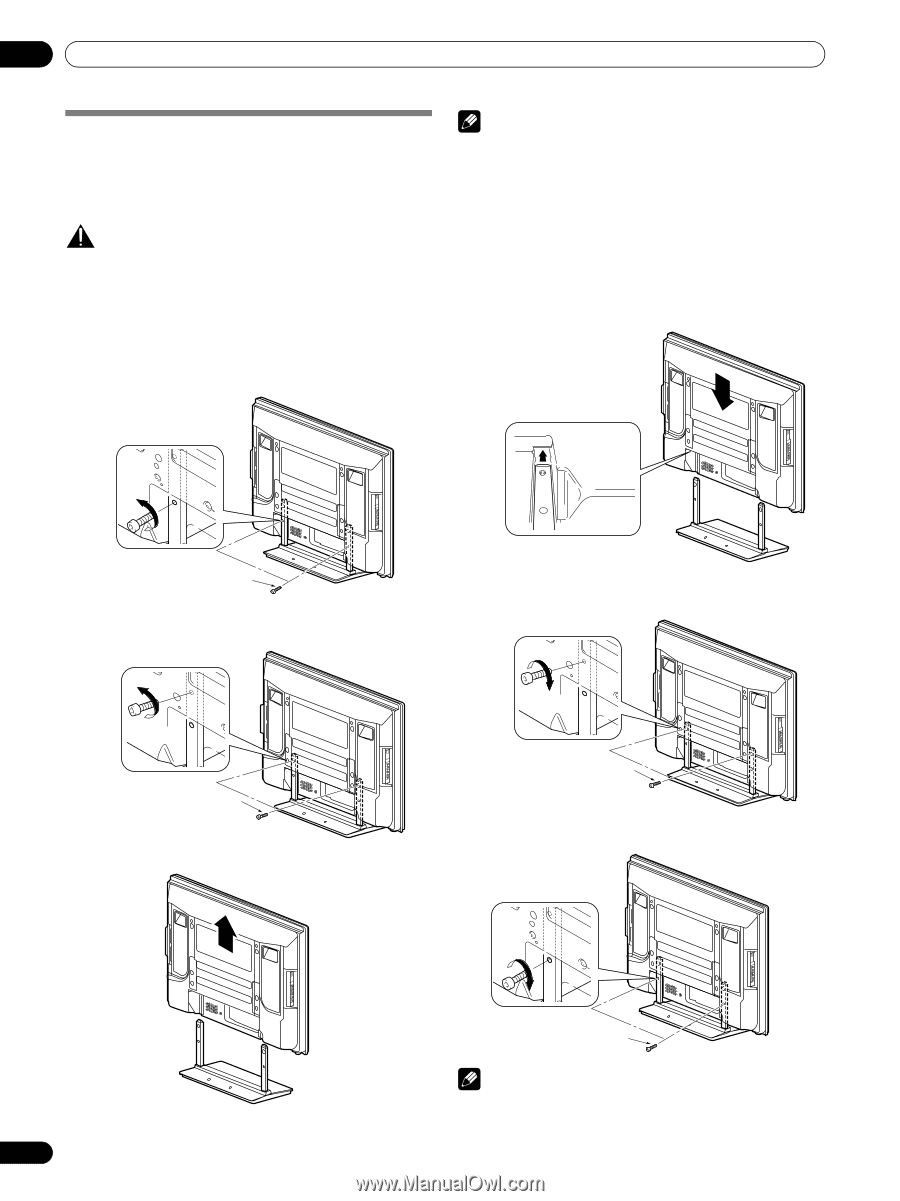
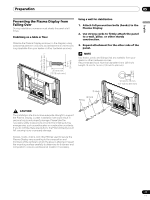
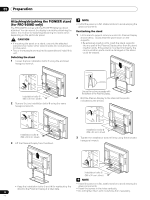
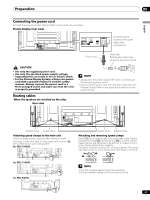
05 Preparation Attaching/detaching the PIONEER stand (for PRO-940HD only) The PRO-940HD comes with the PIONEER table top stand attached. You can mount the display in a rack by detaching the stand. The method for attaching/detaching the stand varies depending on the particular panel. CAUTION • If mounting the panel on a stand, use only the attached stand for this model. Other stand models are not authorized for this panel. • Two or more people are required to assemble and install this unit. Detaching the stand 1 Loosen the two installation bolts ➀ using the enclosed hexagonal wrench. NOTE • Install the panel on a flat, stable location to avoid warping the glass components. Reattaching the stand 1 Fit the stand's support columns under the Plasma Display shown below. Slowly ease the panel down on the supports. • Be extremely careful not to insert the stand supports into any part of the Plasma Display other than the stand insertion slots. If the panel is mounted improperly, the communication ports could be damaged or the stand could be warped. Installation bolts ➀ (M8 x 30 mm: silver) 2 Remove the two installation bolts ➁ using the same hexagonal wrench. Line up the column supports with the bottom of the Plasma Display . 2 Bolt the Plasma Display to the stand at the points indicated by the arrows. Installation bolts ➁ (M8 x 60 mm: silver) 3 Lift the Plasma Display from the stand. Installation bolts ➁ (M8 x 60 mm: silver) 3 Tighten the installation bolts ➀ firmly using the enclosed hexagonal wrench. Installation bolts ➀ (M8 x 30 mm: silver) NOTE • Install the panel on a flat, stable location to avoid warping the • Keep the installation bolts ➀ and ➁ for reattaching the glass components. stand to the Plasma Display at a later date. • Insert the screws in the holes vertically. 22 • Do not tighten them with more force than necessary. En
-
 1
1 -
2
-
3
-
4
-
5
-
6
-
7
-
8
-
9
-
10
-
11
-
12
-
13
-
14
-
15
-
16
-
 17
17 -
 18
18 -
 19
19 -
 20
20 -
 21
21 -
 22
22 -
 23
23 -
 24
24 -
 25
25 -
 26
26 -
 27
27 -
28
-
29
-
30
-
31
-
32
-
33
-
34
-
35
-
36
-
37
-
38
-
39
-
40
-
41
-
42
-
43
-
44
-
45
-
46
-
47
-
48
-
49
-
50
-
51
-
52
-
53
-
54
-
55
-
56
-
57
-
58
-
59
-
60
-
61
-
62
-
63
-
64
-
65
-
66
-
67
-
68
-
69
-
70
-
71
-
72
-
73
-
74
-
75
-
76
-
77
-
78
-
79
-
80
-
81
-
82
-
83
-
84
-
85
-
86
-
87
-
88
-
89
-
90
-
91
-
92
-
93
-
94
-
95
-
96
-
97
-
98
-
99
-
100
-
101
-
102
-
103
-
104
-
105
-
106
-
107
-
108
-
109
-
110
-
111
-
112
-
113
-
114
-
115
-
116
-
117
-
118
-
119
-
120
 |
 |