Pioneer SC-91 Owner's Manual - Page 16
Auto Surr/alc/stream Direct
 |
View all Pioneer SC-91 manuals
Add to My Manuals
Save this manual to your list of manuals |
Page 16 highlights
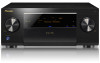
02 Controls and displays Front panel 1 2 3 4 3 5 5 Remote sensor Receives the signals from the remote control (page 11) . 6 6 MASTER VOLUME dial 7 Front panel controls To access the front panel controls, catch the sides of the door with your fingers and pull forward. INPUT SELECTOR STANDBY / ON MASTER VOLUME 8 9 10 11 12 13 14 15 16 AUDIO PARAMETER TUNE VIDEO PARAMETER ZONE 2 ON/OFF MULTI-ZONE CONTROL SPEAKERS iPod iPhone DIRECT CONTROL AUTO/ALC/ DIRECT STATUS BAND TUNER EDIT HDZONE ENTER ON/OFF 7 PRESET PRESET HOME MENU RETURN PHASE PHONES CONTROL MCACC SETUP MIC TUNE 5V 1 A HDMI 5 INPUT 17 18 19 20 21 22 23 1 u STANDBY/ON This switches between standby and on for this receiver. 2 INPUT SELECTOR dial Use to select an input function. 3 Indicators ! MCACC PRO - Lights when EQ is set to ON in the AUDIO PARAMETER menu (page 73) . ! FL OFF - Lights when "off" (nothing displayed) is selected with the display's dimmer adjustment (page 78 ). ! HDMI - Blinks when connecting an HDMI-equipped component; lights when the component is connected (page 28 ). ! WIRELESS - Lights when connected to the network with wireless. The light slowly blinks during WAC (Wireless Accessary Configuration) mode (page 43 ). 4 Character display See Display on page 15 . ISNEPLUETCTOR STANDBY /ON MVOALSUTMERE 8 AUDIO PARAMETER Use to access the Audio options (page 73) . 9 i/j/k/l (TUNE/PRESET) /ENTER Use the arrow buttons when setting up your HOME MENU. Use TUNE i/j to find radio frequencies and use PRESET k/l to find preset stations (page 55 ). 10 VIDEO PARAMETER Use to access the Video options (page 75 ). 11 MULTI-ZONE controls If you've made MULTI-ZONE connections (page 33 ) use these controls to control the sub zone from the main zone (page 77) . 12 SPEAKERS Use to change the speaker terminal (page 75) . 13 iPod iPhone DIRECT CONTROL Change the receiver's input to the iPod and enable iPod operations on the iPod (page 52 ). 14 AUTO SURR/ALC/STREAM DIRECT Switches between Auto Surround (page 59 ), Auto Level Control and Stream Direct mode (page 60 ). 15 STATUS Displays the IP address and information such as selected/set functions and the input signal on the display (page 78) . 16 TUNER controls ! BAND - Switches between AM and FM radio bands (page 55 ). ! TUNER EDIT - Use with TUNE i/j, PRESET k/l and ENTER to memorize and name stations for recall (page 55) . 17 HOME MENU Use to access the Home Menu (pages 49 , 48 , 70 , 87 and 94) . 18 RETURN Press to confirm and exit the current menu screen. 19 PHASE CONTROL Press to switch on/off Phase Control (page 61 ). 20 PHONES jack Use to connect headphones. When the headphones are connected, there is no sound output from the speakers. 16
-
 1
1 -
2
-
3
-
4
-
5
-
6
-
7
-
8
-
9
-
10
-
 11
11 -
 12
12 -
 13
13 -
 14
14 -
 15
15 -
 16
16 -
 17
17 -
 18
18 -
 19
19 -
 20
20 -
 21
21 -
22
-
23
-
24
-
25
-
26
-
27
-
28
-
29
-
30
-
31
-
32
-
33
-
34
-
35
-
36
-
37
-
38
-
39
-
40
-
41
-
42
-
43
-
44
-
45
-
46
-
47
-
48
-
49
-
50
-
51
-
52
-
53
-
54
-
55
-
56
-
57
-
58
-
59
-
60
-
61
-
62
-
63
-
64
-
65
-
66
-
67
-
68
-
69
-
70
-
71
-
72
-
73
-
74
-
75
-
76
-
77
-
78
-
79
-
80
-
81
-
82
-
83
-
84
-
85
-
86
-
87
-
88
-
89
-
90
-
91
-
92
-
93
-
94
-
95
-
96
-
97
-
98
-
99
-
100
-
101
-
102
-
103
-
104
-
105
-
106
-
107
-
108
-
109
-
110
-
111
-
112
-
113
-
114
-
115
-
116
-
117
-
118
-
119
-
120
-
121
-
122
-
123
-
124
 |
 |
