Pioneer VSX-1016TXV Owner's Manual - Page 15
Digital Out - vsx k
 |
UPC - 012562810911
View all Pioneer VSX-1016TXV manuals
Add to My Manuals
Save this manual to your list of manuals |
Page 15 highlights
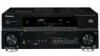
Connecting your equipment 03 VSX-1016TXV OPTICAL IN 1 DIGITAL OUT ANTENNA IN 1 IN 2 (DVR/ VCR1) IN 2 (TV/SAT) OUT HDMI IN 3 (CD) ASSIGNABLE 13 CONTROL OUT XM IN IN AUDIO IN L IN 1 (DVD/LD) R IN 2 (DVR/VCR2) CD COAXIAL ASSIGNABLE 12 COMPONENT VIDEO Y PB PR IN 1 Y PB PR IN 2 Y PB PR Y PB PR ASSIGNABLE 1 3 S-VIDEO IN IN OUT IN VIDEO OUT IN IN IN OUT IN CD-R/TAPE/MD DVD/LD TV/SAT DVR/VCR1 AM LOOP L OUT CENTER IN 3 R SUB FRONT WOOFER OUT IN MONITO OUT OUT IN L DVR/VCR2 R FRONT MULTI C Y PB PR 2 COMPONENT VIDEO TV Connecting digital audio sources This receiver has both digital inputs and outputs, allowing you to connect digital audio components for playback and for making digital recordings. Most digital components also have analog connections. See Connecting analog audio sources on the following page if you want to connect these too. VSX-1016TXV OPTICAL IN 1 DIGITAL OUT ANTENNA IN 1 IN 2 (DVR/ VCR1) IN 2 (TV/SAT) OUT HDMI IN 3 (CD) ASSIGNABLE 13 CONTROL OUT XM IN IN AUDIO IN L IN 1 (DVD/LD) R IN 2 (DVR/VCR2) CD COAXIAL ASSIGNABLE 12 COMPONENT VIDEO Y PB PR IN 1 Y PB PR IN 2 Y PB PR Y PB PR ASSIGNABLE 1 3 S-VIDEO IN IN OUT IN VIDEO OUT IN IN IN OUT IN CD-R/TAPE/MD DVD/LD TV/SAT DVR/VCR1 AM OUT IN 3 R OUT OUT DVR Y PB PR 1 COMPONENT VIDEO DVD player 1 Connect the component video outputs of your source to a set of ASSIGNABLE COMPONENT VIDEO inputs. Connect using a three-way component video cable. • Since they are assignable, it doesn't matter which component video inputs you use for which source. After connecting everything, you'll need to assign the component video inputs-see The Input Assign menu on page 46. 2 Connect the COMPONENT VIDEO OUT jacks to the component video inputs on your TV or monitor. Use a three-way component video cable. 1 OPTICAL COAXIAL DIGITAL OUT OPTICAL 2 DIGITAL IN CD-R, MD, DAT, etc. 1 Connect an optical-type1 digital audio output on your digital component to the DIGITAL 3 (CD) input. Use an optical cable for the connection. 2 For recording equipment, connect the optical-type DIGITAL output to a digital input on the recorder. Use an optical cable to connect to the DIGITAL OUT.2 Note 1 • If your digital component only has a coaxial digital output, you can connect it to one of the coaxial inputs on this receiver using a coaxial cable. When you set up the receiver you'll need to tell the receiver which input you connected the component to (see also The Input Assign menu on page 46). • The digital outputs from other components can be connected to any spare digital audio inputs on this receiver. You can assign them when setting up the receiver (see also The Input Assign menu on page 46). 2 In order to record some digital sources, you must make analog connections as explained in Connecting analog audio sources below. 15 En
-
 1
1 -
2
-
3
-
4
-
5
-
6
-
7
-
8
-
9
-
 10
10 -
 11
11 -
 12
12 -
 13
13 -
 14
14 -
 15
15 -
 16
16 -
 17
17 -
 18
18 -
 19
19 -
 20
20 -
21
-
22
-
23
-
24
-
25
-
26
-
27
-
28
-
29
-
30
-
31
-
32
-
33
-
34
-
35
-
36
-
37
-
38
-
39
-
40
-
41
-
42
-
43
-
44
-
45
-
46
-
47
-
48
-
49
-
50
-
51
-
52
-
53
-
54
-
55
-
56
-
57
-
58
-
59
-
60
-
61
-
62
-
63
-
64
-
65
-
66
-
67
-
68
 |
 |
