Pioneer VSX-815-S Owner's Manual
Pioneer VSX-815-S Manual
 |
View all Pioneer VSX-815-S manuals
Add to My Manuals
Save this manual to your list of manuals |
Pioneer VSX-815-S manual content summary:
- Pioneer VSX-815-S | Owner's Manual - Page 1
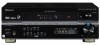
/VIDEO MULTI-CHANNEL RECEIVER VSX-815 VSX-915 Register your product at: www.pioneerelectronics.com • Protect your new investment The details of your purchase will be on file for reference in the event of an insurance claim such as loss or theft. • Receive free tips, updates and service bulletins on - Pioneer VSX-815-S | Owner's Manual - Page 2
Thank you for buying this Pioneer product. Please read through these operating instructions so you will know how to operate your model properly. After you have finished reading the instructions, put them away in a safe place for future reference. If the AC plug of this unit does not match the AC - Pioneer VSX-815-S | Owner's Manual - Page 3
user to the presence of important operating and maintenance (servicing) instructions in the literature accompanying the appliance. D1-4-2-3_En READ INSTRUCTIONS - All the safety and operating instructions mast and supporting structure, grounding lines or other electric light or power circuits, or - Pioneer VSX-815-S | Owner's Manual - Page 4
the batteries 7 Installing the receiver 7 Ventilation 7 02 5 minute guide Listening to Surround Sound 8 Using the Quick Setup 11 03 Quick surround sound setup Automatically setting up for surround sound (MCACC 12 Other problems when using the Auto MCACC Setup 14 04 Connecting up Making - Pioneer VSX-815-S | Owner's Manual - Page 5
menu 66 The Other setup menu 67 Dynamic Range Control Setup 67 Dual Mono Setup 67 LFE Attenuator Setup 68 SR+ Setup for Pioneer plasma displays . . . 68 13 Additional information Troubleshooting 69 Resetting the main unit 72 Switching the speaker impedance 72 Specifications 73 Power cord - Pioneer VSX-815-S | Owner's Manual - Page 6
VOL TV CH INPUT SELECT TV VOL RETURN SYSTEM TUNE GUIDE SETUP TV CONTROL ST BAND ENTER DTVMENU ST T.EDIT Checking what's in the box Please check that you've received the following supplied accessories: • Setup microphone • Remote control unit • Dry cell batteries (AA size IEC R6) x2 • AM - Pioneer VSX-815-S | Owner's Manual - Page 7
a device that gives off a magnetic field). This may interfere with the sound. - in direct sunlight - in damp or wet areas - in extremely governmental regulations or environmental public instruction's rules that apply in and/or causing malfunctions. 8 inches Receiver (20 cm) Slot and openings in - Pioneer VSX-815-S | Owner's Manual - Page 8
Listening to Surround Sound This receiver was designed with the easiest possible setup in mind, so with the following quick setup guide, you should have your system hooked up for surround sound in no time at all. In most cases, you can simply leave the receiver in the default settings. • Be sure to - Pioneer VSX-815-S | Owner's Manual - Page 9
for the VSX-815 are the same. Caution • Make sure that all the bare speaker wire is twisted together and inserted fully into the speaker terminal. Use good quality speaker wire to connect the speakers to the receiver. Note 1 • If you're not using a subwoofer, change the front speaker setting (see - Pioneer VSX-815-S | Owner's Manual - Page 10
isn't, press DVD/LD on the remote control to set the receiver to the DVD input.2 There are several other sound options you can select. See Listening to your system on page 34 for more on this.3 Front speaker (L) Center speaker (C) Front speaker (R) Subwoofer (SW) Surround speaker (RS) Listening - Pioneer VSX-815-S | Owner's Manual - Page 11
to Automatically setting up for surround sound (MCACC) on page 12. If you choose to do so, you can skip the Quick Setup. 1 If the receiver is off, press STANDBY/ON to turn the power on. 2 Press QUICK SETUP. SW DET flashes in the display while the receiver checks your setup for a subwoofer. SW YES - Pioneer VSX-815-S | Owner's Manual - Page 12
, place the microphone at ear level using a table or a chair. 2 If the receiver is off, press RECEIVER to turn the power on. 3 If you have a subwoofer, turn it on. 4 Press RECEIVER on the remote control, then press the SYSTEM SETUP button. • Press SYSTEM SETUP again at any time to exit the System - Pioneer VSX-815-S | Owner's Manual - Page 13
MCACC indicator on the front panel will light to show the surround settings are complete. The settings made in the Auto MCACC Setup should give you excellent surround sound from your system, but it is also possible to adjust these settings manually using the System Setup menu (starting on page 43 - Pioneer VSX-815-S | Owner's Manual - Page 14
03 Quick surround sound setup Other problems when using the Auto MCACC Setup If the room environment is not optimal for the Auto MCACC Setup (too much background noise, echo off the walls, obstacles blocking the speakers from the microphone) the final settings may be incorrect. Check for household - Pioneer VSX-815-S | Owner's Manual - Page 15
cables should be used to connect digital components to this receiver. Important • Before making or changing any connections, switch and disconnect the power cord from the AC outlet. Analog audio cables Use stereo RCA phono cables to connect analog audio components. These cables are typically red - Pioneer VSX-815-S | Owner's Manual - Page 16
is avoided. Component video cables Green (Y) Blue (PB) Red (PR) About the video converter VSX-915 model only The video converter allows you to same type of video cable as you used to connect the recorder to the receiver. • Also note that this feature is available with NTSC signals only. For PAL - Pioneer VSX-815-S | Owner's Manual - Page 17
AM LOOP ANTENNA R OUT CONTROL IN OUT OUT DVR/ VCR IN MONITOR OUT TV/ IN SAT SUB WOOFER PREOUT DVD IN /LD S-VIDEO This receiver* 2 1 COAXIAL DIGITAL OUT R AUDIO L ANALOG OUT VIDEO OUT DVD player * The illustration shows the VSX-915, but connections for the VSX-815 are the same. Note - Pioneer VSX-815-S | Owner's Manual - Page 18
OUT CONTROL SURROUND channel decoder with multi-channel analog output jacks * The illustration shows the VSX-915, but connections for the VSX-815 are the same. 1 Connect a set of audio/video outputs on the set-top box component to the TV/SAT AUDIO and VIDEO inputs on this receiver.2 Use a stereo - Pioneer VSX-815-S | Owner's Manual - Page 19
AM LOOP ANTENNA OUT CONTROL IN OUT V OUT IN MONITOR OUT IN SUB WOOFER IN PREOUT S-VI 1 2 3 OPTICAL COAXIAL DIGITAL OUT R OUT L PLAY AUDIO OUT R IN L REC AUDIO IN CD-R, MD, DAT, Tape recorder, etc. * The illustration shows the VSX-915, but connections for the VSX-815 are the same - Pioneer VSX-815-S | Owner's Manual - Page 20
audio/video outputs on the recorder to the DVR/VCR AUDIO and VIDEO inputs on this receiver. Use a stereo RCA phono cable for the audio connection and a standard RCA video cable for the video connection.1 2 Connect a set of audio/video inputs on the recorder to the DVR/VCR AUDIO and VIDEO outputs on - Pioneer VSX-815-S | Owner's Manual - Page 21
free picture. See the manuals that came with your receiver's COMPONENT VIDEO MONITOR OUT jacks. 1 Connect the component video outputs of your source to a set of component video inputs on this receiver receiver CD CD-R/TAPE/MD TUNER AUX S-VIDEO VIDEO VIDEO INPUT L AUDIO R MCACC DIGITAL IN SETUP - Pioneer VSX-815-S | Owner's Manual - Page 22
reception and sound quality, connect external antennas (see Using external antennas below). Always make sure that the receiver is switched 5.1CH REC INPUT CD-R IN / TAPE / MD PLAY L VIDEO AM LOOP ANTENNA R OUT CONTROL IN OUT OUT DVR/ VCR IN MONITOR OUT TV/ IN SAT SUB WOOFER PREOUT DVD IN /LD - Pioneer VSX-815-S | Owner's Manual - Page 23
for the VSX-815 are the same. Caution • Make sure that all the bare speaker wire is twisted together and inserted fully into the speaker terminal. Use good quality speaker wire to connect the speakers to the receiver. Note 1 If you're not using a subwoofer, change the front speaker setting (see - Pioneer VSX-815-S | Owner's Manual - Page 24
• The speaker terminals also accept single banana plugs. (Refer to speaker manual for details.) Caution • These speaker terminals are hazardous when live. To the center speaker above or below the TV so that the sound of the center channel is localized at the TV screen. Also, make sure the center - Pioneer VSX-815-S | Owner's Manual - Page 25
receiver to turn off automatically. 3-D view of 7.1 channel speaker setup Overhead view of speaker setup You can also refer to the 3-D speaker setup illustration on page 10. Front left Center Front right Surround left Subwoofer • Do not connect a TV set, monitor, heater, or similar appliance - Pioneer VSX-815-S | Owner's Manual - Page 26
also have at least one set of analog audio or video jacks connected to another component for grounding purposes. OUT CONTROL IN Receiver CONTROL IN OUT Remote control unit Other Pioneer products with CONTROL terminals Connect to CONTROL terminal of other Pioneer products Note 1 • If you want - Pioneer VSX-815-S | Owner's Manual - Page 27
05 English Deutsch Français Italiano Nederlands Español Chapter 5: Controls and displays Front panel 1 23 45 AUDIO/VIDEO MULTI-CHANNEL RECEIVER MULTI JOG ENTER ADVANCED ST/DIRECT SIGNAL STANDARD SURR /AUTO SURR SELECT LISTENING MODE STANDBY/ON PHONES DVD/LD TV/SAT DVR/VCR INPUT FL DIMMER - Pioneer VSX-815-S | Owner's Manual - Page 28
62) and to change the impedance setting (page 72). 16 EXTENDED MODE Selects the surround back channel mode (page 39) or virtual surround 22 QUICK SETUP See Using the Quick Setup on page 11. 23 System Setup menu controls SYSTEM SETUP Use with the MULTI JOG dial to access the System Setup menu (page - Pioneer VSX-815-S | Owner's Manual - Page 29
Pro Logic IIx decoding (see Listening in surround sound on page 34). 5 VIR.SB Lights during Virtual surround back processing (page 40). 6 DIRECT Lights when source direct playback is in use. Direct playback bypasses the tone controls and channel levels for the most accurate reproduction of a source - Pioneer VSX-815-S | Owner's Manual - Page 30
EQ indicators These indicators show the EQ balance for each channel when checking your Acoustic Calibration EQ settings. See Checking your Acoustic Calibration EQ settings on page 47 for more on this. Remote control RECEIVER INPUT SELECT 1 2 SOURCE 11 12 DVD/LD TV/SAT DVR/VCR TVCONT 3 MULTI - Pioneer VSX-815-S | Owner's Manual - Page 31
page 52). GUIDE Displays the guides on a digital TV. SYSTEM SETUP (Press RECEIVER first to access) Use to access the System Setup menu (see /ENTER Use the arrow buttons when setting up your surround sound system (see page 43). Also used to control DVD menus/options and for deck channels. 31 En - Pioneer VSX-815-S | Owner's Manual - Page 32
stereo and mono reception of FM broadcasts. If the signal is weak then switching to mono will improve the sound quality (page 51). AUDIO Changes the audio language or channel DVD controls for DVD/HDD recorders. 9 RECEIVER CONTROL buttons STANDARD EQ setting (page 37). INPUT ATT Attenuates (lowers - Pioneer VSX-815-S | Owner's Manual - Page 33
also restores the sound). Operating range of remote control unit The remote control may not work properly if: • There are obstacles between the remote control and the receiver's remote sensor. • Direct sunlight or fluorescent light is shining onto the remote sensor. • The receiver is located near - Pioneer VSX-815-S | Owner's Manual - Page 34
setup and the type of source you're listening to. If you connected surround back speakers, see also Using the surround back channel (Extended mode) on page 39.2 The following modes provide basic surround sound for stereo and multichannel sources. CH CH RECEIVER CONTROL STANDARD ADV.SURR STEREO - Pioneer VSX-815-S | Owner's Manual - Page 35
additional surround sound effects. Most Advanced Surround modes are designed to be used with film soundtracks, but some modes are also suited for music sources. Try different settings with various soundtracks to see which you like.2 CH CH RECEIVER CONTROL STANDARD ADV.SURR STEREO SLEEP MIDNIGHT - Pioneer VSX-815-S | Owner's Manual - Page 36
speaker. CH CH RECEIVER CONTROL STANDARD ADV.SURR STEREO SLEEP MIDNIGHT/ ACOUSTIC LOUDNESS DIALOGE EQ INPUTATT SHIFT EFFECT /CH SEL LEVEL Note 1 If the Extended mode is switched off, 2 Pro Logic IIx becomes 2 Pro Logic II (5.1 channel sound), however these settings will still be effective - Pioneer VSX-815-S | Owner's Manual - Page 37
just the front left and right speakers (and possibly your subwoofer depending on your speaker settings). Dolby Digital and DTS multichannel sources are downmixed to stereo. CH CH RECEIVER CONTROL STANDARD ADV.SURR STEREO SLEEP MIDNIGHT/ ACOUSTIC LOUDNESS DIALOGE EQ INPUTATT SHIFT EFFECT /CH - Pioneer VSX-815-S | Owner's Manual - Page 38
When set to DIGITAL or AUTO, 2 DIGITAL lights when a Dolby Digital signal is input, and DTS lights when a DTS signal is input. Note 1 • This receiver can ) and set the signal input to DIGITAL. • Some DVD players don't output DTS signals. For more details, refer to the instruction manual supplied with - Pioneer VSX-815-S | Owner's Manual - Page 39
Listening to your system 06 English Deutsch Français Italiano Nederlands Español Using the surround back channel (Extended mode) • Default setting: EXT. ON You can have the receiver automatically use 6.1 or 7.1 decoding for 6.1 encoded sources (for example, Dolby Digital EX or DTS-ES), or you can - Pioneer VSX-815-S | Owner's Manual - Page 40
to sources with no surround back channel information (for example, 5.1 encoded material) with emulated 6.1 encoding (VSB ON). Sometimes the material may sound better in the 5.1 format for which it was originally encoded. In this case you can have the receiver only apply this effect to 6.1 encoded - Pioneer VSX-815-S | Owner's Manual - Page 41
and OFF.1 Enhancing dialog • Default setting: OFF The Dialog Enhancement feature localizes dialog in the center channel to make it stand out from other background sounds in a TV or movie soundtrack. CH CH RECEIVER CONTROL STANDARD ADV.SURR STEREO SLEEP MIDNIGHT/ ACOUSTIC LOUDNESS DIALOGE EQ - Pioneer VSX-815-S | Owner's Manual - Page 42
will light. Using the sleep timer The sleep timer switches the receiver into standby after a specified amount of time so you can fall asleep without worrying about the receiver being left on all night. Use the remote control to set the sleep timer. CH CH RECEIVER CONTROL STANDARD ADV.SURR STEREO - Pioneer VSX-815-S | Owner's Manual - Page 43
on. • If headphones are connected to the receiver, disconnect them. 2 Press RECEIVER on the remote control, then press the SYSTEM SETUP button. • Press SYSTEM SETUP again at any time to exit the System Setup menu. 3 Use / (cursor left/right) to select the setting you want to adjust then press ENTER - Pioneer VSX-815-S | Owner's Manual - Page 44
problems when using the Auto MCACC Setup on page 14 for notes regarding high background noise levels and other possible interference. • If you're using a subwoofer, switch it on and turn up the volume to the middle position. 1 Select 'M MCACC' from the System Setup menu. See Making receiver settings - Pioneer VSX-815-S | Owner's Manual - Page 45
use / (cursor left/ right) to select it. 3 When you're finished, press RETURN. You will return to the Manual MCACC setup menu. Fine Channel Distance • Default setting: 10.0 ft (all channels) For proper sound depth and separation with your system, it is necessary to add a slight bit of delay to some - Pioneer VSX-815-S | Owner's Manual - Page 46
'EQ A. SET' from the Manual MCACC setup menu. • Make sure the microphone is connected. • If you're using a subwoofer, it is automatically detected every time you switch on the system. Make sure it is on and the volume is at the middle position. • See Other problems when using the Auto MCACC Setup on - Pioneer VSX-815-S | Owner's Manual - Page 47
the different settings. 3 Use / (cursor up/down) to select the channel you want, using / (cursor left/ right) to check the settings. The MCACC channel EQ indicators in the front panel display will light accordingly. 4 When you're finished, press RETURN. You will return to the Manual MCACC setup menu - Pioneer VSX-815-S | Owner's Manual - Page 48
07 The System Setup menu Manual speaker setup This receiver allows you to make detailed settings to optimize the surround sound performance. You only need to make these settings once (unless you change the placement of your current speaker system or add new speakers.). These settings are designed - Pioneer VSX-815-S | Owner's Manual - Page 49
This setting decides the cutoff between bass sounds playing back from the speakers selected as LARGE, or the subwoofer, and bass sounds playing back from those selected as SMALL.1 It also decides where the cutoff will be for bass sounds in the LFE channel. 1 Select 'X.OVER' from the SP SETUP menu - Pioneer VSX-815-S | Owner's Manual - Page 50
SEL and +/- on the remote control. You can set two channel levels: one for DVD 5.1 CH and one for the listening modes. Speaker Distance For good sound depth and separation from your system, you need to specify the distance of your speakers from the listening position. The receiver can then add the - Pioneer VSX-815-S | Owner's Manual - Page 51
CLASS MENU DTVMENU ST T.EDIT ENTER ST BAND SYSTEM TUNE GUIDE SETUP TV CONTROL RETURN DTVON/OFF REC DTVINFO MUTE TUNER DISPLAY REC STOP MPX CHRETURN AUDIO SUBTITLE HDD CH RECEIVER CONTROL STANDARD ADV.SURR STEREO DVD CH SLEEP MIDNIGHT/ ACOUSTIC LOUDNESS DIALOGE EQ INPUTATT SHIFT - Pioneer VSX-815-S | Owner's Manual - Page 52
INPUT SELECT SOURCE DVD/LD TV/SAT DVR/VCR TVCONT MULTI CONTROL CD CD-R/TAPE TUNER RECEIVER D.ACCESS TOP MENU TUNE ENTER CLASS MENU DTVMENU ST T.EDIT ENTER ST BAND SYSTEM TUNE GUIDE SETUP TV CONTROL RETURN TV VOL INPUT SELECT TV CH VOL DTVON/OFF REC DTVINFO MUTE TUNER DISPLAY REC - Pioneer VSX-815-S | Owner's Manual - Page 53
. Press repeatedly to cycle through classes A, B and C. 3 Press ST +/- to select the station preset you want. • You can also use the number buttons on the remote control to recall the station preset. 53 En - Pioneer VSX-815-S | Owner's Manual - Page 54
to do this. Most video recorders set the audio recording level automatically-check the component's instruction manual if you're unsure. 5 Start recording, then start playback of the source component.1 DVD/LD TV/SAT DVR/VCR TVCONT MULTI CONTROL CD CD-R/TAPE TUNER RECEIVER ADVANCED ST/DIRECT SIGNAL - Pioneer VSX-815-S | Owner's Manual - Page 55
work for the model that you are using.1 VSX-915 only - If you can't find a preset code that matches the component you want to control, you can still teach the remote individual commands from another remote control (page 56). Note • You can cancel or exit any of the steps by pressing RECEIVER. To go - Pioneer VSX-815-S | Owner's Manual - Page 56
ST T.EDIT ENTER ST MCACC SETUP BAND GUIDE TUNE TV CONTROL RETURN TVVOL INPUT SELECT TV CH VOL DTVON/OFF REC DTVINFO MUTE TUNER DISPLAY RECSTOP MPX CHRETURN AUDIO SUBTITLE HDD DVD CH CH RECEIVER CONTROL STANDRAD ADV.SURR STEREO SLEEP MIDNIGHT/ LOUDNESS TESTTONE SHIFT CHSELECT - Pioneer VSX-815-S | Owner's Manual - Page 57
(s). Erasing one of the remote control button settings VSX-915 model only This erases one of the buttons you have programmed and restores the button to the factory default. 1 While pressing the RECEIVER button, press and hold the 1 button. The remote LCD display shows SETUP. 2 Press the MULTI - Pioneer VSX-815-S | Owner's Manual - Page 58
LCD shows OK to confirm the setting. Confirming preset codes Use this feature to check which preset code is assigned to a MULTI CONTROL button. 1 While pressing the RECEIVER button, press and hold the 1 button. The remote LCD display shows SETUP. 2 Press the MULTI CONTROL button of the component for - Pioneer VSX-815-S | Owner's Manual - Page 59
of your system 10 English Deutsch Français Italiano Nederlands Español Controls for TVs This remote control can control components after entering the proper codes or teaching the receiver the commands (see Setting the remote to control other components on page 55 for more on this). Use the MULTI - Pioneer VSX-815-S | Owner's Manual - Page 60
receiver the commands (see Setting the remote to control other components on page 55 for more on this). Use the MULTI CONTROL buttons to select the component. Button (s) Function Components SOURCE Press to switch the component between standby Go forward channels (channel +). some models, pressing - Pioneer VSX-815-S | Owner's Manual - Page 61
. ENTER DVD/DVR Player GUIDE Press to access the DVD player setup screen. DVD/DVR Player CH +/- Selects channels. VCR/DVD/DVR Player or channel. DVD/DVR Player SUBTITLE Displays/changes the subtitles on multilingual DVDs. DVD/DVR Player HDD (SHIFT Switches to the hard disk controls when - Pioneer VSX-815-S | Owner's Manual - Page 62
speakers connected to speaker system B (only stereo playback is possible). Note 1 • The subwoofer output depends on the settings you made in Speaker setting on page 48. However, if SP B is selected above, no sound is heard from the subwoofer (the LFE channel is not downmixed). • Depending on the - Pioneer VSX-815-S | Owner's Manual - Page 63
ñol Other connections 11 • SP AB - Sound is output from speaker system A (up to 5 channels, depending on the source), the two speakers in speaker system B, and the subwoofer. Multichannel sources (heard through speaker system A) are downmixed for stereo output from speaker system B. Bi-amping - Pioneer VSX-815-S | Owner's Manual - Page 64
ANTENNA R OUT CONTROL IN OUT OUT sound only from the pre-outs, simply disconnect any speakers that are connected directly to the receiver. • If you're not using a subwoofer, change the front speaker setting (see Speaker setting on page 48) to large. 2 This receiver is compatible with all Pioneer - Pioneer VSX-815-S | Owner's Manual - Page 65
to connect the CONTROL IN jack of this receiver with the CONTROL OUT of your plasma display. Before you can use the extra SR+ features, you need to make a few settings in the receiver. See The Input Assign menu on page 66 for detailed instructions. VIDEO INPUT 1 Pioneer plasma display VIDEO - Pioneer VSX-815-S | Owner's Manual - Page 66
connected equipment using component video cables. 1 Select 'IN ASSIG.' from the System Setup menu. See Making receiver settings from the System Setup menu on page 43 for more on this. 2 Use / (cursor left/right) to select the setting you want to adjust then press ENTER. • DIG. IN - See Assigning the - Pioneer VSX-815-S | Owner's Manual - Page 67
discs with dual mono encoding (see Dual Mono Setup below). • LFE ATT - Set the attenuator level for the LFE channel (see LFE Attenuator Setup below). • SR+ - Specify how you want to control your Pioneer plasma display (see SR+ Setup for Pioneer plasma displays below) 3 Make the adjustments necessary - Pioneer VSX-815-S | Owner's Manual - Page 68
• LFEAT 0 - No limiting (recommended setting) • LFEAT 10 - 10dB of limiting • LFEAT ** - No sound from LFE channel 3 When you're finished, press RETURN. 2 Use / (cursor up/down) and ENTER to select the 'VOL C.' setting you want. • VOL C. OFF - The receiver does not control the volume of the plasma - Pioneer VSX-815-S | Owner's Manual - Page 69
Pioneer authorized service center or your dealer for servicing. No sound is output when a function is selected. • Make sure the component is connected correctly (refer to Connecting up on page 15). • Press MUTE on the remote control to the instruction manual supplied with the TV. • VSX-915 only - Pioneer VSX-815-S | Owner's Manual - Page 70
an LFE channel. • Switch the subwoofer setting in Speaker setting on page 48 to YES or PLUS. • Switch the LFE Attenuator Setup on page 68 to LFEAT 0 or LFEAT 10. Noise during playback of a • Move the cassette deck further from your receiver, until the noise cassette deck. disappears. Sound is - Pioneer VSX-815-S | Owner's Manual - Page 71
the subwoofer output). After using the Auto MCACC • Low-frequency noise could have been caused by an air conditioner or Setup, the speaker size motor. Switch off all appliances in the room and rerun the Auto setting (LARGE or SMALL) is MCACC Setup. incorrect. Can't operate the remote control - Pioneer VSX-815-S | Owner's Manual - Page 72
the main unit Use this procedure to reset all the receiver's settings to the factory default. Use the front panel controls to do this. 1 Switch the receiver into standby. 2 While holding down the TONE button, press and hold the STANDBY/ON button for about three seconds. 3 When you see RESET - Pioneer VSX-815-S | Owner's Manual - Page 73
Specifications Amplifier section • Continuous power output (stereo)1 Front: VSX-815 . . . 100 W (20-20,000 Hz, THD 0.7%, 8 Ω) VSX-915 . . . 120 W (20-20,000 Hz, THD 0.7%, 8 Ω) • Continuous power output (surround) VSX-815 model: Front . . . . . 100 W per channel /2.2 kΩ • Tone control Bass 6 dB (100 - Pioneer VSX-815-S | Owner's Manual - Page 74
Stereo: 70 dB (at 85 dBf) Distortion Stereo: 0.5 % (1 kHz) Alternate Channel Selectivity 60 dB (400 kHz) Stereo setup 1 Dry cell batteries (AA size IEC R6 2 Remote control 1 AM loop antenna 1 FM wire antenna 1 Warranty card 1 These operating instructions Pioneer authorized service center - Pioneer VSX-815-S | Owner's Manual - Page 75
control at a low setting. • Slowly increase the sound until you can hear it comfortably and clearly, and without distortion. Once you have established a comfortable sound level: • Set room, refrigerator, bedroom away from traffic 50 Light traffic, normal conversation, quiet office 60 Air conditioner - Pioneer VSX-815-S | Owner's Manual - Page 76
or if you wish to purchase replacement parts, operating instructions, service manuals, or accessories, please call the number shown below. 8 0 0 - 4 2 1 - 1 4 0 4 Please do not ship your product to Pioneer without first calling the Customer Support Division at the above listed number for assistance
-
 1
1 -
 2
2 -
 3
3 -
 4
4 -
 5
5 -
 6
6 -
 7
7 -
8
-
9
-
10
-
11
-
12
-
13
-
14
-
15
-
16
-
17
-
18
-
19
-
20
-
21
-
22
-
23
-
24
-
25
-
26
-
27
-
28
-
29
-
30
-
31
-
32
-
33
-
34
-
35
-
36
-
37
-
38
-
39
-
40
-
41
-
42
-
43
-
44
-
45
-
46
-
47
-
48
-
49
-
50
-
51
-
52
-
53
-
54
-
55
-
56
-
57
-
58
-
59
-
60
-
61
-
62
-
63
-
64
-
65
-
66
-
67
-
68
-
69
-
70
-
71
-
72
-
73
-
74
-
75
-
76
 |
 |

AUDIO/VIDEO MULTI-CHANNEL
RECEIVER
VSX-815
VSX-915
Register your product at:
www.pioneerelectronics.com
• Protect your new investment
The details of your purchase will be on file for reference in the event of an
insurance claim such as loss or theft.
• Improve product development
Your input helps us continue to design products that meet your needs.
• Receive a free Pioneer newsletter
Registered customers can opt in to receive a monthly newsletter.
• Receive free tips, updates and service bulletins on
your new product
Operating Instructions