Pioneer VSX-920-K Owner's Manual - Page 44
The System Setup menu, Using the System Setup menu
 |
UPC - 884938109369
View all Pioneer VSX-920-K manuals
Add to My Manuals
Save this manual to your list of manuals |
Page 44 highlights
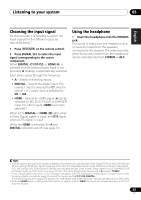
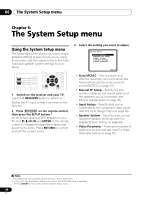
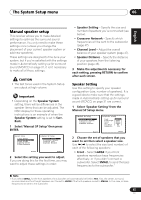
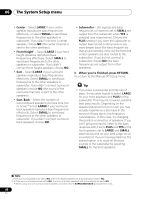
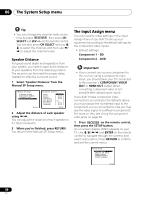
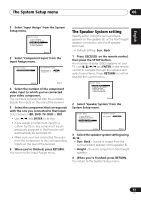
06 The System Setup menu Chapter 6: The System Setup menu Using the System Setup menu The following section shows you how to make detailed settings to specify how you're using the receiver, and also explains how to fine-tune individual speaker system settings to your liking. RECEIVER SLEEP TV SOURCE CONTROL RECEIVER INPUT SELECT BD DVD TV INPUT AUDIO PARAMETER TOP MENU TUNE TUNER EDIT MASTER TOOLS VOLUME MENU PRESET PRESET ENTER HOME MENU SETUP iPod CTRL CATEGORY TUNE BAND RETURN DTV/ TV MUTE 1 Switch on the receiver and your TV. Use the RECEIVER button to switch on.1 Switch the TV input so that it connects to the receiver. 2 Press RECEIVER on the remote control, then press the SETUP button.2 An on-screen display (OSD) appears on your TV. Use and ENTER on the remote control to navigate through the screens and select menu items. Press RETURN to confirm and exit the current menu. 3 Select the setting you want to adjust. System Setup 1.Auto MCACC 2.Manual SP Setup 3.Input Assign 4.Speaker System 5.Video Parameter Return • Auto MCACC - This is a quick and effective automatic surround setup (see Automatically setting up for surround sound (MCACC) on page 31). • Manual SP Setup - Specify the size, number, distance and overall balance of the speakers you've connected (see Manual speaker setup on page 45). • Input Assign - Specify what you've connected to the component video inputs (see The Input Assign menu on page 48). • Speaker System - Specifies how you are using the speaker terminals (see The Speaker System setting on page 49). • Video Parameter - There are a number of additional picture settings (see The Video Parameter setting on page 50). Note 1 If headphones are connected to the receiver, disconnect them. 2 • You can't use the System Setup menu when the iPod/USB input is selected. • Press SETUP at any time to exit the System Setup menu. 44 En
-
 1
1 -
2
-
3
-
4
-
5
-
6
-
7
-
8
-
9
-
10
-
11
-
12
-
13
-
14
-
15
-
16
-
17
-
18
-
19
-
20
-
21
-
22
-
23
-
24
-
25
-
26
-
27
-
28
-
29
-
30
-
31
-
32
-
33
-
34
-
35
-
36
-
37
-
38
-
 39
39 -
 40
40 -
 41
41 -
 42
42 -
 43
43 -
 44
44 -
 45
45 -
 46
46 -
 47
47 -
 48
48 -
 49
49 -
50
-
51
-
52
-
53
-
54
-
55
-
56
-
57
-
58
-
59
-
60
-
61
-
62
-
63
-
64
-
65
-
66
-
67
-
68
-
69
-
70
-
71
-
72
-
73
-
74
-
75
-
76
-
77
-
78
-
79
-
80
-
81
-
82
-
83
-
84
-
85
-
86
-
87
-
88
-
89
-
90
-
91
-
92
-
93
-
94
-
95
-
96
-
97
-
98
-
99
-
100
-
101
-
102
-
103
-
104
-
105
-
106
-
107
-
108
-
109
-
110
-
111
-
112
-
113
-
114
-
115
-
116
-
117
-
118
-
119
-
120
-
121
-
122
-
123
-
124
-
125
-
126
-
127
-
128
-
129
-
130
-
131
-
132
-
133
-
134
-
135
-
136
-
137
-
138
-
139
-
140
-
141
-
142
-
143
-
144
-
145
-
146
-
147
-
148
-
149
-
150
-
151
-
152
-
153
-
154
-
155
-
156
-
157
-
158
-
159
-
160
 |
 |