ProForm 935 E Elliptical English Manual - Page 20
How To Use A Set-a-goal Workout
 |
View all ProForm 935 E Elliptical manuals
Add to My Manuals
Save this manual to your list of manuals |
Page 20 highlights
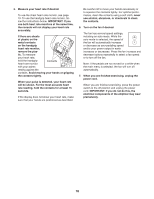
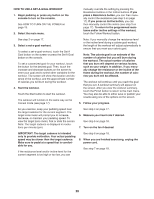
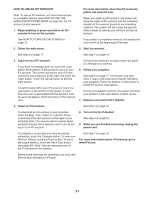
HOW TO USE A SET-A-GOAL WORKOUT 1. Begin pedaling or press any button on the console to turn on the console. See HOW TO TURN ON THE POWER on page 15. 2. Select the main menu. manually override the setting by pressing the Resistance buttons or the Incline buttons. If you press a Resistance button, you can then manually control the resistance (see step 3 on page 17). If you press an Incline button, you can then manually control the incline (see step 3 on page 17). To return to the programmed resistance and/or incline settings of the workout, touch the Follow Workout button. See step 2 on page 17. 3. Select a set-a-goal workout. To select a set-a-goal workout, touch the Set A Goal button on the screen or press the Set A Goal button on the console. To set a customized goal for your workout, touch the button for the desired goal. Then, touch the increase and decrease buttons on the screen to enter your goal and to select other variables for the workout. The screen will show the duration and distance of the workout, and the approximate number of calories you will burn during the workout. 4. Start the workout. Touch the Start button to start the workout. The workout will function in the same way as the manual mode (see page 17). Note: If you manually change the resistance level or the incline level during a calorie goal workout, the length of the workout will adjust automatically to ensure that you meet your calorie goal. Note: The calorie goal is an estimate of the number of calories that you will burn during the workout. The actual number of calories that you burn will depend on various factors, such as your weight. In addition, if you manually change the resistance or the incline of the frame during the workout, the number of calories you burn will be affected. The workout will continue until you reach the goal that you set. A workout summary will appear on the screen. After you view the workout summary, touch the Finish button to return to the main menu. You may also be able to either save or publish your results using one of the options on the screen. 5. Follow your progress. As you exercise, keep your pedaling speed near the target cadence for the current segment. The target zone meter will prompt you to increase, decrease, or maintain your pedaling speed. To view the target zone meter, flick or slide the screen. Note: The target cadence is displayed in revolutions per minute (rpm). See step 4 on page 17. 6. Measure your heart rate if desired. See step 5 on page 18. 7. Turn on the fan if desired. IMPORTANT: The target cadence is intended only to provide motivation. Your actual pedaling speed may be slower than the target cadence. Make sure to pedal at a speed that is comfortable for you. If the resistance level and/or incline level for the current segment is too high or too low, you can See step 6 on page 18. 8. When you are finished exercising, unplug the power cord. See step 7 on page 18. 20
-
 1
1 -
2
-
3
-
4
-
5
-
6
-
7
-
8
-
9
-
10
-
11
-
12
-
13
-
14
-
 15
15 -
 16
16 -
 17
17 -
 18
18 -
 19
19 -
 20
20 -
 21
21 -
 22
22 -
 23
23 -
 24
24 -
 25
25 -
26
-
27
-
28
-
29
-
30
-
31
-
32
-
33
-
34
-
35
-
36
 |
 |
