RCA RCU811 User Guide - Page 14
VCR/DVD Punch-through, Record Key, Additional Features - cable
 |
UPC - 079000323990
View all RCA RCU811 manuals
Add to My Manuals
Save this manual to your list of manuals |
Page 14 highlights
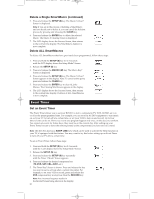
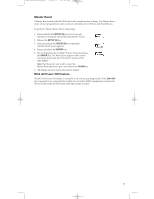
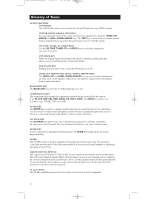
RCU811US_IB_REVB 9/26/03 11:54 AM Page 14 VCR/DVD Punch-through Your RCU811 punches through the six transport keys (REVERSE, PLAY, FORWARD, RECORD, STOP and PAUSE) to VCR or DVD Mode, whichever was used most recently. Punch-through to VCR or DVD transport keys is only allowed for TV, VCR, DVD and CABLE Modes. The SAT and CD/AUDIO transport keys are dedicated to their programmed modes. The LCD shows component changes for the VCR or DVD Punch-through keys if they are pressed in other modes (e.g., If you are in CABLE Mode and you press and release PLAY, either VCR or DVD is displayed in the LCD). Record Key In the VCR and AUDIO/CD Modes (including Punch-through), the RECORD key must be pressed twice before the command is sent. This is also true if a VCR component is programmed under any other mode. The exceptions are for TV, DVD, CABLE and SAT codes, where the RECORD key transmits the command after only a single RECORD keypress. Additional Features Set Time for LCD Display You can set the time the LCD displays. To set the time for the status display, follow these steps: 1. Press and hold the SETUP (S) key for 2-3 seconds until the LCD display shows the Setup Mode? Screen. 2. Release the SETUP (S) key. 3. Press and release the SETUP (S) key repeatedly until the Clock Setup Screen 1 appears. 4. The cursor under the Hours digits (HH) will be flashing. Press and release the LEVEL+/UP ARROW or LEVEL-/DOWN ARROW keys to select the hour. Press and release the ENTER key once you have reached the correct hour. Note: To adjust the AM/PM designation, repeatedly scroll through the hour settings. 5. The cursor under the Minutes digits (MM) now flashes. Press and release the LEVEL+/UP ARROW or LEVEL-/DOWN ARROW keys to select the minutes. Press and release the ENTER key once you have reached the correct minute setting. The LCD display shows the Success Screen, then returns to the normal time display. The time setting is now complete. Backlighting Backlight illumination is generated by an Electroluminescent (EL) panel that gives a blue light, which lets you see the status display in the dark. Backlight illumination is toggled on or off with successive keypresses of the BACKLIGHT key. When toggled on, the backlighting remains on as long as keys are being pressed. The backlighting will turn off five seconds after the last keypress. Once the Backlight time has expired, the Backlight does not reactivate until a key is pressed again. If the Backlight illumination is on, and the BACKLIGHT key is pressed again, the Backlight turns off. 14
-
 1
1 -
2
-
3
-
4
-
5
-
6
-
7
-
8
-
 9
9 -
 10
10 -
 11
11 -
 12
12 -
 13
13 -
 14
14 -
 15
15 -
 16
16 -
 17
17 -
 18
18 -
 19
19 -
20
-
21
-
22
-
23
-
24
-
25
-
26
-
27
-
28
-
29
-
30
-
31
-
32
-
33
-
34
-
35
-
36
-
37
-
38
-
39
-
40
 |
 |
