RCA RCU811 User Guide - Page 6
Code Entry - manual
 |
UPC - 079000323990
View all RCA RCU811 manuals
Add to My Manuals
Save this manual to your list of manuals |
Page 6 highlights
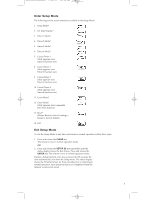
RCU811US_IB_REVB 9/26/03 11:54 AM Page 6 Code Entry In order for the RCU811 to control your components (TV, VCR, DVD, etc.), you must program it with the corresponding code from the Code Lists. (Refer to the Code List enclosed.) This enables the remote to control your component with the proper commands. If your TV, VCR, DVD or satellite receiver is an RCA, PROSCAN or GE brand, the RCU811 may not need any programming to control it. To program the remote with the codes for your components, you can use one of three methods: Code List Entry, Code Search or Code Autosearch. Code List Entry You can enter codes in your RCU811 from the Code Lists using the SETUP (S) key. When you enter a valid code for any given mode (e.g., when you enter a valid code for a TV), any previously Learned functions for that mode are deleted. To enter a code directly from one of the Code Lists, follow these steps: 1. Manually turn on the component to be controlled (TV, VCR, DVD, etc.). 2. Press and hold the SETUP (S) key for 2-3 seconds until the LCD display shows the Setup Mode? Screen. 3. Release the SETUP (S) key. 4. Press and release the desired component key (TV, VCR, SAT•CBL, etc.). For AUX1 or AUX2, press and release the AUX1 or AUX2 key followed by the desired component key to be programmed under that key. Note: If the AUX1 or AUX2 key is selected, the status display will alternate between showing the AUX number (AUX1 or AUX2) and the component label (TV, VCR, SAT•CBL, etc.) at 0.5-second intervals. 5. Enter the three-digit code for your component brand from the corresponding Code Lists at the back of this User's Guide. If your brand has more than one code listed, begin with the first code. When a valid code from the list is entered, the LCD displays the Success Screen, then returns to the normal time display. Note: For an invalid code entry, the LCD displays the Invalid Screen for three seconds before returning to the normal time display. In this case, no changes are made. 6. With the component on, aim the RCU811 at the component and press and release the ON•OFF key. If you have entered the correct code number for your component, it responds to the ON•OFF key. If the component responds, no further programming is required. Code List Entry is now complete. 7. If your component does not respond, try the next code in the list for your brand by repeating the procedure starting at step two. If no other codes exist for your brand, try the Code Search or Code Autosearch methods. Code Search If the component you wish to control does not respond to any of the codes you have entered using the Code List Entry method, you can search the entire Code List for a particular component that might not be listed in the Code List or might be listed under a different brand. When you enter a valid code for any given mode (e.g., when you enter a code for a TV), any previously Learned functions for that mode are deleted. 6
-
 1
1 -
 2
2 -
 3
3 -
 4
4 -
 5
5 -
 6
6 -
 7
7 -
 8
8 -
 9
9 -
 10
10 -
 11
11 -
 12
12 -
13
-
14
-
15
-
16
-
17
-
18
-
19
-
20
-
21
-
22
-
23
-
24
-
25
-
26
-
27
-
28
-
29
-
30
-
31
-
32
-
33
-
34
-
35
-
36
-
37
-
38
-
39
-
40
 |
 |