Ricoh 3045 Scanner Reference - Page 117
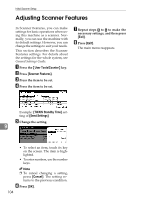
Specifying and loading the original, Start Position, Scan Area, Custom Size, Original Orientation
 |
View all Ricoh 3045 manuals
Add to My Manuals
Save this manual to your list of manuals |
Page 117 highlights
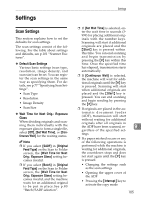
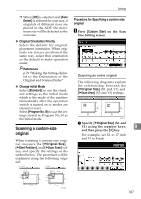
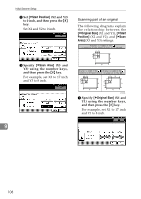
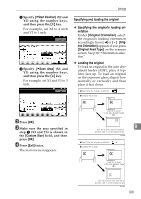
Settings B Specify [VStart Position] (X2 and Y2) using the number keys, and then press the {#} key. For example, set X2 to 2 inch and Y2 to 1 inch. C Specify [VScan Area] (X3 and Y3) using the number keys, and then press the {#} key. For example, set X3 and Y3 to 3 inch. Specifying and loading the original ❖ Specifying the original's loading orientation Under [Original Orientation] select the original's loading orientation accordingly from [ ] or [ ]. [Original Orientation] appears if you press [Original Feed Type] on the scanner screen. See p.80 "Orientation selection". ❖ Loading the original To load an original in the auto document feeder (ADF), place it topfirst, face up. To load an original on the exposure glass, align it horizontally or vertically and then place it face down. B Press [OK]. C Make sure the area specified in step C (X3 and Y3) is shown in the [Custom Size] field, and then press [OK]. D Press [Exit] twice. The main menu reappears. 9 AHU009S AHU010S 109
-
 1
1 -
2
-
3
-
4
-
5
-
6
-
7
-
8
-
9
-
10
-
11
-
12
-
13
-
14
-
15
-
16
-
17
-
18
-
19
-
20
-
21
-
22
-
23
-
24
-
25
-
26
-
27
-
28
-
29
-
30
-
31
-
32
-
33
-
34
-
35
-
36
-
37
-
38
-
39
-
40
-
41
-
42
-
43
-
44
-
45
-
46
-
47
-
48
-
49
-
50
-
51
-
52
-
53
-
54
-
55
-
56
-
57
-
58
-
59
-
60
-
61
-
62
-
63
-
64
-
65
-
66
-
67
-
68
-
69
-
70
-
71
-
72
-
73
-
74
-
75
-
76
-
77
-
78
-
79
-
80
-
81
-
82
-
83
-
84
-
85
-
86
-
87
-
88
-
89
-
90
-
91
-
92
-
93
-
94
-
95
-
96
-
97
-
98
-
99
-
100
-
101
-
102
-
103
-
104
-
105
-
106
-
107
-
108
-
109
-
110
-
111
-
 112
112 -
 113
113 -
 114
114 -
 115
115 -
 116
116 -
 117
117 -
 118
118 -
 119
119 -
 120
120 -
 121
121 -
 122
122 -
123
-
124
-
125
-
126
-
127
-
128
-
129
-
130
-
131
-
132
-
133
-
134
-
135
-
136
-
137
-
138
 |
 |
