Samsung 570DX User Manual (user Manual) (ver.1.0) (English) - Page 51
The direct button on the remote control is the, button.], Source, Position, Transparency, Medium
 |
UPC - 729507801155
View all Samsung 570DX manuals
Add to My Manuals
Save this manual to your list of manuals |
Page 51 highlights
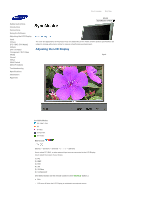
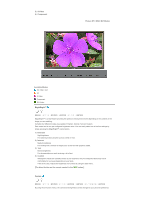
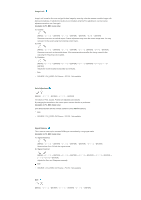
PIP When external AV devices such as VCRs or DVDs are connected to the LCD Display , PIP allows you to watch video from those devices in a small window super-imposed on the PC Video signal. (Off/On) Note • More than one PIP cannot be overlapped on screen as BNC and the component use the same terminal. 1) PIP [MENU] → [ENTER ENTER] → [ENTER ENTER] Turns the PIP Screen Off/On. - Off - On [The direct button on the remote control is the 'PIP' button.] 2) Source [MENU] → [ENTER ENTER ENTER ENTER] Selects the input source for the PIP. - PC : AV / S-Video / Component Mode - BNC : AV / S-Video Mode - DVI : AV / S-Video / Component Mode - AV / S-Video : PC / BNC / DVI Mode - Component : PC / DVI Mode [The direct button on the remote control is the 'SOURCE' button.] 3) Swap [MENU] → [ENTER ENTER ENTER] Swaps the contents of the PIP and main image. The image in the PIP window will appear on the main screen, and the main screen image will appear in the PIP window. [The direct button on the remote control is the 'SWAP' button.] 4) Size [MENU] → [ENTER ENTER ENTER ENTER] Changes the Size of the PIP window. [The direct button on the remote control is the 'SIZE' button.] 5) Position [MENU] → [ENTER ENTER ENTER ENTER] Changes the Position of the PIP window. 6) Transparency [MENU] → [ENTER ENTER ENTER ENTER] Adjusts the Transparency of PIP windows. - High - Medium - Low - Opaque Note • If you select , , in Size, Position and Transparency will not be activated. Available Modes: PIP ON Edit Name [MENU] → [ENTER ENTER ENTER ENTER] Name the input device connected to the input jacks to make your input source selection easier. 1) PC 2) BNC 3) DVI 4) AV
-
 1
1 -
2
-
3
-
4
-
5
-
6
-
7
-
8
-
9
-
10
-
11
-
12
-
13
-
14
-
15
-
16
-
17
-
18
-
19
-
20
-
21
-
22
-
23
-
24
-
25
-
26
-
27
-
28
-
29
-
30
-
31
-
32
-
33
-
34
-
35
-
36
-
37
-
38
-
39
-
40
-
41
-
42
-
43
-
44
-
45
-
 46
46 -
 47
47 -
 48
48 -
 49
49 -
 50
50 -
 51
51 -
 52
52 -
 53
53 -
 54
54 -
 55
55 -
 56
56 -
57
-
58
-
59
-
60
-
61
-
62
-
63
-
64
-
65
-
66
-
67
-
68
-
69
-
70
-
71
-
72
-
73
-
74
-
75
-
76
-
77
-
78
-
79
-
80
 |
 |