Samsung BD-E5300 User Manual Ver.1.0 (English) - Page 18
General Settings, Support Settings - new
 |
View all Samsung BD-E5300 manuals
Add to My Manuals
Save this manual to your list of manuals |
Page 18 highlights
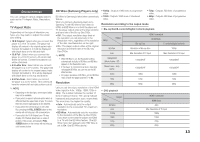
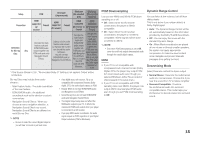
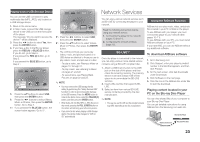
YouTube Lock Restrict the use of the YouTube service unless the 4 digit PIN is entered. •• Off : Turn Off YouTube lock. •• On : Turn On YouTube lock. Change PIN Change the 4-digit password used to access security functions. To change the PIN, follow these steps: 111 Select Change PIN, and then press the ENTER button. The Enter old PIN screen appears. 222 Enter the old PIN. If you never changed the PIN, enter the default PIN: 0000. The Enter new PIN screen appears. 333 Enter the new PIN in the Enter new PIN fields. 444 Re-enter the new PIN in the Confirm new PIN fields. The "PIN is changed successfully." message appears 555 Press the ENTER button. If you forgot your password 111 Remove any discs. 222 Press and hold the PLAY/PAUSE ( ) button on the front panel for 5 seconds or more. All settings will revert to the factory settings. ✎ NOTE ▪▪ When the factory default settings are restored, all the user stored BD data will be deleted. General Settings Time Zone You can specify the time zone that is applicable to your area. To set the Time Zone, follow these steps: 111 Select Time Zone, and then press the ENTER button. The Time Zone screen appears. 222 Use the ◄► buttons to select your time zone. Press the ENTER button to save. Support Settings Software Upgrade The Software Upgrade menu allows you to upgrade the player's software for performance improvements or additional services. By Online To upgrade By Online, follow these steps: 111 Select By Online, and then press the ENTER button. The Connecting to Server message appears. 222 A popup message will appear if an update is available. 333 If you select Yes, the player will turn off automatically before restarting. (Never turn the player on during an upgrade.) 444 The update progress popup will appear. When the update is completed, the player will turn off automatically. 555 Press the POWER button to turn on the player. ✎ NOTE ▪▪ The Update is complete when the player turns off after restarting. Press the POWER button to turn on the updated player for your use. ▪▪ Never turn the player off or back on manually during the update process. ▪▪ Samsung Electronics takes no legal responsibility for player malfunction caused by an unstable Internet connection or consumer negligence during a software upgrade. ▪▪ If you want to cancel the upgrade while the upgrade software is downloading, press the ENTER button. By USB To upgrade by USB, follow these steps: 111 Visit www.samsung.com/bluraysupport. 222 Download the latest USB software upgrade zip archive to your computer. 333 Unzip the zip archive to your computer. You should have a single RUF file with the same name as the zip file. 444 Copy the RUF file to a USB flash drive. 555 Make sure there is no disc in the player, and then insert the USB flash drive into the USB port of the player. 666 In the player's menu, go to Settings > Support > Software Upgrade. 777 Select By USB. ✎ NOTE ▪▪ No disc should be inserted in the product when you upgrade the software using the USB Host jack. ▪▪ When the software upgrade is done, check the software details in the software Upgrade menu. ▪▪ Do not turn off the player during the software upgrade. It may cause the player to malfunction. ▪▪ Software upgrades using the USB Host jack must be performed with a USB flash memory stick only. By Disc To upgrade by Disc, follow these steps: 111 Visit www.samsung.com/bluraysupport. 222 Download the latest disc software upgrade zip archive to your computer. 333 Unzip the zip archive to your computer. You should have a single RUF file with the same name as the zip file. 444 Write the RUF file onto a disc. We recommend a CD-R or DVD-R. 555 Finalize the disc before you remove it from your computer. 666 Insert the disc into player. 777 In the player's menu, go to Settings > Support > Software upgrade. 888 Select By Disc. ✎ NOTE ▪▪ When the system upgrade is done, check the software details in the software Upgrade menu. ▪▪ Do not turn off the player during the Software Upgrade. It may cause the player malfunction. Auto Upgrade Notification If you have connected the player to your network, and then set Auto Upgrade Notification on, the player automatically notifies you when a new software version is available for the player. To set Auto Upgrade Notification on, follow these steps: 111 Select Auto Upgrade Notification, and then press the ENTER button. 222 Use the ▲▼ buttons to select On, and then press the ENTER button. 18
-
 1
1 -
2
-
3
-
4
-
5
-
6
-
7
-
8
-
9
-
10
-
11
-
12
-
 13
13 -
 14
14 -
 15
15 -
 16
16 -
 17
17 -
 18
18 -
 19
19 -
 20
20 -
 21
21 -
 22
22 -
 23
23 -
24
-
25
-
26
-
27
-
28
 |
 |
