Samsung DVD-V3650 User Manual (user Manual) (ver.1.0) (English) - Page 7
Basic Connections/Auto Setup, Using the TV Buttons on the Remote Control
 |
View all Samsung DVD-V3650 manuals
Add to My Manuals
Save this manual to your list of manuals |
Page 7 highlights
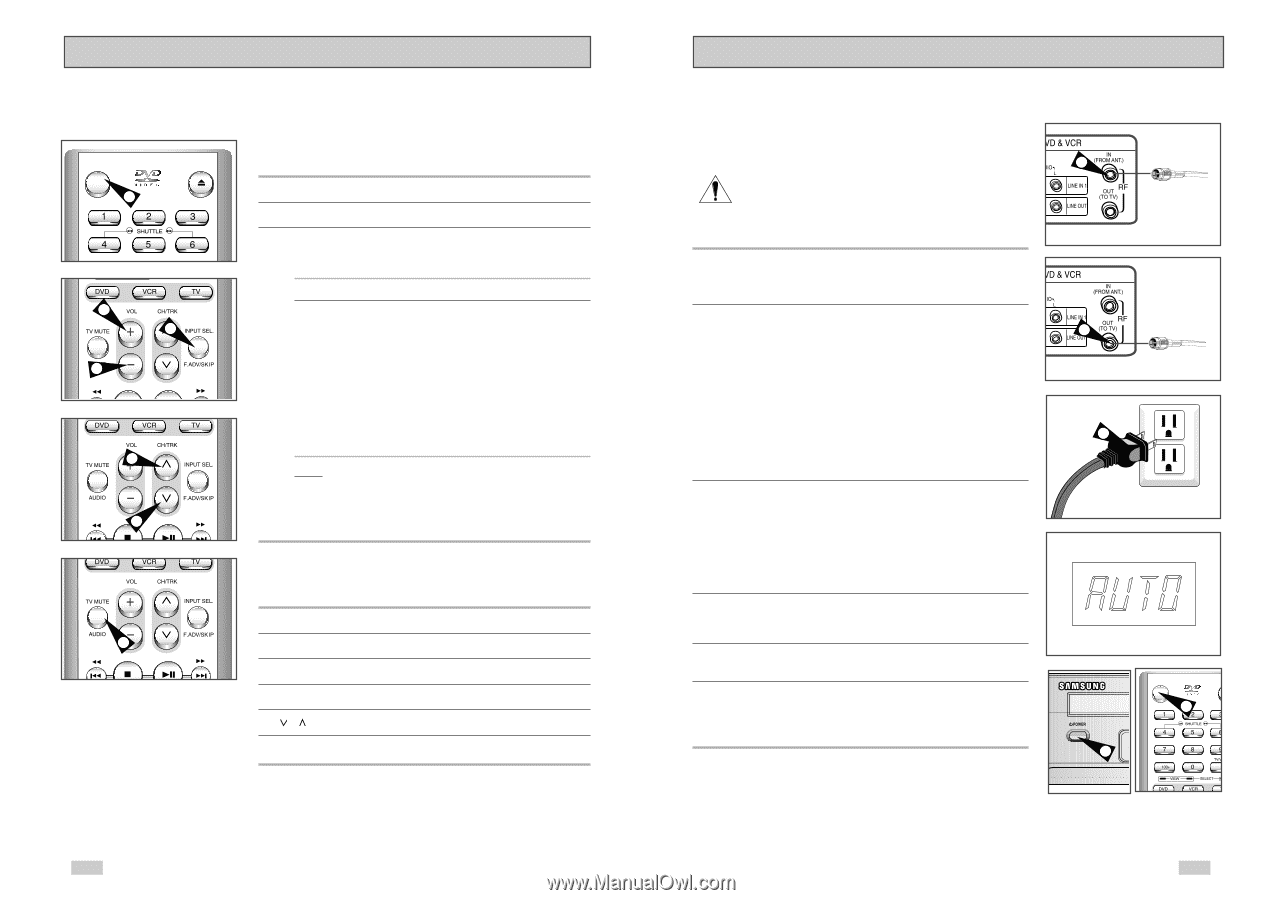
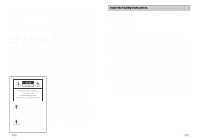
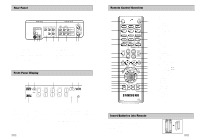
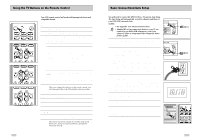
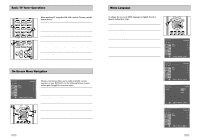
Using the TV Buttons on the Remote Control POWER 1 OPEN/CLOSE 3 2 3 4 4 5 Your VCR remote control will work with Samsung televisions and compatible brands. To determine whether your television is compatible, follow the instructions below. 1 Switch your television on. 2 Point the remote control towards the television. 3 Hold down the TV button and enter the two-figure code corresponding to the brand of your television, by pressing the appropriate numeric buttons. Brand Codes Brand Codes SAMSUNG SHARP SONY RCA TOSHIBA PANASONIC HITACHI NEWSAN 01, 14, 15, 23 02, 16, 22 03 07, 29 09 12, 24 10 27 LOEWE 28 ZENITH 17 LG 06, 08, 18 MAGNAVOX 04 EMERSON 21 SANYO 05, 20 DAEWOO 19 NOBLEX 25 TELEFUNKEN 26 Result: If your television is compatible with the remote control, it will switch off. It is now programmed to operate with the remote control. ➢ If several codes are indicated for your television brand, try each one in turn until you find one that works. ☛ When you change the batteries in the remote control, you must reprogram the code, following the same procedure. You can then control the television using the following buttons. Button Function POWER ➀ Used to switch the television on and off. INPUT SEL. ➁ Used to select an external source. VOL + or - ➂ Used to adjust the volume of the television. CH ( or ) ➃ Used to select the required channel. MUTE ➄ Used to toggle the sound on and off. ➢ The various functions will not necessarily work on all televisions. If you encounter problems, operate the television directly. 12 Basic Connections/Auto Setup You will need to connect the DVD-VCR to a TV and run Auto Setup. The Auto Setup will automatically search for channels and then set your DVD-VCR's internal clock. NOTES: • See Appendix A for Advanced Connections. • Standard RF or Line connections between your TV are required to run DVD+VCR setup menu, even if you connect S-Video or Component Video Output for better picture quality. 1 Connect the RF Antenna Cable to your DVD-VCR Connect an external indoor/outdoor antenna or wall outlet antenna cable to the Ant-In jack on the rear panel. 2 Connect your DVD-VCR to a TV Choose one of the following methods: RF Connection Using the supplied RF antenna cable, connect the OUT jack (TO TV) on the back panel of your DVD-VCR to your TV's Antenna Input. Line Connection Using an RCA-type audio/video cable (red, white, yellow), connect the LINE OUT jacks on the back panel of your DVD-VCR to your TV's Line In jacks. Use the three cables as follows: red for right audio, white for left audio, and yellow for video. NOTE: If your TV is equipped with RCA jacks, it is better to use the Line Connection method. 3 Plug In Your DVD-VCR's power should be plugged into a standard 120V/60Hz wall outlet. Avoid pressing any buttons on the remote control or on the unit during an Auto Setup. While your DVD-VCR is running an Auto Setup, "AUTO" will blink. When Auto Setup is complete, the current time will be displayed on the front panel. In case Auto Clock set fails to locate a channel to set the clock, you should set the clock manually. See page 18. 4 Turn On your DVD-VCR Turn on the power by pressing the POWER button on the remote control or on the front panel of the unit. 5 Turn On your TV Turn on the TV by pressing the POWER button. 6 Set the TV to Channel 3, 4 or Line The same channel you selected in Step 2 above must be used. If you are using the Line Connection method, set your TV to its Line Input. 1 From Antenna or Cable 2 To TV's Antenna Input 3 POWER OP 4 4 13
-
 1
1 -
 2
2 -
 3
3 -
 4
4 -
 5
5 -
 6
6 -
 7
7 -
 8
8 -
 9
9 -
 10
10 -
 11
11 -
 12
12 -
13
-
14
-
15
-
16
-
17
-
18
-
19
-
20
-
21
-
22
-
23
-
24
-
25
-
26
-
27
-
28
-
29
-
30
-
31
-
32
-
33
-
34
-
35
 |
 |