Samsung GT-P7510/M32 User Manual Ver.f3 (English) - Page 94
Setting a Photo as a Contact Icon, Copy the current photo to the clipboard.
 |
View all Samsung GT-P7510/M32 manuals
Add to My Manuals
Save this manual to your list of manuals |
Page 94 highlights
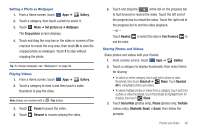
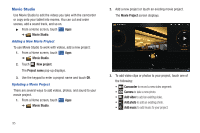
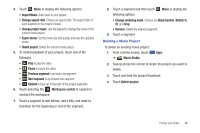
• Rotate Right: Allows you to rotate the photo clockwise 90 degrees. • Set picture as: Assign the photo as a Contact photo, Lock Screen, or Wallpaper. • Crop: Allows you to crop the image. Touch and drag the crop box or the sides or corners of the crop box to create the crop area, then touch Ok. Touch X to stop without cropping the photo. • Print: Print the current photo to a Samsung printer. • Copy: Copy the current photo to the clipboard. • Motion: Display Motion activation settings. There is only one option for videos that are not playing: • Details: Provides details about the video such as Title, Time, Duration, File Size, and so on. Touch the X to close the pop-up. For menu options while a video is playing and other video options, see "Video" on page 88. Note: Videos are stored in the /Root/DCIM/Camera folder as mp4 files. 10. Press Back to return to the category screen. Setting a Photo as a Contact Icon 1. From a Home screen, touch Apps ➔ Gallery. 2. Touch a category, then touch a photo to select it. 3. Touch Menu ➔ Set picture as ➔ Contact photo. 4. Touch a contact entry. The Crop picture screen displays. 5. Touch and drag the crop box or the sides or corners of the crop box to create the crop area, then touch Ok to save the cropped photo as the contact's icon. Touch X to stop without cropping the photo. Tip: To remove the icon, see "Updating Contacts" on page 42. 91
-
 1
1 -
2
-
3
-
4
-
5
-
6
-
7
-
8
-
9
-
10
-
11
-
12
-
13
-
14
-
15
-
16
-
17
-
18
-
19
-
20
-
21
-
22
-
23
-
24
-
25
-
26
-
27
-
28
-
29
-
30
-
31
-
32
-
33
-
34
-
35
-
36
-
37
-
38
-
39
-
40
-
41
-
42
-
43
-
44
-
45
-
46
-
47
-
48
-
49
-
50
-
51
-
52
-
53
-
54
-
55
-
56
-
57
-
58
-
59
-
60
-
61
-
62
-
63
-
64
-
65
-
66
-
67
-
68
-
69
-
70
-
71
-
72
-
73
-
74
-
75
-
76
-
77
-
78
-
79
-
80
-
81
-
82
-
83
-
84
-
85
-
86
-
87
-
88
-
 89
89 -
 90
90 -
 91
91 -
 92
92 -
 93
93 -
 94
94 -
 95
95 -
 96
96 -
 97
97 -
 98
98 -
 99
99 -
100
-
101
-
102
-
103
-
104
-
105
-
106
-
107
-
108
-
109
-
110
-
111
-
112
-
113
-
114
-
115
-
116
-
117
-
118
-
119
-
120
-
121
-
122
-
123
-
124
-
125
-
126
-
127
-
128
-
129
-
130
-
131
-
132
-
133
-
134
-
135
-
136
-
137
-
138
-
139
-
140
-
141
-
142
-
143
-
144
-
145
-
146
-
147
-
148
-
149
-
150
-
151
-
152
-
153
-
154
-
155
-
156
-
157
-
158
-
159
-
160
-
161
-
162
-
163
-
164
-
165
-
166
-
167
-
168
-
169
-
170
-
171
-
172
-
173
-
174
-
175
-
176
-
177
-
178
-
179
-
180
-
181
 |
 |
