Samsung HLR5656W Owner Instructions - Page 35
Option 2: Setting the Clock Automatically, DSTDaylight Saving Time, then press
 |
View all Samsung HLR5656W manuals
Add to My Manuals
Save this manual to your list of manuals |
Page 35 highlights
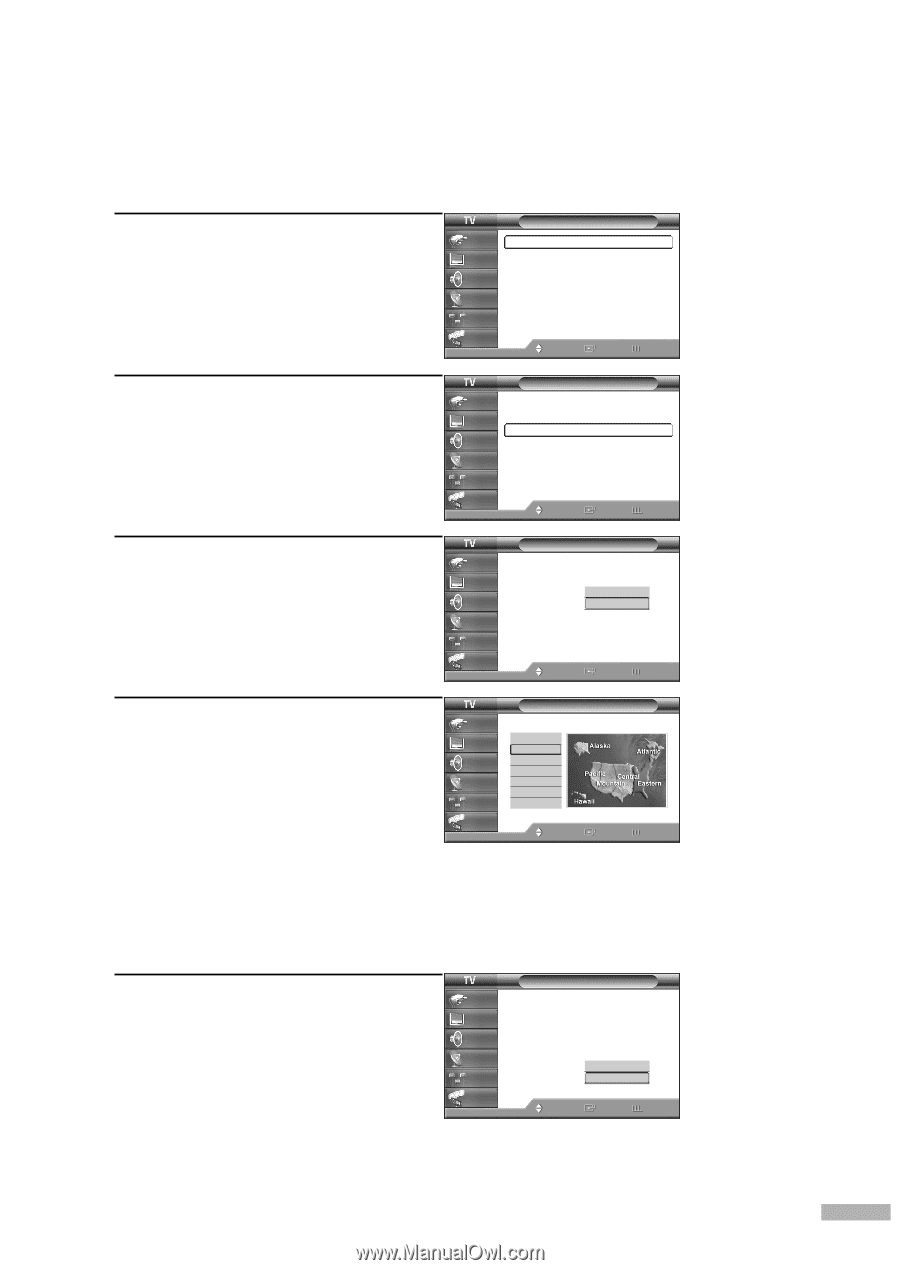
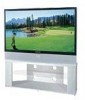
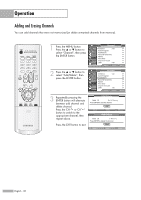
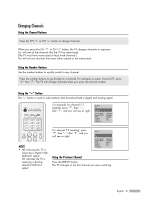
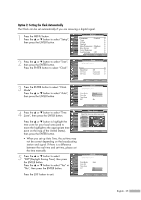
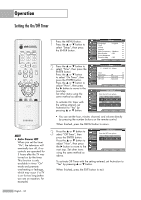
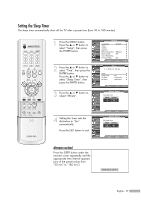
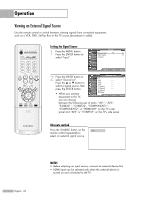
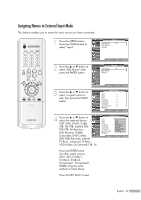
Option 2: Setting the Clock Automatically The Clock can be set automatically if you are receiving a digital signal. 1 Press the MENU button. Press the ... or † button to select "Setup", then press the ENTER button. Setup Input Picture Sound Channel Setup Guide Language : English √ Time √ V-Chip √ Caption √ Menu Transparency : Medium √ Blue Screen : Off √ Color Weakness √ Function Help : Off √ Move Enter Return 2 Press the ... or † button to select "Time", then press the ENTER button. Press the ENTER button to select "Clock". Time Input Picture Clock √ Sound Sleep Timer : Off √ On Timer Channel Off Timer : Inactivated √ : Inactivated √ Setup Guide Move Enter Return 3 Press the ENTER button to select "Clock Mode". Press the ... or † button to select "Auto", then press the ENTER button. Input Clock Picture Sound Channel Setup Clock Mode Clock Set Time Zone DST :MAauntuoal Auto : No Guide Move Enter Return 4 Press the ... or † button to select "Time Zone", then press the ENTER button. Press the ... or † button to highlight the time zone for your local area (and to move the highlight to the appropriate time zone on the map of the United States), then press the ENTER button. Input Picture Sound Channel Setup Guide Time Zone Select the time zone where you locate. Atlantic Eastern Central Mountain Pacific Alaska Hawaii Move Enter Return • When you set up Auto Time, the set time may not be correct depending on the broadcasting station and signal. If there is a difference between the real time and set time, please set the time manually. 5 Press the ... or † button to select "DST"(Daylight Saving Time), then press the ENTER button. Press the ... or † button to select "Yes" or "No", then press the ENTER button. Clock Input Picture Sound Channel Setup Clock Mode Clock Set Time Zone DST : Auto : YNeos No Press the EXIT button to exit. Guide Move Enter Return English - 35
-
 1
1 -
2
-
3
-
4
-
5
-
6
-
7
-
8
-
9
-
10
-
11
-
12
-
13
-
14
-
15
-
16
-
17
-
18
-
19
-
20
-
21
-
22
-
23
-
24
-
25
-
26
-
27
-
28
-
29
-
 30
30 -
 31
31 -
 32
32 -
 33
33 -
 34
34 -
 35
35 -
 36
36 -
 37
37 -
 38
38 -
 39
39 -
 40
40 -
41
-
42
-
43
-
44
-
45
-
46
-
47
-
48
-
49
-
50
-
51
-
52
-
53
-
54
-
55
-
56
-
57
-
58
-
59
-
60
-
61
-
62
-
63
-
64
-
65
-
66
-
67
-
68
-
69
-
70
-
71
-
72
-
73
-
74
-
75
-
76
-
77
-
78
-
79
-
80
-
81
-
82
-
83
-
84
-
85
-
86
-
87
-
88
-
89
-
90
-
91
-
92
-
93
-
94
-
95
-
96
 |
 |