Samsung HLR5656W Owner Instructions - Page 51
Changing the Picture Size
 |
View all Samsung HLR5656W manuals
Add to My Manuals
Save this manual to your list of manuals |
Page 51 highlights
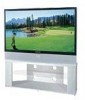
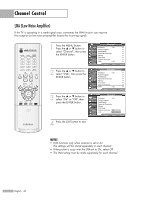
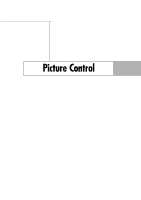
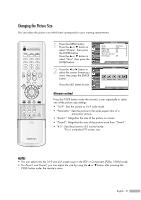
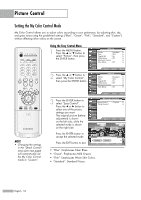
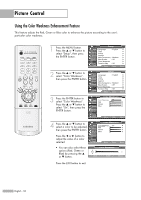
Changing the Picture Size You can select the picture size which best corresponds to your viewing requirements. 1 Press the MENU button. Press the ... or † button to select "Picture", then press the ENTER button. Press the ... or † button to select "Size", then press the ENTER button. Picture Input Mode : Standard √ Picture Size Digital NR : 16:9 : On √ √ Sound DNIe Demo : Off √ My Color Control √ Channel Film Mode : Off √ Setup Guide Move Enter Return 2 Press the œ or √ button to select the screen format you want, then press the ENTER button. Press the EXIT button to exit. Input Picture Sound Channel Setup Guide Size 16:9 Panorama Zoom1 Zoom2 4:3 Move Enter Return Alternate method Press the P.SIZE button under the remote's cover repeatedly to select one of the picture size settings. • "16:9": Sets the picture to 16:9 wide mode. • "Panorama": Sets the picture to the wide aspect ratio of a panoramic picture. • "Zoom1": Magnifies the size of the picture on screen. • "Zoom2": Magnifies the size of the picture more than "Zoom1". • "4:3": Sets the picture to 4:3 normal mode. This is a standard TV screen size. NOTES • You can select only the 16:9 and 4:3 screen sizes in the DTV or Component (720p, 1080i) mode. • For Zoom1 and Zoom2, you can adjust the size by using the ... or † button after pressing the P.SIZE button under the remote's cover. English - 51
-
 1
1 -
2
-
3
-
4
-
5
-
6
-
7
-
8
-
9
-
10
-
11
-
12
-
13
-
14
-
15
-
16
-
17
-
18
-
19
-
20
-
21
-
22
-
23
-
24
-
25
-
26
-
27
-
28
-
29
-
30
-
31
-
32
-
33
-
34
-
35
-
36
-
37
-
38
-
39
-
40
-
41
-
42
-
43
-
44
-
45
-
 46
46 -
 47
47 -
 48
48 -
 49
49 -
 50
50 -
 51
51 -
 52
52 -
 53
53 -
 54
54 -
 55
55 -
 56
56 -
57
-
58
-
59
-
60
-
61
-
62
-
63
-
64
-
65
-
66
-
67
-
68
-
69
-
70
-
71
-
72
-
73
-
74
-
75
-
76
-
77
-
78
-
79
-
80
-
81
-
82
-
83
-
84
-
85
-
86
-
87
-
88
-
89
-
90
-
91
-
92
-
93
-
94
-
95
-
96
 |
 |