Samsung LTN226W User Manual (user Manual) (ver.1.0) (English) - Page 20
Connecting a DVD Player
 |
View all Samsung LTN226W manuals
Add to My Manuals
Save this manual to your list of manuals |
Page 20 highlights
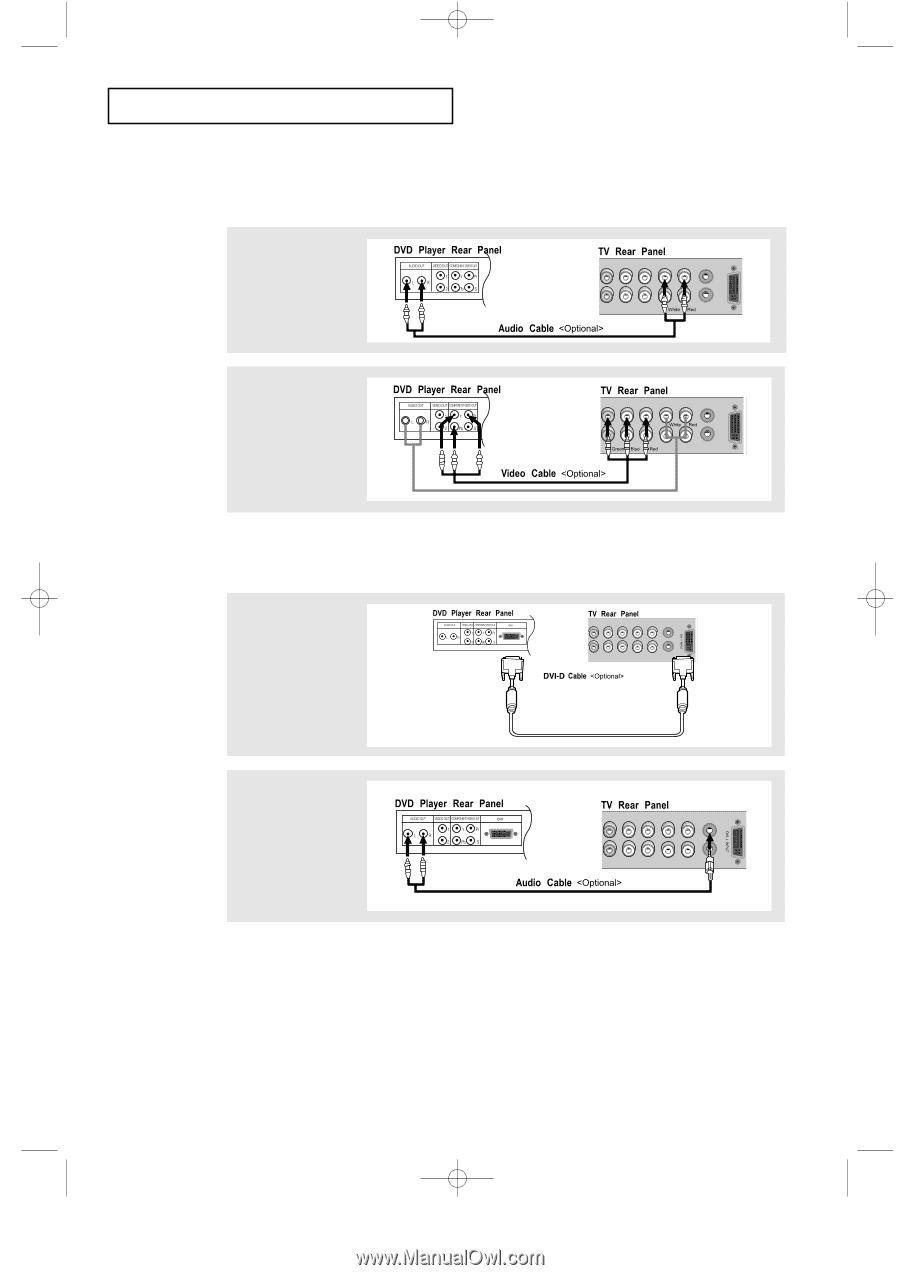
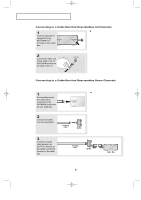
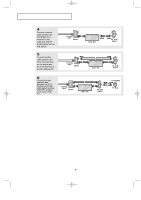
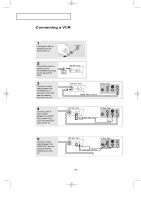
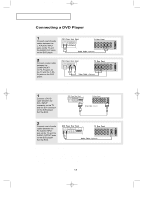
06.CHAPTER2_EN 9/2/03 3:24 AM Page 12 I N S TA L L AT I O N Connecting a DVD Player The rear panel jacks on your TV make it easy to connect a DVD player to your TV. 1 Connect a set of audio cables between the L, R AUDIO INPUT jacks on the TV and the AUDIO OUT jacks on the DVD player. 2 Connect a video cable between the COMPONENT1 (Y, Pb, Pr) jacks on the TV and the Y, Pb, Pr jacks on the DVD player. Note: For an explanation of Component video, see your DVD player owner's manual. Connecting a DVD Player or Set-Top Box to the TV with a DVI-D Cable 1 Connect a DVI-D cable between the DVI-I INPUT connector on the TV and the DVI connector on the DVD player/ Set-Top BOX. 2 Connect a set of audio cables between the PC AUDIO INPUT jack on the TV and the AUDIO OUTPUT jacks on the DVD player/ Set-Top BOX. Note: If you are using a DVI-D cable to connect 1. Be sure to connect the audio cable (sold separately) as shown above to get normal TV sound. 2. See Appendix A. 1. "Display Modes" for supported resolutions. 3. The screen may have shifted to the right or to the left after connecting the cable. See Page 54 for how to adjust the screen position. 4. Each external input Source device has a ditterent back panel configuration. 5.This television supports 480p and 720p only. English-12
-
 1
1 -
2
-
3
-
4
-
5
-
6
-
7
-
8
-
9
-
10
-
11
-
12
-
13
-
14
-
 15
15 -
 16
16 -
 17
17 -
 18
18 -
 19
19 -
 20
20 -
 21
21 -
 22
22 -
 23
23 -
 24
24 -
 25
25 -
26
-
27
-
28
-
29
-
30
-
31
-
32
-
33
-
34
-
35
-
36
-
37
-
38
-
39
-
40
-
41
-
42
-
43
-
44
-
45
-
46
-
47
-
48
-
49
-
50
-
51
-
52
-
53
-
54
-
55
-
56
-
57
-
58
-
59
-
60
-
61
-
62
-
63
-
64
-
65
-
66
-
67
-
68
-
69
-
70
-
71
-
72
 |
 |