Samsung SCH-I405 User Manual (user Manual) (ver.f8) (English(north America)) - Page 51
Add to Contacts, Windows Live
 |
View all Samsung SCH-I405 manuals
Add to My Manuals
Save this manual to your list of manuals |
Page 51 highlights
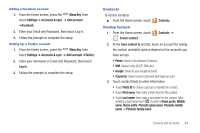
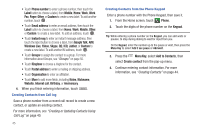
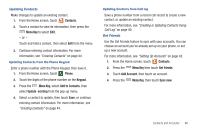
• Touch Phone number to enter a phone number, then touch the Label button to choose a label, from Mobile, Home, Work, Work Fax, Pager, Other, or Custom to create a new label. To add another number, touch . • Touch Email address to enter an email address, then touch the Label button to choose a label, from Home, Work, Mobile, Other, or Custom to create a new label. To add an address, touch . • Touch Instant msg to enter an instant message address, then touch the label button to choose a label, from Google Talk, AIM, Windows Live, Yahoo, Skype, QQ, ICQ, Jabber, or Custom to create a new label. To add another IM address, touch . • Touch Groups to assign the contact to a group. For more information about Groups, see "Groups" on page 50. • Touch Ringtone to choose a ringtone for the contact. • Touch Postal address to enter a mailing or shipping address. • Touch Organisation to enter an affiliation. • Touch More to add more fields, including Notes, Nickname, Website, Internet call, Birthday, or Anniversary. 4. When you finish entering information, touch . Save Creating Contacts from Call log Save a phone number from a recent call record to create a new contact, or update an existing contact. For more information, see "Creating or Updating Contacts Using Call Log" on page 40. 45 Creating Contacts from the Phone Keypad Enter a phone number with the Phone Keypad, then save it. 1. From the Home screen, touch Phone. 2. Touch the digits of the phone number on the Keypad. Tip: While entering a phone number on the Keypad, you can add waits or pauses, to stop during dialing to wait for input from you. On the Keypad, enter the number up to the pause or wait, then press the Menu Key to select Add 2 sec pause or Add wait. 3. Press the Menu Key, select Add to Contacts, then select Create contact from the pop-up menu. 4. Continue entering contact information. For more information, see "Creating Contacts" on page 44.
-
 1
1 -
2
-
3
-
4
-
5
-
6
-
7
-
8
-
9
-
10
-
11
-
12
-
13
-
14
-
15
-
16
-
17
-
18
-
19
-
20
-
21
-
22
-
23
-
24
-
25
-
26
-
27
-
28
-
29
-
30
-
31
-
32
-
33
-
34
-
35
-
36
-
37
-
38
-
39
-
40
-
41
-
42
-
43
-
44
-
45
-
 46
46 -
 47
47 -
 48
48 -
 49
49 -
 50
50 -
 51
51 -
 52
52 -
 53
53 -
 54
54 -
 55
55 -
 56
56 -
57
-
58
-
59
-
60
-
61
-
62
-
63
-
64
-
65
-
66
-
67
-
68
-
69
-
70
-
71
-
72
-
73
-
74
-
75
-
76
-
77
-
78
-
79
-
80
-
81
-
82
-
83
-
84
-
85
-
86
-
87
-
88
-
89
-
90
-
91
-
92
-
93
-
94
-
95
-
96
-
97
-
98
-
99
-
100
-
101
-
102
-
103
-
104
-
105
-
106
-
107
-
108
-
109
-
110
-
111
-
112
-
113
-
114
-
115
-
116
-
117
-
118
-
119
-
120
-
121
-
122
-
123
-
124
-
125
-
126
-
127
-
128
-
129
-
130
-
131
-
132
-
133
-
134
-
135
-
136
-
137
-
138
-
139
-
140
-
141
-
142
-
143
-
144
-
145
-
146
-
147
-
148
-
149
-
150
-
151
-
152
-
153
-
154
-
155
-
156
-
157
-
158
-
159
-
160
-
161
-
162
-
163
-
164
-
165
-
166
-
167
-
168
-
169
-
170
-
171
-
172
-
173
-
174
-
175
-
176
-
177
-
178
-
179
-
180
-
181
-
182
-
183
-
184
-
185
-
186
 |
 |