Samsung SM-N900A User Manual At&t Wireless Sm-n900a Galaxy Note 3 Jb Engli - Page 155
Creating a Corporate Email Account, Email, Email address, Password, Show password, Manual setup - user manual
 |
View all Samsung SM-N900A manuals
Add to My Manuals
Save this manual to your list of manuals |
Page 155 highlights
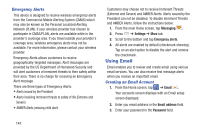
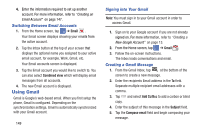
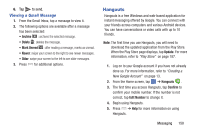
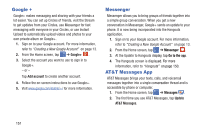
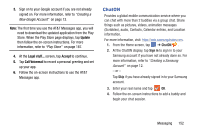
4. If you want to see your password as it is being typed, tap Show password to create a checkmark. 5. Tap Next. 6. At the Account options screen, tap any of the options you would like. 7. Tap Next. 8. Enter a name for this email account (optional). 9. Tap Done. Creating a Corporate Email Account Use the following procedure to configure your phone to synchronize with a corporate email account. 1. From the Home screen, tap ➔ Email . Your accounts screen displays with an Email setup screen displayed. 2. Enter you email address in the Email address field. 3. Enter your password in the Password field. 4. If you want to see your password as it is being typed, tap Show password to create a checkmark. 5. If you want all of your emails sent from this email account by default, tap checkbox to create a checkmark. 6. Tap Manual setup. 7. Tap the Microsoft Exchange ActiveSync field. 8. Enter all the Exchange server information, Domain, User name and Password, then tap Next. 9. At the Activation prompt, tap OK. The Account options screen is displayed. 10. Enter the desired information in the different fields, then tap Next. 11. Enter an Account name for this account (Optional) and tap Done. Wait for the Inbox to synchronize before use. 12. Press ➔ Settings to change the account settings. Creating Additional Email Accounts To create additional email accounts after setting up your first account, follow these steps: 1. From the Home screen, tap ➔ Email . Your Email screen displays showing your emails from the active account. 2. Press ➔ Settings. 3. Tap Add account to add another email account. Messaging 148
-
 1
1 -
2
-
3
-
4
-
5
-
6
-
7
-
8
-
9
-
10
-
11
-
12
-
13
-
14
-
15
-
16
-
17
-
18
-
19
-
20
-
21
-
22
-
23
-
24
-
25
-
26
-
27
-
28
-
29
-
30
-
31
-
32
-
33
-
34
-
35
-
36
-
37
-
38
-
39
-
40
-
41
-
42
-
43
-
44
-
45
-
46
-
47
-
48
-
49
-
50
-
51
-
52
-
53
-
54
-
55
-
56
-
57
-
58
-
59
-
60
-
61
-
62
-
63
-
64
-
65
-
66
-
67
-
68
-
69
-
70
-
71
-
72
-
73
-
74
-
75
-
76
-
77
-
78
-
79
-
80
-
81
-
82
-
83
-
84
-
85
-
86
-
87
-
88
-
89
-
90
-
91
-
92
-
93
-
94
-
95
-
96
-
97
-
98
-
99
-
100
-
101
-
102
-
103
-
104
-
105
-
106
-
107
-
108
-
109
-
110
-
111
-
112
-
113
-
114
-
115
-
116
-
117
-
118
-
119
-
120
-
121
-
122
-
123
-
124
-
125
-
126
-
127
-
128
-
129
-
130
-
131
-
132
-
133
-
134
-
135
-
136
-
137
-
138
-
139
-
140
-
141
-
142
-
143
-
144
-
145
-
146
-
147
-
148
-
149
-
 150
150 -
 151
151 -
 152
152 -
 153
153 -
 154
154 -
 155
155 -
 156
156 -
 157
157 -
 158
158 -
 159
159 -
 160
160 -
161
-
162
-
163
-
164
-
165
-
166
-
167
-
168
-
169
-
170
-
171
-
172
-
173
-
174
-
175
-
176
-
177
-
178
-
179
-
180
-
181
-
182
-
183
-
184
-
185
-
186
-
187
-
188
-
189
-
190
-
191
-
192
-
193
-
194
-
195
-
196
-
197
-
198
-
199
-
200
-
201
-
202
-
203
-
204
-
205
-
206
-
207
-
208
-
209
-
210
-
211
-
212
-
213
-
214
-
215
-
216
-
217
-
218
-
219
-
220
-
221
-
222
-
223
-
224
-
225
-
226
-
227
-
228
-
229
-
230
-
231
-
232
-
233
-
234
-
235
-
236
-
237
-
238
-
239
-
240
-
241
-
242
-
243
-
244
-
245
-
246
-
247
-
248
-
249
-
250
-
251
-
252
-
253
-
254
-
255
-
256
-
257
-
258
-
259
-
260
 |
 |