Samsung SNT-1010 User Manual - Page 7
Installing SNT-1010, Connecting SNT-1010
 |
View all Samsung SNT-1010 manuals
Add to My Manuals
Save this manual to your list of manuals |
Page 7 highlights
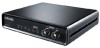
Installing and Connecting Installing SNT-1010 (Continued) To install onto a dedicated shelf Assemble as follows for both sides of the main body. Installing and Connecting Connecting SNT-1010 If you connect the SNT-1010 to the Internet and setup the network settings,you can monitor the picture of the connected camera in real-time. To connect to RS-485 Chapter 2 Installing and Connecting Installing SNT-1010/Connecting SNT-1010 3 2 1 1 Insert the Fixing Block onto a side of the product and turn it in the arrow direction as described in the figure. 2 Fix the Fixing Metal onto the Fixing Block using the 2 screws (small). Fix the Fixing Metal so that the bottom of the Fixing Metal faces forward. 3 Fix the Fixing Metal on the shelf using one screw (big). When you install this product on a wall, check if the wall is strong enough to sustain the weight of the product. Notice Dropping of this product may cause an injury when it is installed on a wall. Therefore fix the product firmly when you install this product on a wall. This product is designed for indoor use. Install this product in a dry place so that it is not wet by rain or snow. 12 You can use the rear port of SNT-1010 to connect to the RS-485 device. You can install and control over a PTZ camera that supports RS-485 communications. You can make the connection in either Half Duplex or Full Duplex. The baud rate available is : 600/1200/2400/4800/9600/19200/38400. Ensure that the RS-485 device you want to use is compatible with SNT-1010. Notice Ensure that you connect to the RS-485 device so it fits the polarity of the port. 13
-
 1
1 -
 2
2 -
 3
3 -
 4
4 -
 5
5 -
 6
6 -
 7
7 -
 8
8 -
 9
9 -
 10
10 -
 11
11 -
 12
12 -
13
-
14
-
15
-
16
-
17
-
18
-
19
-
20
-
21
-
22
-
23
-
24
-
25
-
26
-
27
-
28
-
29
-
30
-
31
-
32
-
33
-
34
-
35
-
36
-
37
-
38
-
39
-
40
-
41
-
42
-
43
-
44
-
45
-
46
-
47
-
48
-
49
-
50
-
51
 |
 |
