Sanyo PLC-XR70N Owners Manual - Page 27
Selecting Computer System, Automatic Multiscanning system - xga
 |
View all Sanyo PLC-XR70N manuals
Add to My Manuals
Save this manual to your list of manuals |
Page 27 highlights
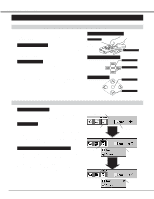
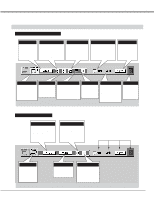
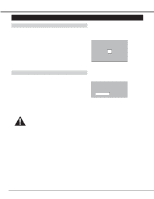
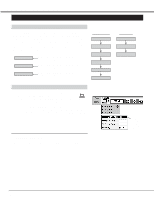
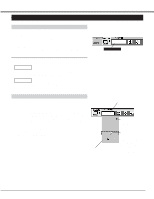
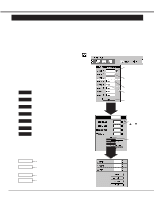
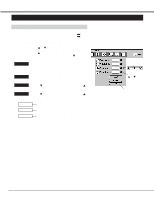
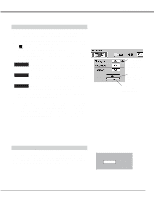
SELECTING COMPUTER SYSTEM COMPUTER MODE Automatic Multiscanning system This projector automatically adapt to most different types of computer based on VGA, SVGA or XGA (refer to "COMPATIBLE COMPUTER SPECIFICATION" on page 28). When selecting "Computer 1," "Computer 2," or "Computer 3", this projector become automatically suited to the incoming signal and projectors the proper image without any special setting. (Setting of the Computer System may be required when connecting some computers.) Note : The projector may provides the messages below. Go PC adj. No signal The projector cannot discriminate or detect the input signal from the computer. Adjust and set the computer system manually. (Refer to PC ADJUSTMENT on page 28.) There is no signal from the computer on the any terminal (the Rear Terminal or the Front Terminal). Make sure the connection of the computer and the projector is set correctly. (Refer to TROUBLESHOOTING on page 43.) Selecting Computer System Manually To set the Computer system manually, select the Mode from the COMPUTER SYSTEM Menu on the ON-SCREEN MENU. 1 Press the MENU button and the ON-SCREEN MENU will appear. Press the POINT LEFT/RIGHT buttons to select SYSTEM and press the SELECT (REAR CLICK) button. Another dialog box COMPUTER MODE Menu will appear. (The COMPUTER MODE Menu also appears by pressing the SYSTEM button on the Front Control or the Remote Control Units.) 2 Press the POINT DOWN button and a red-arrow icon will appear. Move the arrow to the system that you want to set, and then press SELECT (REAR CLICK) button. VGA 1 SYSTEM BOX It displays the SYSTEM being selected. The system being selected. VGA 1 VGA 1 VGA 2 VGA 3 MODE 1 MODE 2 It terminates the SYSTEM Menu. The system on this dialog box can be selected. When this mark is displayed as black, more computer system modes will be available. Move the arrow to this mark and then press the SELECT (REAR CLICK) button, and another mode will be displayed. 27
-
 1
1 -
2
-
3
-
4
-
5
-
6
-
7
-
8
-
9
-
10
-
11
-
12
-
13
-
14
-
15
-
16
-
17
-
18
-
19
-
20
-
21
-
 22
22 -
 23
23 -
 24
24 -
 25
25 -
 26
26 -
 27
27 -
 28
28 -
 29
29 -
 30
30 -
 31
31 -
 32
32 -
33
-
34
-
35
-
36
-
37
-
38
-
39
-
40
-
41
-
42
-
43
-
44
-
45
-
46
 |
 |
