Sanyo PLC-XR70N Owners Manual - Page 39
Appendix, Operating Wireless Mouse
 |
View all Sanyo PLC-XR70N manuals
Add to My Manuals
Save this manual to your list of manuals |
Page 39 highlights
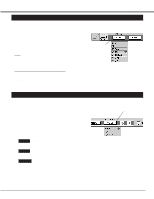
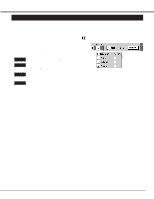
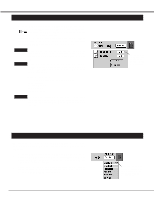
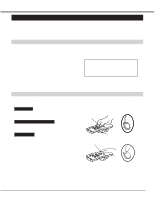
APPENDIX OPERATING WIRELESS MOUSE The Wireless Remote Control Unit is not only able to operate the projector but also usable as a wireless mouse for a PC. One Pointing Pad (POINT button) and two click buttons are used for wireless mouse operation. Wireless mouse is usable when PC mouse pointer is displayed on the screen. When the menu or indicator of the projector is displayed on the screen instead of the PC mouse pointer, the wireless mouse cannot be used. installation To use the Wireless Remote Control Unit as the Wireless Mouse for a PC, installation of the mouse driver (not supplied) is required. Make sure that the mouse driver is properly installed in your computer. And make sure that the mouse port of the computer connected to Control Port is activated. 1 Connect the mouse port of your computer to the Control Port of the projector with the Mouse Cable. (Refer to page 14 and 15 for connection.) 2 Turn the projector on first, and then turn on your computer. When the computer is switched on first, the Wireless Mouse may not work properly. Note : When the computer has no mouse port, connect the Serial Port of the computer to Control Port of the projector with the Mouse Cable for Serial Port. Controlling Wireless Mouse When controlling the pointer of the computer, operate the Wireless Mouse with POINT button, SELECT button, and FRONT CLICK button on the Wireless Remote Control Unit. POINT button Used to move the pointer. The pointer is moved according to the direction you are pressing. SELECT (REAR CLICK) button This button has the same function as the left button in a PC mouse. POINT button FRONT CLICK This button has the same function as the right button in a PC mouse. Pressing this button dose not affect any operation when in Menu mode. SELECT button FRONT CLICK button 39
-
 1
1 -
2
-
3
-
4
-
5
-
6
-
7
-
8
-
9
-
10
-
11
-
12
-
13
-
14
-
15
-
16
-
17
-
18
-
19
-
20
-
21
-
22
-
23
-
24
-
25
-
26
-
27
-
28
-
29
-
30
-
31
-
32
-
33
-
 34
34 -
 35
35 -
 36
36 -
 37
37 -
 38
38 -
 39
39 -
 40
40 -
 41
41 -
 42
42 -
 43
43 -
 44
44 -
45
-
46
 |
 |
