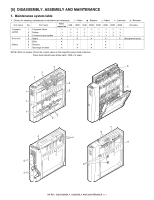
Sharp AR-RB1 Service Manual - Page 16
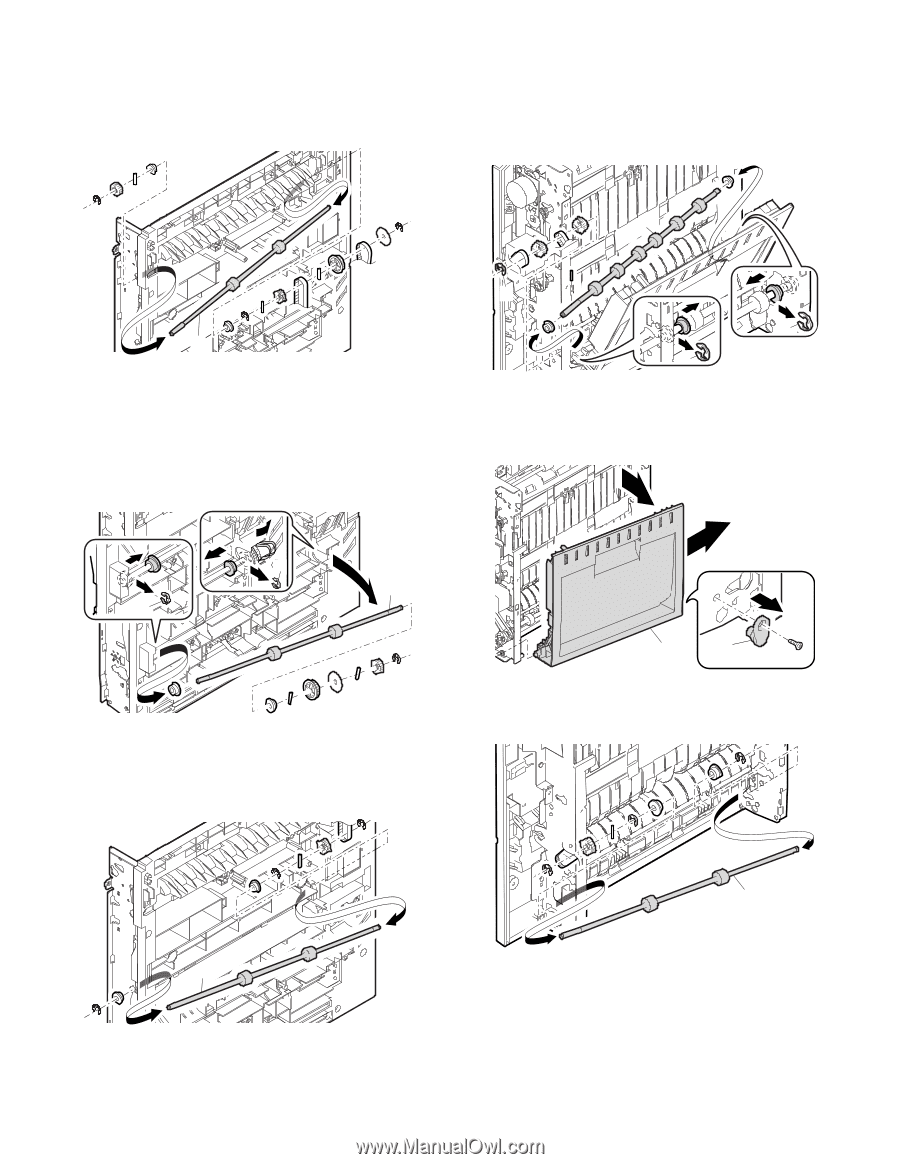
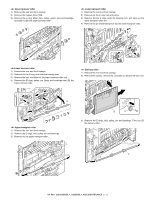
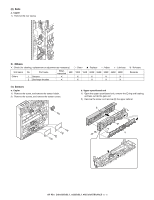
<3> Upper turnover roller, <4>Lower turnover roller, <5> Upper transport roller, &
 |
View all Sharp AR-RB1 manuals
Add to My Manuals
Save this manual to your list of manuals |
Page 16 highlights
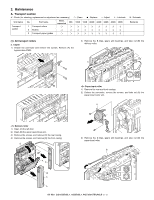
Upper turnover roller 1) Remove the rear and front casings. 2) Remove the bypass drive PWB. 3) Remove the E-ring, Mylar, belt, pulley, gears, pins and bearings, and take out (B) the upper turnover roller. Lower transport roller 1) Remove the rear and front casings. 2) Remove (A) the E-ring, belt and pulley. 3) Remove (B) the E-rings, slide the bearing over, and take out the lower transport roller unit. 4) Remove the pin and bearing from (C) the lower transport roller. C B Lower turnover roller 1) Remove the rear and front casings. 2) Remove (A) the E-ring, and slide the bearing over. 3) Remove the belt, and take out the lower turnover roller unit. 4) Remove the E-rings, pulley, pin, Mylar and bearings from (B) the lower turnover roller. A B B Delivery roller 1) Remove the rear and front casings. 2) Remove the screws, remove (A), and take out (B) the left door unit. A B A Upper transport roller 1) Remove the rear and front casings. 2) Remove the E-rings, belt, pulley, pin and bearings. 3) Remove (A) the upper transport roller. B A 3) Remove the E-rings, belt, pulley, pin and bearings. Take out (C) the delivery roller. C A AR-RB1 DISASSEMBLY, ASSEMBLY AND MAINTENANCE 5 - 3
-
 1
1 -
2
-
3
-
4
-
5
-
6
-
7
-
8
-
9
-
10
-
 11
11 -
 12
12 -
 13
13 -
 14
14 -
 15
15 -
 16
16 -
 17
17 -
 18
18 -
 19
19 -
 20
20 -
 21
21 -
22
-
23
-
24
-
25
-
26
-
27
-
28
-
29
-
30
-
31
-
32
-
33
-
34
-
35
-
36
 |
 |