Sharp AR-RB1 Service Manual - Page 17
Drive
 |
View all Sharp AR-RB1 manuals
Add to My Manuals
Save this manual to your list of manuals |
Page 17 highlights
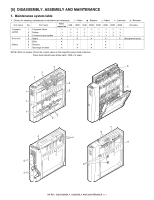
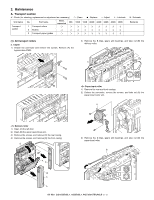
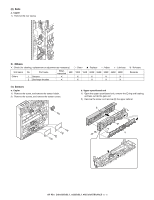
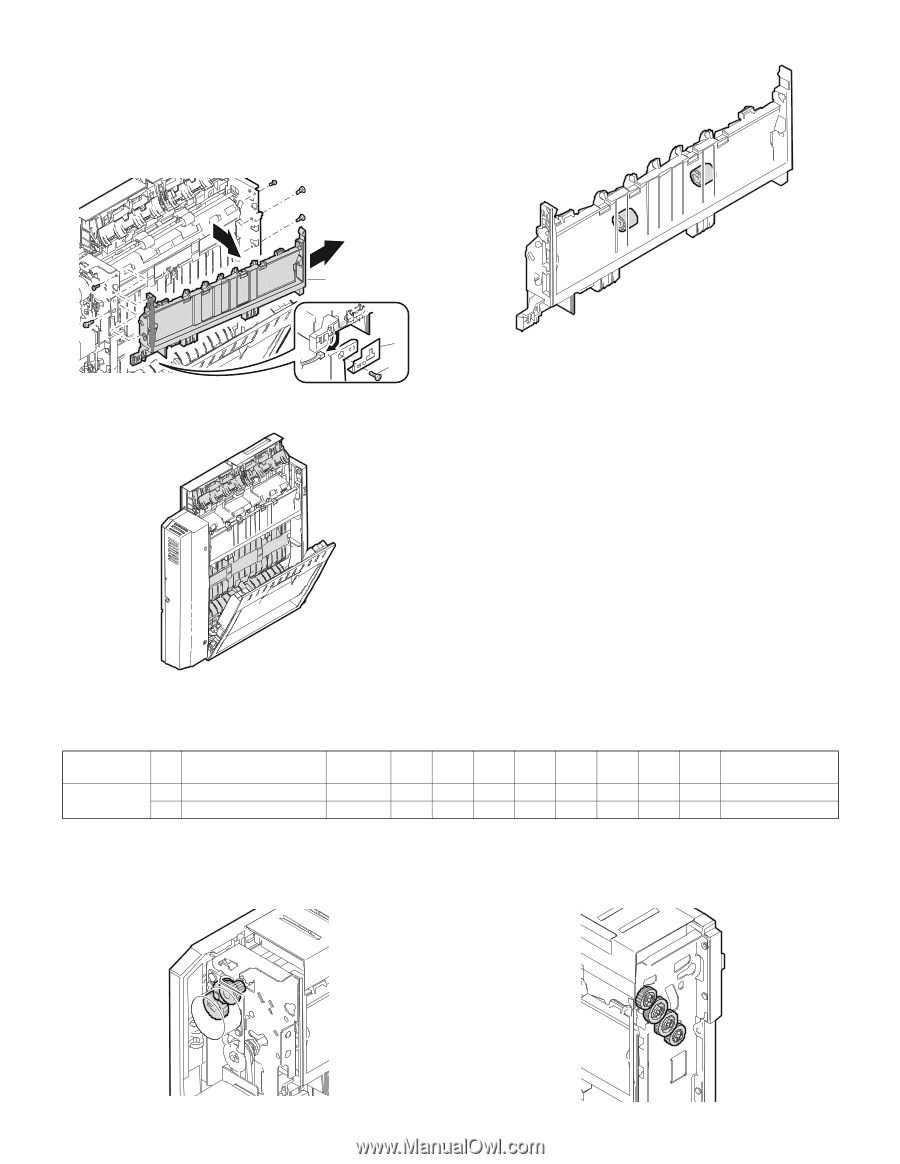
(2) Rollers a. Paper delivery cabinet 1) Remove the delivery roller. 2) Remove (A) the screw, remove (B) the ADU open/closed sensor mounting plate, and detach the connector. 3) Remove the screws, and take out (C) the paper delivery cabinet unit. (3) Transport paper guides C B A B. Drive section ✕ : Check (for cleaning, replacement or adjustment as necessary) ❍ : Clean v : Replace ∆ : Adjust ✩ : Lubricate ❏ : Relocate Unit name Drive unit No. Part name 1 Gears When requested 50K 100K 150K 200K 250K 300K 350K 400K Remarks ✕ ✕ ✕ ✕ ✕ (designated spots) 2 Belts ✕ ✕ (1) Gears a. Copier 1) Remove the rear casing. 2) Remove the front gears. AR-RB1 DISASSEMBLY, ASSEMBLY AND MAINTENANCE 5 - 4
-
 1
1 -
2
-
3
-
4
-
5
-
6
-
7
-
8
-
9
-
10
-
11
-
 12
12 -
 13
13 -
 14
14 -
 15
15 -
 16
16 -
 17
17 -
 18
18 -
 19
19 -
 20
20 -
 21
21 -
 22
22 -
23
-
24
-
25
-
26
-
27
-
28
-
29
-
30
-
31
-
32
-
33
-
34
-
35
-
36
 |
 |
AR-RB1
DISASSEMBLY, ASSEMBLY AND MAINTENANCE
5 - 4
(2) Rollers
a.
Paper delivery cabinet
1)
Remove the delivery roller.
2)
Remove (A) the screw, remove (B) the ADU open/closed sensor
mounting plate, and detach the connector.
3)
Remove the screws, and take out (C) the paper delivery cabinet
unit.
(3) Transport paper guides
B.
Drive section
✕
: Check (for cleaning, replacement or adjustment as necessary)
❍
: Clean
▲
: Replace
∆
: Adjust
✩
: Lubricate
❏
: Relocate
(1) Gears
a. Copier
1)
Remove the rear casing.
2) Remove the front gears.
A
B
C
Unit name
No.
Part name
When
requested
50K
100K
150K
200K
250K
300K
350K
400K
Remarks
Drive unit
1
Gears
✕
✕
✕
✕
✕
(designated spots)
2
Belts
✕
✕