Sharp DX-B351PL DX-B351PL User Manual - Page 30
Web server
 |
View all Sharp DX-B351PL manuals
Add to My Manuals
Save this manual to your list of manuals |
Page 30 highlights
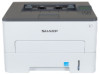
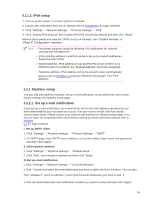
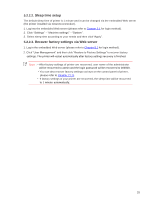
5.Web server You can manage printer setup via the embedded Web server. 5.1. Visit the embedded Web server 1. Turn on the power for the printer and computer. 2. Connect the printer to network to ensure that the printer is connected to the network where the computer is connected to (please refer to Chapter 4 for network setup method). 3. Input the IP address of printer in the address bar of Web browser to visit the Web server imbedded in printer. View the IP address of printer via control panel (please refer to Chapter 7.3) or print the "Network setup page" out to view the IP Address of printer (please refer to Chapter 7.4). Note: • Windows users are suggested to use Microsoft Internet Explorer 8.0 (or higher version) or Firefox 1.0 (or higher version), Mac users are suggested to use Safari 4.0 (or higher version). No matter what kind of browser you are using, please ensure that JavaScript and Cookies are always enabled. Please ensure compatibility with HTTP 1.0 and HTTP 1.1 when other network browsers are used. • If the computer cannot visit the Web server embedded in printer, then your computer and printer may be connected to different networks. Please inspect your network environment or consult your network administrator. 4. Click "Log in" option, input user name and password (the default user name is admin and the initial password is 000000) and click "Log in". which can be done in the "User Management" interface. 5.2. Use Web server to manage printer You can use the embedded Web server to manage the printer. 1. View the basic information including product name, printer state and ink cartridge of printer. 2. Set up the network protocol parameters supported by printer. 3.Set up mail server client and acquire printer state via E-mail notification. 22
-
 1
1 -
2
-
3
-
4
-
5
-
6
-
7
-
8
-
9
-
10
-
11
-
12
-
13
-
14
-
15
-
16
-
17
-
18
-
19
-
20
-
21
-
22
-
23
-
24
-
 25
25 -
 26
26 -
 27
27 -
 28
28 -
 29
29 -
 30
30 -
 31
31 -
 32
32 -
 33
33 -
 34
34 -
 35
35 -
36
-
37
-
38
-
39
-
40
-
41
-
42
-
43
-
44
-
45
-
46
-
47
-
48
-
49
-
50
-
51
-
52
-
53
-
54
-
55
-
56
-
57
-
58
-
59
-
60
-
61
-
62
-
63
-
64
-
65
-
66
-
67
-
68
-
69
-
70
-
71
 |
 |
