Sharp LC-60LE810UN Service Manual - Page 37
Monitor microprocessor software version upgrade, 3.1 How to upgrade the software - no power led blinking
 |
UPC - 074000372580
View all Sharp LC-60LE810UN manuals
Add to My Manuals
Save this manual to your list of manuals |
Page 37 highlights
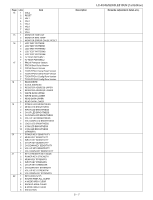
LC-40/46/52/60LE810UN (1st Edition) 2.3. Monitor microprocessor software version upgrade Create the USB memory for monitor microprocessor software version upgrade in the same manner as explained in the "Main software version upgrade". Copy the file HLNRVA0x.USB and HLNIMxxx.BIN (named temporarily) for monitor microprocessor software version upgrade to the USB memory. 2.3.1 How to upgrade the software 1. Plug AC cord and turn on the TV. 2. After picture displayed, touch the power key for 5seconds. NOTE: Picture will disappear when you touch the power key, but keep touching it. 3. When the center icon LED blinks, release your finger from the power key. 4. Next, touch the "POWER" and "CH ( )" keys at the same time. 5. When the center icon LED turns on, release your finger form the keys. CAUTION: • The moment this operation is done, the upgrading of the monitor microprocessor software starts. While the upgrade is ongoing, never power off the unit. Otherwise the upgrade will fail and the system may be serious damaged beyond recovery (inability to start). • After the monitor microprocessor software is upgraded, also perform the 'Industry Init'. 6. After the unit startup, the upgrade starts. The power led will blink continuously. Also, an upgrade screen will be shown during a minor upgrade. LE810UN 7. If the upgrade fails, power led will stop blinking. Also, the upgrade failure screen will be shown if upgrade screen was shown at 5. LE810UN NOTE: In the event of a transient failure, upgrade will be automatically retried up to three times. If the process repeatedly fails, hardware may be the cause. 8. Up on completion of the whole process, power and OPC LED will blink alternately. Also, the upgrade success screen will be shown if upgrade screen was shown at 5. LE810UN 9. Unplug the AC cord and remove the USB Memory for version upgrade. 10.Now the software version upgrade is complete. NOTE: When you are done with the software version upgrade, start the set, go to the top page of the adjustment process screen and check the mon- itor microprocessor software version information and panel size information. 5 - 3
-
 1
1 -
2
-
3
-
4
-
5
-
6
-
7
-
8
-
9
-
10
-
11
-
12
-
13
-
14
-
15
-
16
-
17
-
18
-
19
-
20
-
21
-
22
-
23
-
24
-
25
-
26
-
27
-
28
-
29
-
30
-
31
-
 32
32 -
 33
33 -
 34
34 -
 35
35 -
 36
36 -
 37
37 -
 38
38 -
 39
39 -
 40
40 -
 41
41 -
 42
42 -
43
-
44
-
45
-
46
-
47
-
48
-
49
-
50
-
51
-
52
-
53
-
54
-
55
-
56
-
57
-
58
-
59
-
60
-
61
-
62
-
63
-
64
-
65
-
66
-
67
-
68
-
69
-
70
-
71
-
72
-
73
-
74
-
75
-
76
-
77
-
78
-
79
-
80
-
81
-
82
-
83
-
84
-
85
-
86
-
87
-
88
-
89
-
90
-
91
-
92
-
93
-
94
-
95
-
96
 |
 |
