Sharp PG-C355W Owners Manual for XG-C455W - Page 5
How to Read this Operation Manual, s 66 and 67 - troubleshooting
 |
UPC - 074000365629
View all Sharp PG-C355W manuals
Add to My Manuals
Save this manual to your list of manuals |
Page 5 highlights
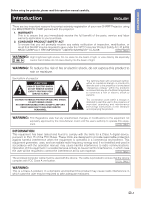
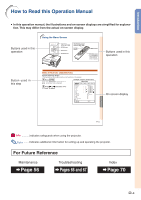
Introduction How to Read this Operation Manual • In this operation manual, the illustrations and on-screen displays are simplified for explanation. This may differ from the actual on-screen display. Buttons used in this operation Using the Menu Screen Adjustment buttons ('/"/\/|) ENTER button MENU button RETURN button MOUSE/Adjustment buttons ('/"/\/|) ENTER button MENU button RETURN button • Press RETURN to return to previous screen when the menu is displayed Buttons used in this operation Button used in this step Menu Selections (Adjustments) Example: Adjusting "Bright". • This operation can also be performed by using the buttons on the projector. 1 Press MENU. • The "Picture" menu screen for the selected input mode is displayed. 2 Press | or \ and select "Pic- ture" to adjust. Example: "Picture" screen menu Menu item Picture SIG Picture Mode Contrast Bright Color Tint Sharp Red Blue CLR Temp Progressive Film Mode DNR MNR Eco+Quiet Mode Reset SEL./ADJ. RETURN SCR 0 0 0 0 0 0 0 PRJ Net. Standard 7500K 3D Progressive Auto Off Off Off ENTER END On-screen display Useful Features -43 Info ...........Indicates safeguards when using the projector. Note ........Indicates additional information for setting up and operating the projector. For Future Reference Maintenance Page 56 Troubleshooting Pages 66 and 67 Index Page 70 -3
-
 1
1 -
 2
2 -
 3
3 -
 4
4 -
 5
5 -
 6
6 -
 7
7 -
 8
8 -
 9
9 -
 10
10 -
 11
11 -
12
-
13
-
14
-
15
-
16
-
17
-
18
-
19
-
20
-
21
-
22
-
23
-
24
-
25
-
26
-
27
-
28
-
29
-
30
-
31
-
32
-
33
-
34
-
35
-
36
-
37
-
38
-
39
-
40
-
41
-
42
-
43
-
44
-
45
-
46
-
47
-
48
-
49
-
50
-
51
-
52
-
53
-
54
-
55
-
56
-
57
-
58
-
59
-
60
-
61
-
62
-
63
-
64
-
65
-
66
-
67
-
68
-
69
-
70
-
71
-
72
-
73
 |
 |
