Sharp PN-H701 Operations Manual - Page 29
Character input, Adjustments for PC screen display, Menu Items, Automatic adjustment
 |
View all Sharp PN-H701 manuals
Add to My Manuals
Save this manual to your list of manuals |
Page 29 highlights
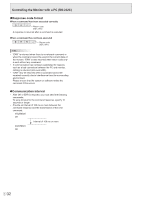
Menu Items Character input For items that require entry of text, press ENTER to display the software keyboard. Select a character with enter. , and press ENTER to • To change the characters entered, select CHAR. SET or press DISPLAY (F1). • To switch between upper case and lower case, select CAPS and press . ENTER • To delete characters, select CLEAR or DELETE and press . ENTER You can also perform DELETE by pressing MODE (F2). • When you are done entering characters, select DONE and press . ENTER You can also finish by pressing SIZE (F3). To cancel character entry, select CANCEL and press . ENTER Adjustments for PC screen display nAutomatic adjustment When you use the PC D-sub to display a PC screen, or when you change the setting of the PC, use the automatic screen adjustment. 1. Switch the input to D-SUB and display the adjustment pattern. (See the description below.) 2. Press MENU and select AUTO SYNC. of SCREEN POSITION of INPUT SELECT in the SETUP menu. (See page 27.) 3. Press ENTER and select YES. 4. Press . ENTER Wait until automatic adjustment finishes. 5. Press MENU to close the menu screen. TIPS • If the screen cannot be adjusted properly with one automatic adjustment, repeat the automatic adjustment two or three times. Try manual adjustment if necessary. • When the input signal is 1024 x 768 or 1366 x 768, the input resolution must be set manually. Select the resolution with INPUT SIGNAL in SCREEN POSITION of INPUT SELECT in the SETUP menu. (See page 27.) nScreen display for adjustment Before making adjustments in the SCREEN POSITION menu or PICTURE menu, display an image to brighten the entire screen. If you are using a Windows PC, use the adjustment pattern on the supplied CD-ROM. Opening the adjustment pattern The following example is performed in Windows 7. 1. Load the supplied CD-ROM into the computer's CD- ROM drive. 2. Open [CD Drive] in [Computer]. 3. Double-click [Adj_uty.exe]. The adjustment pattern will appear. Adjust the screen automatically or manually. 4. When adjustment is finished, press the [Esc] on the computer's keyboard to quit the adjustment program. 5. Eject the CD-ROM from the CD-ROM drive. TIPS • If the display mode on the computer you are using is 65,000 colors, the color levels in the color pattern may appear differently or grayscale may appear to be colored. (This is due to the specifications of the input signal and is not a malfunction.) 29 E
-
 1
1 -
2
-
3
-
4
-
5
-
6
-
7
-
8
-
9
-
10
-
11
-
12
-
13
-
14
-
15
-
16
-
17
-
18
-
19
-
20
-
21
-
22
-
23
-
 24
24 -
 25
25 -
 26
26 -
 27
27 -
 28
28 -
 29
29 -
 30
30 -
 31
31 -
 32
32 -
 33
33 -
 34
34 -
35
-
36
-
37
-
38
-
39
-
40
-
41
-
42
-
43
-
44
-
45
-
46
-
47
-
48
-
49
-
50
-
51
-
52
-
53
-
54
-
55
-
56
-
57
-
58
-
59
-
60
 |
 |
