Sharp PN-H701 Operations Manual - Page 37
Command-based control, IP CONTROL SETUP
 |
View all Sharp PN-H701 manuals
Add to My Manuals
Save this manual to your list of manuals |
Page 37 highlights
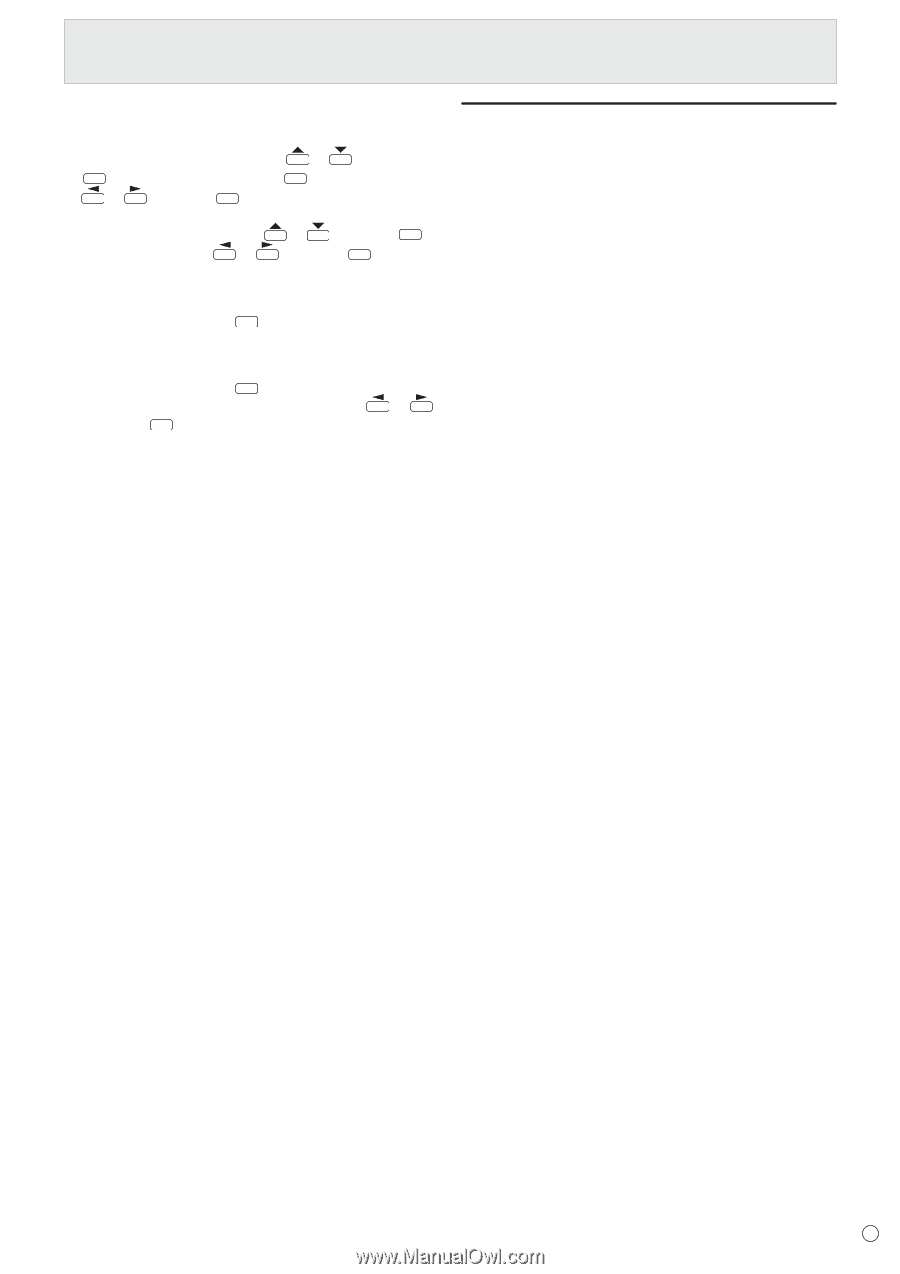
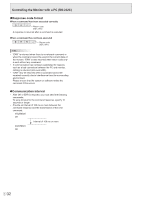
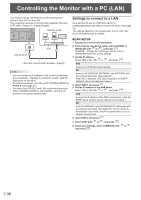
Controlling the Monitor with a PC (LAN) nIP CONTROL SETUP 1. Set IP control to ENABLE. Select IP CONTROL SETUP with or and press . ENTER Select CHANGE and press . ENTER Select ENABLE with or and press . ENTER 2. Configure advanced security settings. Select DETAIL SETTING with or and press . ENTER Select CHANGE with or and press . ENTER 3. Set the login information. Enter the LOGIN ID and PASSWORD with the software keyboard (see page 29). 4. Select NEXT and press . ENTER 5. Set the control port. Enter the CONTROL PORT with the software keyboard (see page 29). 6. Select NEXT and press . ENTER 7. Check your settings, select COMPLETE with and press . ENTER or , Command-based control You can control the monitor using control commands (see page 33) via terminal software and other appropriate applications. Read the manual for the terminal software for detailed instructions. (1) Connect the PC to the monitor. Use a commercially available LAN cable to connect a PC to the monitor. (See page 36.) (2) Send commands to control the monitor. • The commands used are the same as those for RS232C. Refer to the communication procedure (see page 31) for operation. • Usable commands are provided in the control command table (see page 33). 37 E
-
 1
1 -
2
-
3
-
4
-
5
-
6
-
7
-
8
-
9
-
10
-
11
-
12
-
13
-
14
-
15
-
16
-
17
-
18
-
19
-
20
-
21
-
22
-
23
-
24
-
25
-
26
-
27
-
28
-
29
-
30
-
31
-
 32
32 -
 33
33 -
 34
34 -
 35
35 -
 36
36 -
 37
37 -
 38
38 -
 39
39 -
 40
40 -
 41
41 -
 42
42 -
43
-
44
-
45
-
46
-
47
-
48
-
49
-
50
-
51
-
52
-
53
-
54
-
55
-
56
-
57
-
58
-
59
-
60
 |
 |