Sharp R930AK Service Manual - Page 34
Door Disassembly - microwave oven parts
 |
UPC - 074000606036
View all Sharp R930AK manuals
Add to My Manuals
Save this manual to your list of manuals |
Page 34 highlights
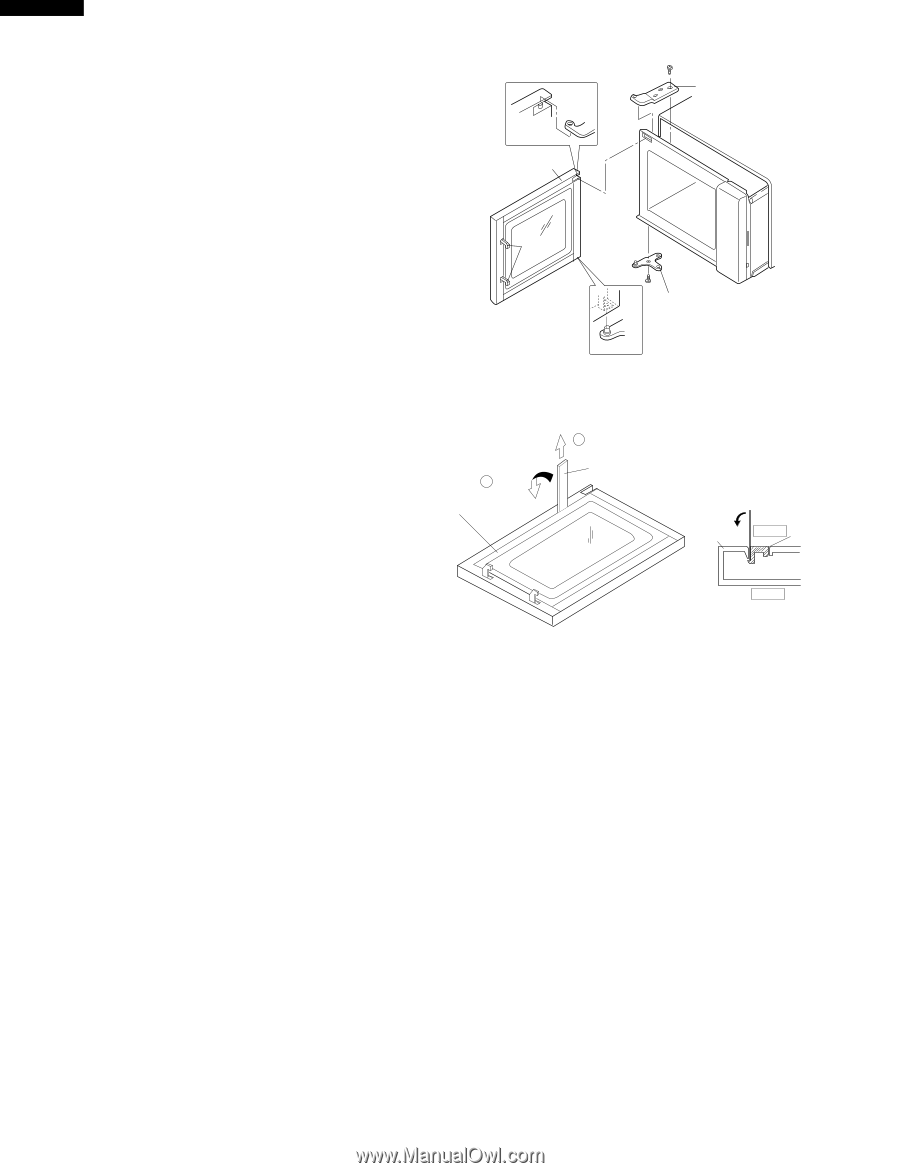
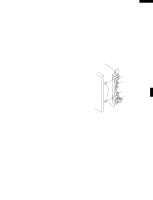
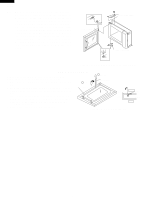
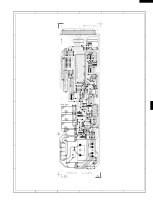
R-930AK R-930AW Note: The door on a microwave oven is designed to act as an electronic seal preventing the leakage of microwave energy from oven cavity during cook cycle. This function does not require that door be airtight, moisture (condensation)-tight or light-tight. Therefore, occasional appearance of moisture, light or sensing of gentle warm air movement around oven door is not abnormal and do not of themselves indicate a leakage of microwave energy from oven cavity. If such were the case, your oven could not be equipped with a vent, the very purpose of which is to exhaust the vapor-laden air from the oven cavity. RE-INSTALL DOOR ASSEMBLY LATCH HEADS UPPER OVEN HINGE LOWER OVEN HINGE RE-INSTALL Figure C-5. Door Replacement and adjustment DOOR DISASSEMBLY Remove door assembly, refer to "Door Replacement". Replacement of door components are as follows: 1. Place door assembly on a soft cloth with latches facing up. Note: As the engaging part of choke cover and door panel are provided at several places, do not force any particular part. 2. Insert an putty knife (thickness of about 0.5mm) into the gap between the choke cover and corner portion of door panel as shown Figure C-6 to free engaging parts. 3. Lift up choke cover. 4. Now choke cover is free from door panel. 1 BENT CHOKE COVER 2 LIFT UP PUTTY KNIFE Door Bent INSIDE Choke Panel cover Upper Lower FRONT Figure C-6. Door Disassembly 32
-
 1
1 -
2
-
3
-
4
-
5
-
6
-
7
-
8
-
9
-
10
-
11
-
12
-
13
-
14
-
15
-
16
-
17
-
18
-
19
-
20
-
21
-
22
-
23
-
24
-
25
-
26
-
27
-
28
-
 29
29 -
 30
30 -
 31
31 -
 32
32 -
 33
33 -
 34
34 -
 35
35 -
 36
36 -
 37
37 -
 38
38 -
 39
39 -
40
-
41
-
42
-
43
-
44
 |
 |