Sharp XE-A202 Service Manual - Page 16
IPL Initial Program Loading FUNCTION - replacement
 |
UPC - 074000048270
View all Sharp XE-A202 manuals
Add to My Manuals
Save this manual to your list of manuals |
Page 16 highlights
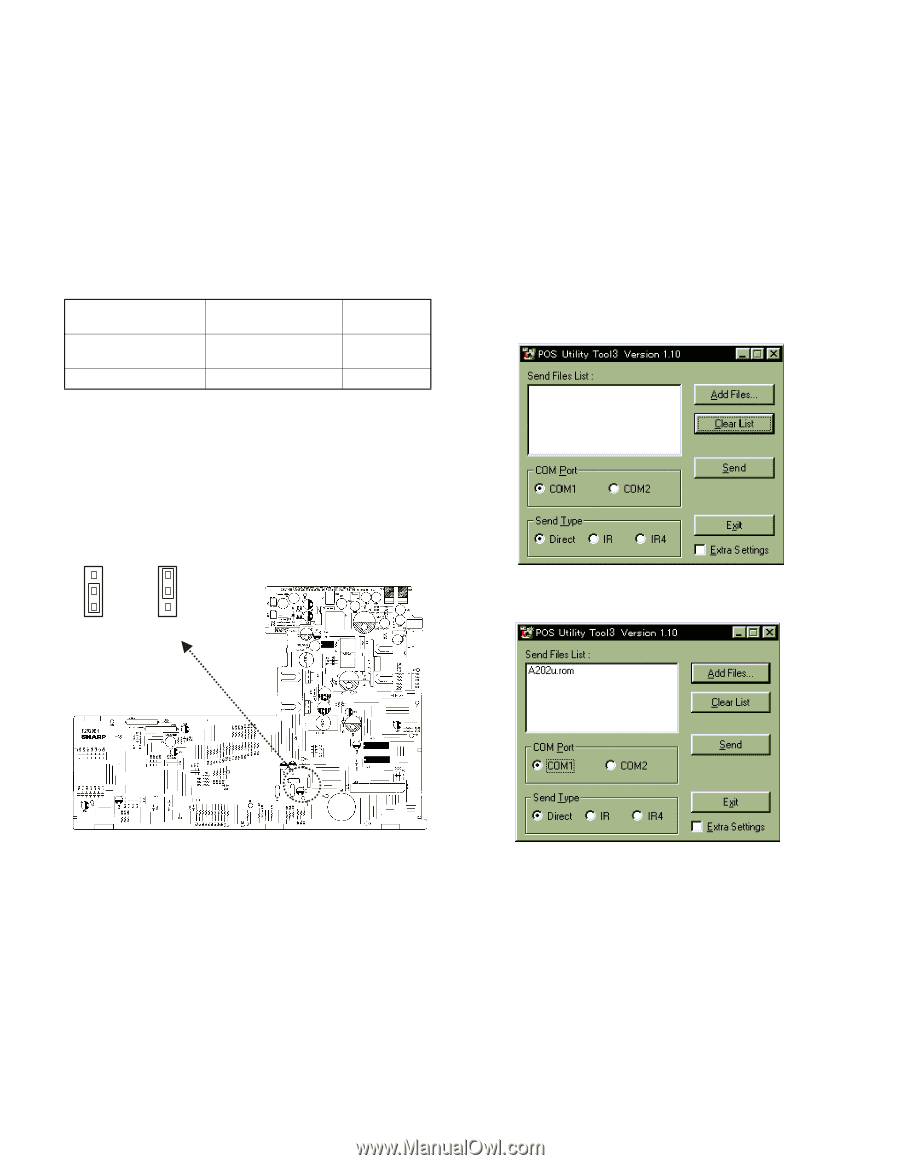
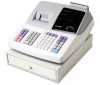
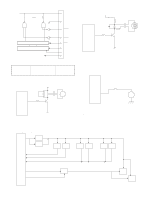
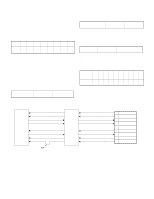
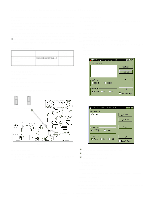
CHAPTER 6. IPL (Initial Program Loading) FUNCTION The application program of the XE-A202 is written into the Flash ROM in the CPU. Since the CPU supplied as a service part does not include the application program in it, the application program must be written when the CPU is replaced with a new one. To write the application program into the Flash ROM, connect the PC and the XE-A202 with an RS-232C cable, and execute the PC software. *Use a D-Sub 9pin cross cable employed in conventional communication between ECR-ECR (See APPENDIX: RS232C CABLE). [Related parts/Tool] PARTS NAME PARTS CODE LOCATION No. CPU (without application VHI30624FGA-1 IC5 program) PosUtilityTool3 Software [IPL PROCEDURE] 1) Connect the XE-A202 and PC with an RS-232C cable. 2) Turn off the AC Power. (& remove batteries.) 3) Open the cabinet. 4) Change the IPL JUMPER PIN (SP1) to the rear side. SP1 SP1 7) Copy the following files in "PosUtilityTool3" into the hard disk of PC. Postool3.exe A202u.ROM 8) Boot "Postool3.exe." 9) Push [Add Files] in the screen. 10) Select the ROM DATA file. (File name: A202u.ROM) 11) By pushing [Send] in the screen, the ROM data is sent from PC to ECR. The address counter is shown on PC and counts up. 12) After about 3-minuites, the message "Complete" is shown on PC. Default When IPL 5) Close the cabinet. 6) Turn on the AC Power. (At this time, ECR looks like inactive, but ECR waits the ROM data from PC.) *1 COM Port is selectable between COM1 and 2. *2 For "Send Type", select "Direct". *3 Do not select "Extra Setting". 12) Turn on the AC Power. 13) Open the cabinet. 14) Change the Jumper PIN (SP1) to the front side. (default position) 15) Close the cabinet. 16) Turn on the AC Power. Master Reset will be performed. If not, power off the XE-A202, wait 1miniute and turn on the power again. XE-A202U IPL (Initial Program Loading) FUNCTION - 15 -
-
 1
1 -
2
-
3
-
4
-
5
-
6
-
7
-
8
-
9
-
10
-
 11
11 -
 12
12 -
 13
13 -
 14
14 -
 15
15 -
 16
16 -
 17
17 -
 18
18 -
 19
19 -
 20
20 -
 21
21 -
22
-
23
-
24
-
25
-
26
-
27
 |
 |