Sharp XV-Z9000U XVZ9000U Operation Manual - Page 36
Reducing Image Noise VIDEO menu only
 |
UPC - 074000358126
View all Sharp XV-Z9000U manuals
Add to My Manuals
Save this manual to your list of manuals |
Page 36 highlights
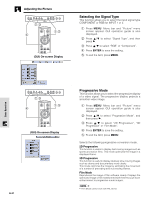
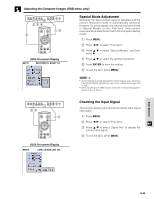
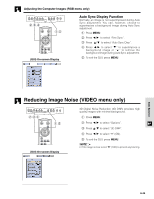
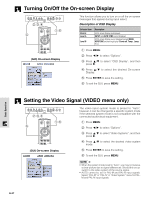
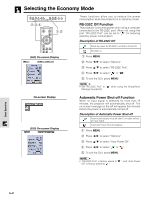
Adjusting the Computer Images (RGB menu only) 2,3,4 1,5 (GUI) On-screen Display Auto Sync Display Function Normally, an image is not superimposed during Auto Sync adjustment. You can, however, choose to superimpose a background image during Auto Sync adjustment. 1 Press MENU. 2 Press / to select "Fine Sync". 3 Press / to select "Auto Sync Disp". 4 Press / to select " " to superimpose a background image or " " to remove the background image during Auto Sync adjustment. 5 To exit the GUI, press MENU. Reducing Image Noise (VIDEO menu only) 2,3,4 1,5 (GUI) On-screen Display 3D Digital Noise Reduction (3D DNR) provides high quality images with minimal background. 1 Press MENU. 2 Press / to select "Options". 3 Press / to select "3D DNR". 4 Press / to select " " (ON). 5 To exit the GUI, press MENU. • If the image is clear, select " " (OFF) to prevent any blurring. Basic Operation E-36
-
 1
1 -
2
-
3
-
4
-
5
-
6
-
7
-
8
-
9
-
10
-
11
-
12
-
13
-
14
-
15
-
16
-
17
-
18
-
19
-
20
-
21
-
22
-
23
-
24
-
25
-
26
-
27
-
28
-
29
-
30
-
 31
31 -
 32
32 -
 33
33 -
 34
34 -
 35
35 -
 36
36 -
 37
37 -
 38
38 -
 39
39 -
 40
40 -
 41
41 -
42
-
43
-
44
-
45
-
46
-
47
-
48
-
49
-
50
-
51
-
52
-
53
-
54
-
55
-
56
-
57
-
58
-
59
-
60
-
61
 |
 |
