Snapper 150Z Operater's Manual - Page 32
Mower Deck Leveling, Adjustments
 |
View all Snapper 150Z manuals
Add to My Manuals
Save this manual to your list of manuals |
Page 32 highlights
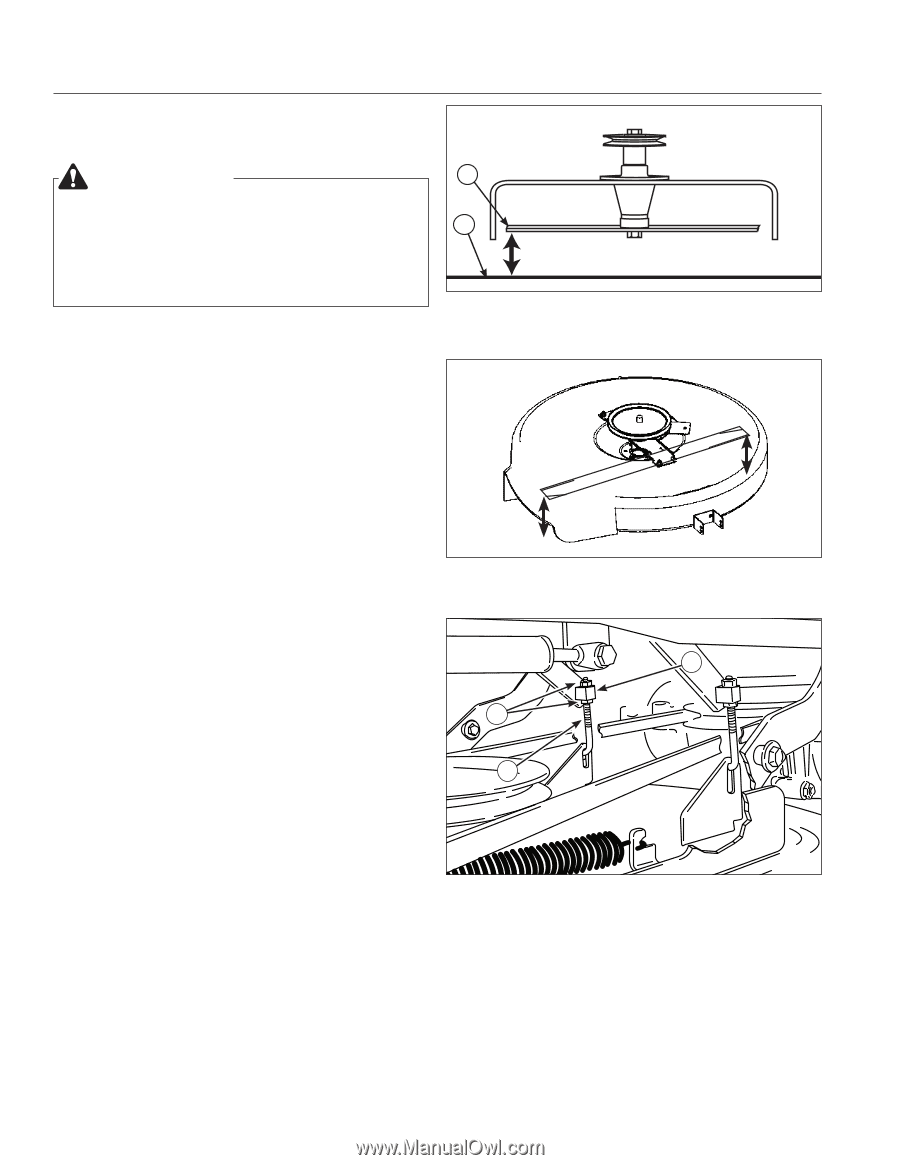
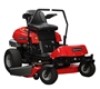
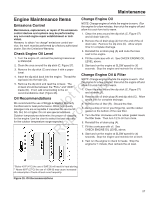
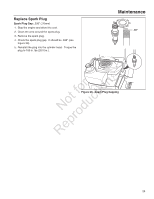
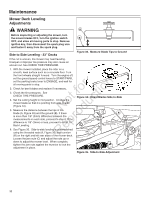
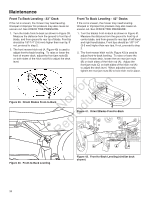
Maintenance Mower Deck Leveling Adjustments WARNING A Before inspecting or adjusting the mower, turn the mower blades OFF, turn the ignition switch B OFF, and allow all moving parts to stop. Remove ignition key, then disconnect the spark plug wire and fasten it away from the spark plug. Side to Side Leveling - 33" Decks Figure 33. Measure Blade Tips to Ground If the cut is uneven, the mower may need leveling. Unequal or improper tire pressure may also cause an uneven cut. See CHECK TIRE PRESSURE. 1. With the mower installed, place the rider on a smooth, level surface such as a concrete floor. Turn the front wheels straight forward. Turn the engine off, set the ground speed control levers to START/PARK, set the parking brake lever to ENGAGE, and wait for r n all moving parts to stop. 2. Check for bent blades and replace if necessary. fo tio 3. Check the tire pressures. See CHECK TIRE PRESSURE. t c 4. Set the cutting height to mid position. Arrange the o mower blade so that it is pointing from side-to-side u (Figure 34). N d 5. Measure the distance between the tips of the blade (A, Figure 33) and the ground (B). If there o is more than 1/8" (3mm) difference between the r measurements on each side, proceed to step 6. If the p difference is 1/8" (3mm) or less, proceed to Front To Back Leveling. e 6. See Figure 35. Side-to-side leveling is accomplished R using the threaded rods (A, Figure 35) and trunnion Figure 34. Orient Blades Side-to-Side B C A (B) on the right and left rear sides of the mower deck. Loosen the jam nuts (C) and adjust the nuts up or down to adjust the mower level. When complete, tighten the jam nuts against the trunnion to lock the adjustment in place. Figure 35. Side-to-Side Adjustment 32
-
 1
1 -
2
-
3
-
4
-
5
-
6
-
7
-
8
-
9
-
10
-
11
-
12
-
13
-
14
-
15
-
16
-
17
-
18
-
19
-
20
-
21
-
22
-
23
-
24
-
25
-
26
-
 27
27 -
 28
28 -
 29
29 -
 30
30 -
 31
31 -
 32
32 -
 33
33 -
 34
34 -
 35
35 -
 36
36 -
 37
37 -
38
-
39
-
40
-
41
-
42
-
43
-
44
 |
 |