Sony BDV-HZ970W Operating Instructions - Page 60
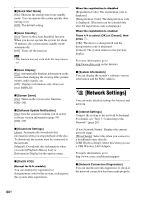
[Network Update], [Screen Settings
 |
UPC - 027242780712
View all Sony BDV-HZ970W manuals
Add to My Manuals
Save this manual to your list of manuals |
Page 60 highlights
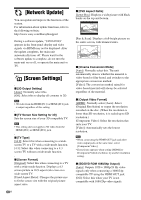
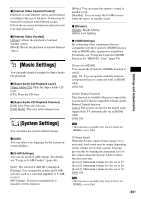
[Network Update] You can update and improve the functions of the system. For information about update functions, refer to the following website: http://www.sony.com/blurayhtsupport During a software update, "UPDATING" appears in the front panel display and video signals via HDMI may not be displayed. After the update completes, the main unit automatically turns off. Please wait for the software update to complete; do not turn the main unit on or off, or operate the main unit or TV. [Screen Settings] x [3D Output Setting] [Auto]: Normally select this. [Off]: Select this to display all contents in 2D. Note • 3D video from the HDMI (IN 1) or HDMI (IN 2) jack is output regardless of this setting. x [TV Screen Size Setting for 3D] Sets the screen size of your 3D compatible TV. Note • This setting does not apply to 3D video from the HDMI (IN 1) or HDMI (IN 2) jack. x [TV Type] [16:9]: Select this when connecting to a widescreen TV or a TV with a wide-mode function. [4:3]: Select this when connecting to a 4:3 screen TV without a wide-mode function. x [Screen Format] [Original]: Select this when connecting to a TV with a wide-mode function. Displays a 4:3 screen picture in 16:9 aspect ratio even on a wide-screen TV. [Fixed Aspect Ratio]: Changes the picture size to fit the screen size with the original picture aspect ratio. 60US x [DVD Aspect Ratio] [Letter Box]: Displays a wide picture with black bands on the top and bottom. [Pan & Scan]: Displays a full-height picture on the entire screen, with trimmed sides. x [Cinema Conversion Mode] [Auto]: Normally select this. The unit automatically detects whether the material is video-based or film-based, and switches to the appropriate conversion method. [Video]: The conversion method suited for video-based material will always be selected regardless of the material. x [Output Video Format] [HDMI]: Normally select [Auto]. Select [Original Resolution] to output the resolution recorded on the disc. (When the resolution is lower than SD resolution, it is scaled up to SD resolution.) [Component Video]: Select the resolution that suits your TV. [Video]: Automatically sets the lowest resolution. Note • When connecting the HDMI OUT jack and other video output jacks at the same time, select [Component Video]. • If no picture appears when setting [HDMI] or [Component Video] resolution, try another resolution setting. x [BD/DVD-ROM 1080/24p Output] [Auto]: Outputs 1920 × 1080p/24 Hz video signals only when connecting a 1080/24pcompatible TV using the HDMI OUT jack. [Off]: Select this when your TV is not compatible with 1080/24p video signals.
-
 1
1 -
2
-
3
-
4
-
5
-
6
-
7
-
8
-
9
-
10
-
11
-
12
-
13
-
14
-
15
-
16
-
17
-
18
-
19
-
20
-
21
-
22
-
23
-
24
-
25
-
26
-
27
-
28
-
29
-
30
-
31
-
32
-
33
-
34
-
35
-
36
-
37
-
38
-
39
-
40
-
41
-
42
-
43
-
44
-
45
-
46
-
47
-
48
-
49
-
50
-
51
-
52
-
53
-
54
-
 55
55 -
 56
56 -
 57
57 -
 58
58 -
 59
59 -
 60
60 -
 61
61 -
 62
62 -
 63
63 -
 64
64 -
 65
65 -
66
-
67
-
68
-
69
-
70
-
71
-
72
-
73
-
74
-
75
-
76
-
77
-
78
-
79
-
80
-
81
-
82
-
83
-
84
-
85
-
86
-
87
-
88
 |
 |
