Sony DCR DVD301 Operating Instructions - Page 92
Installing the USB driver, or Windows XP Home Edition/Professional
 |
UPC - 027242654792
View all Sony DCR DVD301 manuals
Add to My Manuals
Save this manual to your list of manuals |
Page 92 highlights
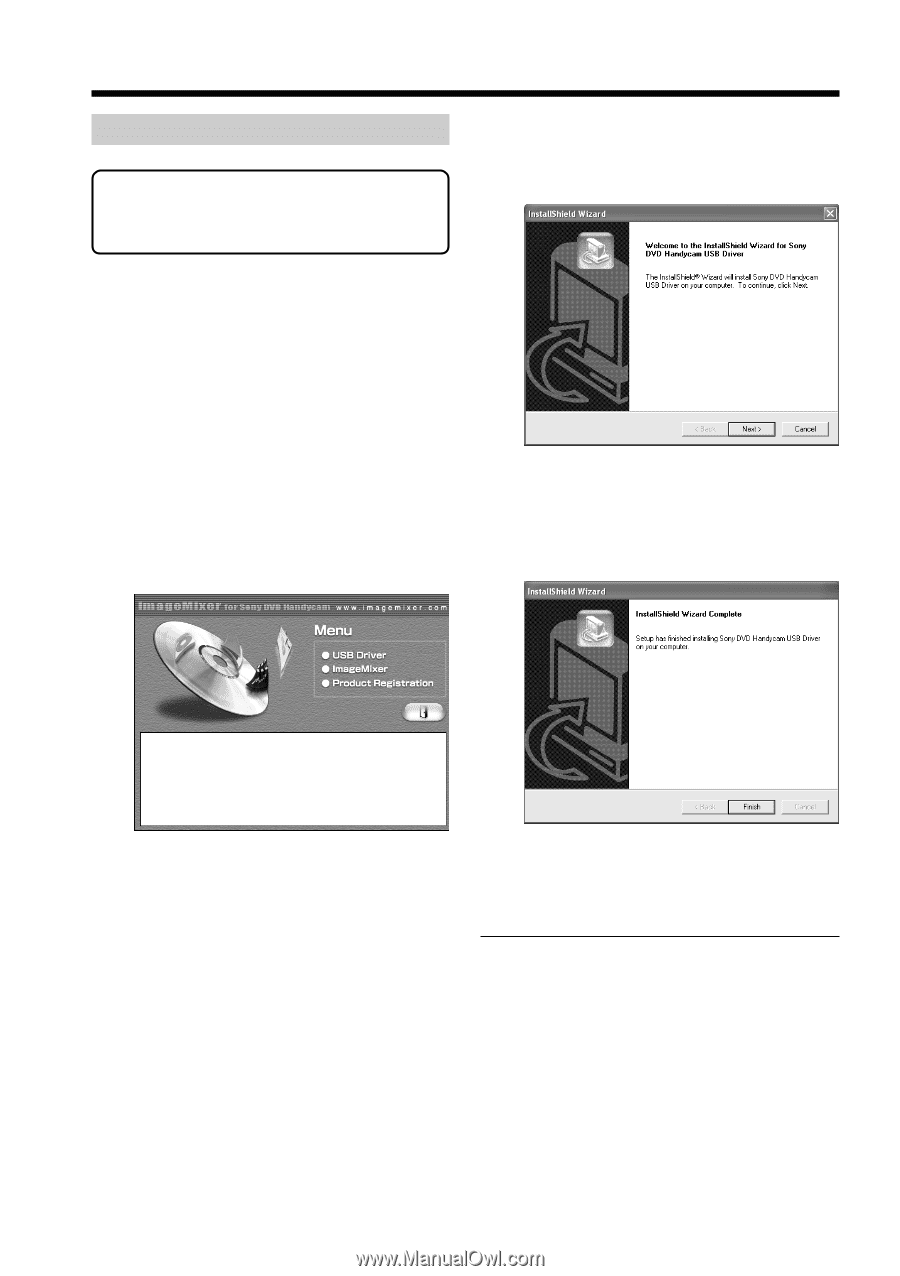
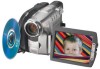
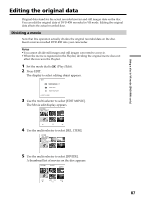
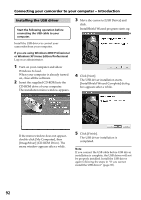
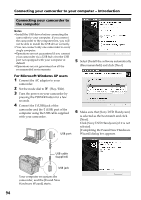
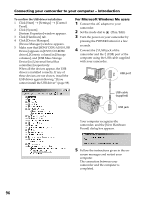
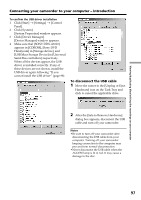
Connecting your camcorder to your computer - Introduction Installing the USB driver Start the following operation before connecting the USB cable to your computer. Install the USB driver to control your camcorder from your computer. If you are using Windows 2000 Professional or Windows XP Home Edition/Professional Log on as administrator. 1 Turn on your computer and allow Windows to load. When your computer is already turned on, close all the software. 2 Insert the supplied CD-ROM into the CD-ROM drive of your computer. The installation menu window appears. 3 Move the cursor to [USB Driver] and click. InstallShield Wizard program starts up. 4 Click [Next]. The USB driver installation starts. [InstallShield Wizard Complete] dialog box appears after a while. If the menu window does not appear, double-click [My Computer], then [ImageMixer] (CD-ROM Drive). The menu window appears after a while. 5 Click [Finish]. The USB driver installation is completed. Note If you connect the USB cable before USB driver installation is complete, the USB driver will not be properly installed. Install the USB driver again following the steps in "If you cannot install the USB driver" (page 98). 92
-
 1
1 -
2
-
3
-
4
-
5
-
6
-
7
-
8
-
9
-
10
-
11
-
12
-
13
-
14
-
15
-
16
-
17
-
18
-
19
-
20
-
21
-
22
-
23
-
24
-
25
-
26
-
27
-
28
-
29
-
30
-
31
-
32
-
33
-
34
-
35
-
36
-
37
-
38
-
39
-
40
-
41
-
42
-
43
-
44
-
45
-
46
-
47
-
48
-
49
-
50
-
51
-
52
-
53
-
54
-
55
-
56
-
57
-
58
-
59
-
60
-
61
-
62
-
63
-
64
-
65
-
66
-
67
-
68
-
69
-
70
-
71
-
72
-
73
-
74
-
75
-
76
-
77
-
78
-
79
-
80
-
81
-
82
-
83
-
84
-
85
-
86
-
 87
87 -
 88
88 -
 89
89 -
 90
90 -
 91
91 -
 92
92 -
 93
93 -
 94
94 -
 95
95 -
 96
96 -
 97
97 -
98
-
99
-
100
-
101
-
102
-
103
-
104
-
105
-
106
-
107
-
108
-
109
-
110
-
111
-
112
-
113
-
114
-
115
-
116
-
117
-
118
-
119
-
120
-
121
-
122
-
123
-
124
-
125
-
126
-
127
-
128
-
129
-
130
-
131
-
132
-
133
-
134
-
135
-
136
-
137
-
138
-
139
-
140
-
141
-
142
-
143
-
144
-
145
-
146
-
147
-
148
 |
 |