Sony DCR-SR40 Operating Guide - Page 12
Step 3: Turning the power on and setting the date and time, When resetting the date and time - handycam
 |
UPC - 027242701496
View all Sony DCR-SR40 manuals
Add to My Manuals
Save this manual to your list of manuals |
Page 12 highlights
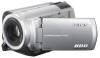
Step 3: Turning the power on and setting the date and time 1 2 Touch the button on the LCD screen. When using the camcorder for the first time, the [CLOCK SET] screen appears on the LCD screen. 3&4 CLOCK SET AREA26 GMT -5.0 New york , Bogota DST OFF DATE 2006 Y JAN M 1D 12 00 AM OK 1 Remove the lens cap by pressing both tabs on the sides of the cap. Pull the lens cap string down until stopped by the grip belt (DCRSR40). 2 Turn on the power by sliding the POWER switch in the direction of the arrow while pressing the green button in the center. When you record or play back an image, slide the POWER switch in the direction of the arrow repeatedly until the respective lamp lights up. (Movie): To record movies (Still): To record still images (PLAY/EDIT): To play back images on your camcorder, or to edit/delete them 4 Set [DST], [Y] (year), [M] (month), [D] (day), hour and minute. The clock starts. • The recording date and time are not displayed during recording but are automatically recorded onto the hard disk and displayed during playback (see "Handycam Handbook" (PDF)). • Instead of [DST], [SUMMERTIME] is displayed for some models. When resetting the date and time You can set the desired date and time by touching t [SETUP] t TIME/LANGU. t [CLOCK SET] (p.24). 3 Select the desired geographical area with / , then touch . 12
-
 1
1 -
2
-
3
-
4
-
5
-
6
-
 7
7 -
 8
8 -
 9
9 -
 10
10 -
 11
11 -
 12
12 -
 13
13 -
 14
14 -
 15
15 -
 16
16 -
 17
17 -
18
-
19
-
20
-
21
-
22
-
23
-
24
-
25
-
26
-
27
-
28
-
29
-
30
-
31
-
32
-
33
-
34
-
35
 |
 |
