Sony DCR-TRV25 Operating Instructions - Page 167
Capturing moving pictures
 |
View all Sony DCR-TRV25 manuals
Add to My Manuals
Save this manual to your list of manuals |
Page 167 highlights
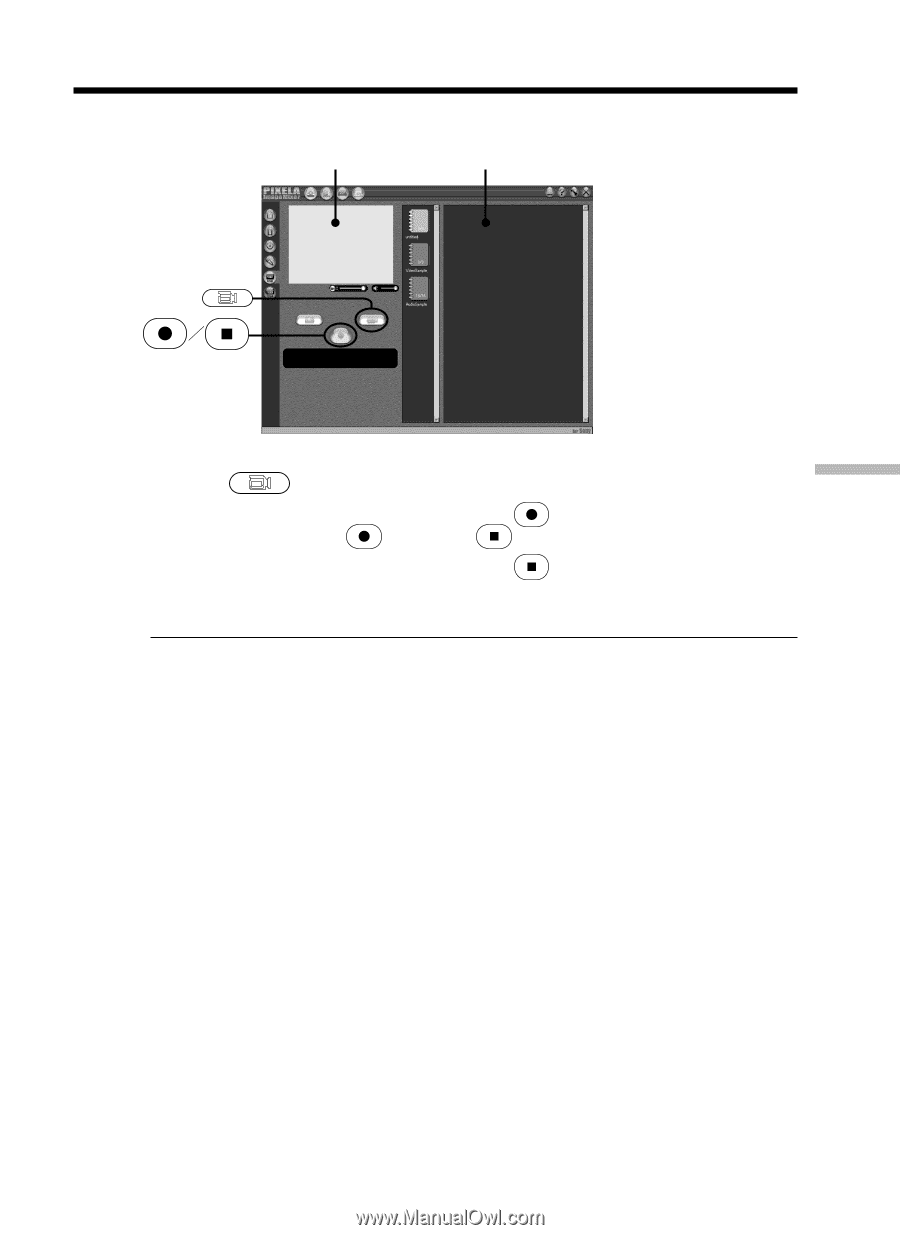
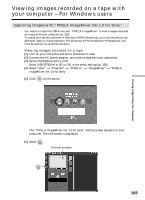
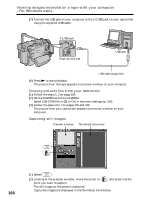
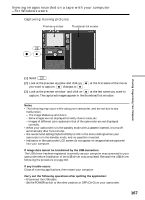
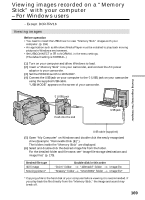
Viewing images recorded on a tape with your computer - For Windows users Capturing moving pictures Preview window Thumbnail list widow Viewing Images Using Your Computer (1) Select . (2) Look at the preview window and click on at the first scene of the movie you want to capture. changes to . (3) Look at the preview window and click on at the last scene you want to capture. The captured images appear in the thumbnail list window. Notes •The following may occur while using your camcorder, and are not due to any malfunction. - The image shakes up and down. - Some images are not displayed correctly due to noise, etc. - Images of different color systems to that of the camcorder are not displayed correctly. •When your camcorder is in the standby mode with a cassette inserted, it turns off automatically after five minutes. •We recommend setting DEMO MODE to OFF in the menu settings when your camcorder is in the standby mode, and no cassette is inserted. •Indicators in the camcorder LCD screen do not appear on images that are captured into your computer. If image data cannot be transferred by the USB connection The USB driver has been registered incorrectly as your computer was connected to your camcorder before installation of the USB driver was completed. Reinstall the USB driver following the procedure on page 162. If any trouble occurs Close all running applications, then restart your computer. Carry out the following operations after quitting the application: - Disconnect the USB cable. - Set the POWER switch to the other position or OFF (CHG) on your camcorder. 167
-
 1
1 -
2
-
3
-
4
-
5
-
6
-
7
-
8
-
9
-
10
-
11
-
12
-
13
-
14
-
15
-
16
-
17
-
18
-
19
-
20
-
21
-
22
-
23
-
24
-
25
-
26
-
27
-
28
-
29
-
30
-
31
-
32
-
33
-
34
-
35
-
36
-
37
-
38
-
39
-
40
-
41
-
42
-
43
-
44
-
45
-
46
-
47
-
48
-
49
-
50
-
51
-
52
-
53
-
54
-
55
-
56
-
57
-
58
-
59
-
60
-
61
-
62
-
63
-
64
-
65
-
66
-
67
-
68
-
69
-
70
-
71
-
72
-
73
-
74
-
75
-
76
-
77
-
78
-
79
-
80
-
81
-
82
-
83
-
84
-
85
-
86
-
87
-
88
-
89
-
90
-
91
-
92
-
93
-
94
-
95
-
96
-
97
-
98
-
99
-
100
-
101
-
102
-
103
-
104
-
105
-
106
-
107
-
108
-
109
-
110
-
111
-
112
-
113
-
114
-
115
-
116
-
117
-
118
-
119
-
120
-
121
-
122
-
123
-
124
-
125
-
126
-
127
-
128
-
129
-
130
-
131
-
132
-
133
-
134
-
135
-
136
-
137
-
138
-
139
-
140
-
141
-
142
-
143
-
144
-
145
-
146
-
147
-
148
-
149
-
150
-
151
-
152
-
153
-
154
-
155
-
156
-
157
-
158
-
159
-
160
-
161
-
 162
162 -
 163
163 -
 164
164 -
 165
165 -
 166
166 -
 167
167 -
 168
168 -
 169
169 -
 170
170 -
 171
171 -
 172
172 -
173
-
174
-
175
-
176
-
177
-
178
-
179
-
180
-
181
-
182
-
183
-
184
-
185
-
186
-
187
-
188
-
189
-
190
-
191
-
192
-
193
-
194
-
195
-
196
-
197
-
198
-
199
-
200
-
201
-
202
-
203
-
204
-
205
-
206
-
207
-
208
-
209
-
210
-
211
-
212
-
213
-
214
-
215
-
216
-
217
-
218
-
219
-
220
 |
 |