Sony DCR-TRV340 Operating Instructions - Page 101
Capturing images with, PIXELA ImageMixer Ver.1.0 for Sony, Viewing images recorded on a tape on your - usb stream windows 7
 |
UPC - 027242600287
View all Sony DCR-TRV340 manuals
Add to My Manuals
Save this manual to your list of manuals |
Page 101 highlights
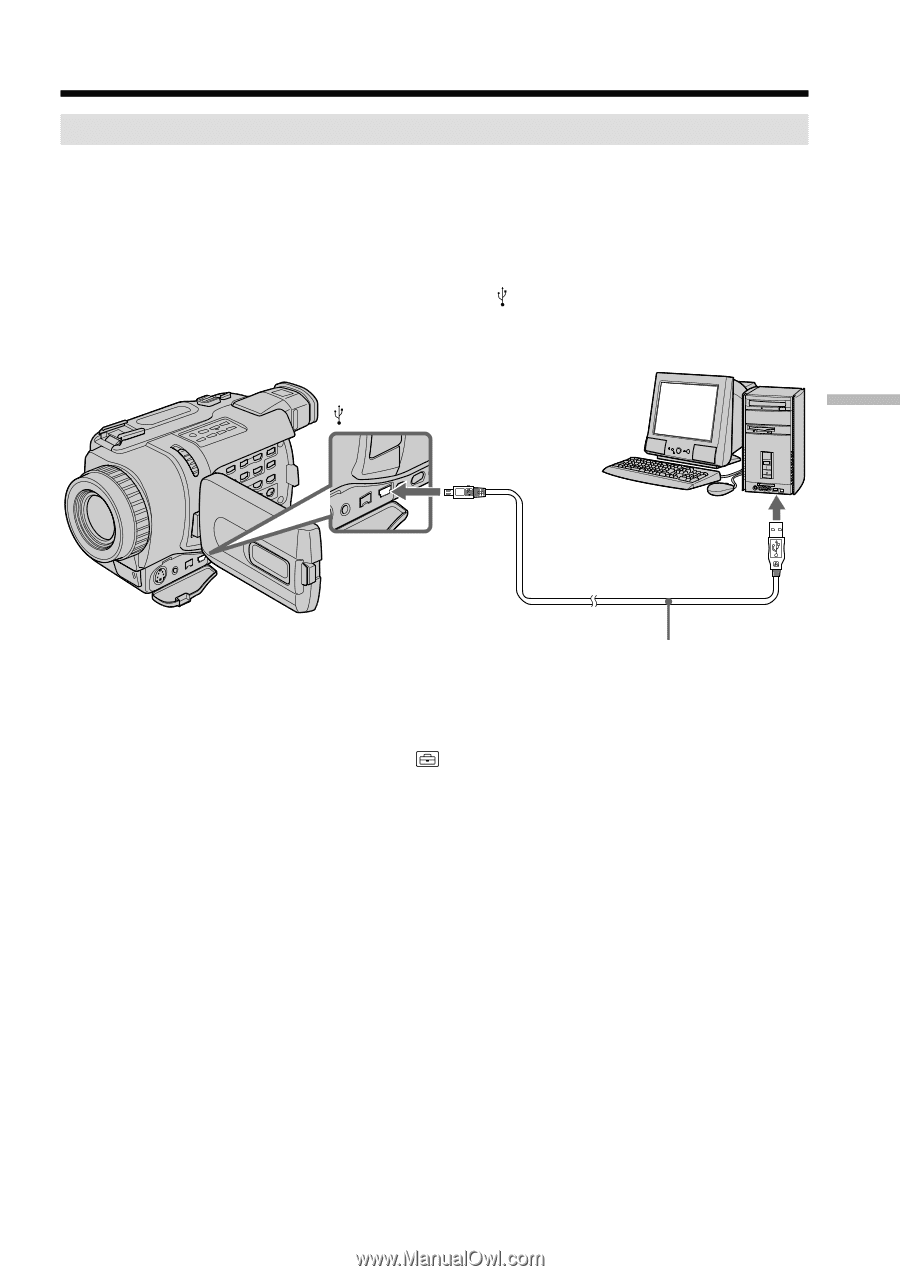
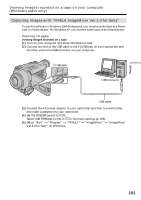
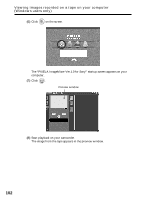
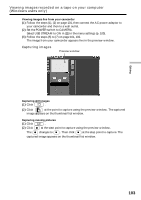
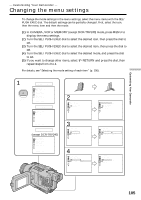
Editing Viewing images recorded on a tape on your computer (Windows users only) Capturing images with "PIXELA ImageMixer Ver.1.0 for Sony" To use this software in Windows 2000 Professional, you must be authorized as a Power User or Administrator. For Windows XP, you must be authorized as an Administrator. Viewing images Viewing images recorded on a tape (1) Turn on your computer and allow Windows to load. (2) Connect one end of the USB cable to the (USB) jack on your camcorder and the other end to the USB connector on your computer. (USB) jack USB connector USB cable (3) Connect the AC power adaptor to your camcorder and then to a wall outlet, and insert a cassette into your camcorder. (4) Set the POWER switch to VCR. Select USB STREAM to ON in in the menu settings (p. 105). (5) Select "Start" t "Program" t "PIXELA" t "ImageMixer" t "ImageMixer Ver.1.0 for Sony" on Windows. 101
-
 1
1 -
2
-
3
-
4
-
5
-
6
-
7
-
8
-
9
-
10
-
11
-
12
-
13
-
14
-
15
-
16
-
17
-
18
-
19
-
20
-
21
-
22
-
23
-
24
-
25
-
26
-
27
-
28
-
29
-
30
-
31
-
32
-
33
-
34
-
35
-
36
-
37
-
38
-
39
-
40
-
41
-
42
-
43
-
44
-
45
-
46
-
47
-
48
-
49
-
50
-
51
-
52
-
53
-
54
-
55
-
56
-
57
-
58
-
59
-
60
-
61
-
62
-
63
-
64
-
65
-
66
-
67
-
68
-
69
-
70
-
71
-
72
-
73
-
74
-
75
-
76
-
77
-
78
-
79
-
80
-
81
-
82
-
83
-
84
-
85
-
86
-
87
-
88
-
89
-
90
-
91
-
92
-
93
-
94
-
95
-
 96
96 -
 97
97 -
 98
98 -
 99
99 -
 100
100 -
 101
101 -
 102
102 -
 103
103 -
 104
104 -
 105
105 -
 106
106 -
107
-
108
-
109
-
110
-
111
-
112
-
113
-
114
-
115
-
116
-
117
-
118
-
119
-
120
-
121
-
122
-
123
-
124
-
125
-
126
-
127
-
128
-
129
-
130
-
131
-
132
-
133
-
134
-
135
-
136
-
137
-
138
-
139
-
140
-
141
-
142
-
143
-
144
-
145
-
146
-
147
-
148
-
149
-
150
-
151
-
152
-
153
-
154
-
155
-
156
-
157
-
158
-
159
-
160
-
161
-
162
-
163
-
164
-
165
-
166
-
167
-
168
-
169
-
170
-
171
-
172
-
173
-
174
-
175
-
176
-
177
-
178
-
179
-
180
-
181
-
182
-
183
-
184
-
185
-
186
-
187
-
188
-
189
-
190
-
191
-
192
-
193
-
194
-
195
-
196
-
197
-
198
-
199
-
200
-
201
-
202
-
203
-
204
-
205
-
206
-
207
-
208
-
209
-
210
-
211
-
212
 |
 |