Sony DPP-F800 Operating Instructions - Page 26
Changing the display, When you insert a memory card, To change the playback device
 |
View all Sony DPP-F800 manuals
Add to My Manuals
Save this manual to your list of manuals |
Page 26 highlights
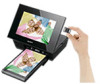
For details on compatible memory cards, see pages 100 to 102. For supported file formats, see page 103. When you insert a memory card When you insert a memory card, the images on it are automatically displayed. If you switch off the power while they are being displayed and then switch the power back on, the same images continue to be displayed. Notes • In clock and calendar display, change to "Slideshow", "Single image display" or "Index" (See next section). To change the playback device Press the SELECT DEVICE (page 44). To remove a memory card Remove the memory card from its slot in the opposite direction from which it was inserted. Do not remove the memory card while the access lamp is flashing. Notes • The slot is both a "Memory Stick" standard and Duo size compatible slot, so you do not need a "Memory Stick" adaptor. • The "Memory Stick" (Standard/Duo)/SD memory card/MMC/xD-Picture Card multi-purpose slot automatically detects the card type. Changing the display You can change the view style by pressing the VIEW MODE buttons. 1 Press the button corresponding to view mode you want to select. VIEW MODE buttons The display changes to selected view mode. 1 Slideshow (page 28) 2 Clock and calendar (page 29) 3 Single view (page 30) 26 GB 4 Index (page 31) Tips • When using the buttons on this unit, press VIEW MODE on the upper back of the LCD screen, press V to move the cursor to the display selection area and press B/b to select a display.
-
 1
1 -
2
-
3
-
4
-
5
-
6
-
7
-
8
-
9
-
10
-
11
-
12
-
13
-
14
-
15
-
16
-
17
-
18
-
19
-
20
-
 21
21 -
 22
22 -
 23
23 -
 24
24 -
 25
25 -
 26
26 -
 27
27 -
 28
28 -
 29
29 -
 30
30 -
 31
31 -
32
-
33
-
34
-
35
-
36
-
37
-
38
-
39
-
40
-
41
-
42
-
43
-
44
-
45
-
46
-
47
-
48
-
49
-
50
-
51
-
52
-
53
-
54
-
55
-
56
-
57
-
58
-
59
-
60
-
61
-
62
-
63
-
64
-
65
-
66
-
67
-
68
-
69
-
70
-
71
-
72
-
73
-
74
-
75
-
76
-
77
-
78
-
79
-
80
-
81
-
82
-
83
-
84
-
85
-
86
-
87
-
88
-
89
-
90
-
91
-
92
-
93
-
94
-
95
-
96
-
97
-
98
-
99
-
100
-
101
-
102
-
103
-
104
-
105
-
106
-
107
-
108
-
109
-
110
-
111
 |
 |
