Sony DPP-F800 Operating Instructions - Page 34
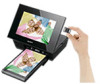
Inserting the print paper, Front surface, Rear surface
 |
View all Sony DPP-F800 manuals
Add to My Manuals
Save this manual to your list of manuals |
Page 34 highlights
Inserting the print paper 1 Open the paper tray cover. Hold the parts on both sides of the paper tray cover (shown with arrows) and open the paper tray cover. Front surface Rear surface 3 Close the paper tray cover. 4 Open the slide cover. 2 Set the print paper in the paper tray with the print surface facing up. Front surface Make sure the print paper is not upside down. 34 GB Notes • You can set up to 20 sheets of print paper. Riffle the print paper thoroughly. Insert the print paper with the protective sheet facing up. Remove the protective sheet from the tray. • If there is no protective sheet, insert the print paper into the paper tray with its printing surface (the side with no imprint) facing up. • Do not touch the printing surface. Fingerprints or contamination on the printing surface may result in imperfect printing.
-
 1
1 -
2
-
3
-
4
-
5
-
6
-
7
-
8
-
9
-
10
-
11
-
12
-
13
-
14
-
15
-
16
-
17
-
18
-
19
-
20
-
21
-
22
-
23
-
24
-
25
-
26
-
27
-
28
-
 29
29 -
 30
30 -
 31
31 -
 32
32 -
 33
33 -
 34
34 -
 35
35 -
 36
36 -
 37
37 -
 38
38 -
 39
39 -
40
-
41
-
42
-
43
-
44
-
45
-
46
-
47
-
48
-
49
-
50
-
51
-
52
-
53
-
54
-
55
-
56
-
57
-
58
-
59
-
60
-
61
-
62
-
63
-
64
-
65
-
66
-
67
-
68
-
69
-
70
-
71
-
72
-
73
-
74
-
75
-
76
-
77
-
78
-
79
-
80
-
81
-
82
-
83
-
84
-
85
-
86
-
87
-
88
-
89
-
90
-
91
-
92
-
93
-
94
-
95
-
96
-
97
-
98
-
99
-
100
-
101
-
102
-
103
-
104
-
105
-
106
-
107
-
108
-
109
-
110
-
111
 |
 |
