Sony DPP-F800 Operating Instructions - Page 59
Adjusting an image quality, Saving an image, Calendar preview screen, Items, Description, Brightness
 |
View all Sony DPP-F800 manuals
Add to My Manuals
Save this manual to your list of manuals |
Page 59 highlights
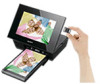
Adjusting an image quality 1 On the image edit screen, press B/b to select and press . The image quality adjustment menu is displayed. 2 Press v/V to select the desired adjustment tool and press . The adjustment screen of the selected tool appears. When [Brightness] is selected. Saving an image 1 Press B/b to select on the image preview screen and press . Calendar preview screen The destination selection screen appears. 2 Press v/V to select a device to export the image to and press . Printing in various ways Press B/b to adjust an image while checking the level. The image before adjustment is displayed on the left half of the screen, and the adjusted image is displayed on the right. Items Description Brightness Press b to brighten the picture or B to darken it. Tint Press b to make the picture greenish or B to make it reddish. Saturation Press b to deepen the colors or B to lighten them. Sharpness Press b to sharpen the outlines or B to soften them. 3 Press . The adjustment takes effect. 3 Press v/V to select the folder you want to save and press . Tips • If you select [New folder], a new folder is created automatically. 4 Press on the confirmation screen. Tips • The previous image is not overwritten. Notes • Do not turn this unit off or remove a memory card while saving the image. Doing so may damage this unit or the memory card or corrupt the data. 59 GB
-
 1
1 -
2
-
3
-
4
-
5
-
6
-
7
-
8
-
9
-
10
-
11
-
12
-
13
-
14
-
15
-
16
-
17
-
18
-
19
-
20
-
21
-
22
-
23
-
24
-
25
-
26
-
27
-
28
-
29
-
30
-
31
-
32
-
33
-
34
-
35
-
36
-
37
-
38
-
39
-
40
-
41
-
42
-
43
-
44
-
45
-
46
-
47
-
48
-
49
-
50
-
51
-
52
-
53
-
 54
54 -
 55
55 -
 56
56 -
 57
57 -
 58
58 -
 59
59 -
 60
60 -
 61
61 -
 62
62 -
 63
63 -
 64
64 -
65
-
66
-
67
-
68
-
69
-
70
-
71
-
72
-
73
-
74
-
75
-
76
-
77
-
78
-
79
-
80
-
81
-
82
-
83
-
84
-
85
-
86
-
87
-
88
-
89
-
90
-
91
-
92
-
93
-
94
-
95
-
96
-
97
-
98
-
99
-
100
-
101
-
102
-
103
-
104
-
105
-
106
-
107
-
108
-
109
-
110
-
111
 |
 |
