Sony DPP-MP1 Operating Instructions
Sony DPP-MP1 Manual
 |
UPC - 027242594371
View all Sony DPP-MP1 manuals
Add to My Manuals
Save this manual to your list of manuals |
Sony DPP-MP1 manual content summary:
- Sony DPP-MP1 | Operating Instructions - Page 1
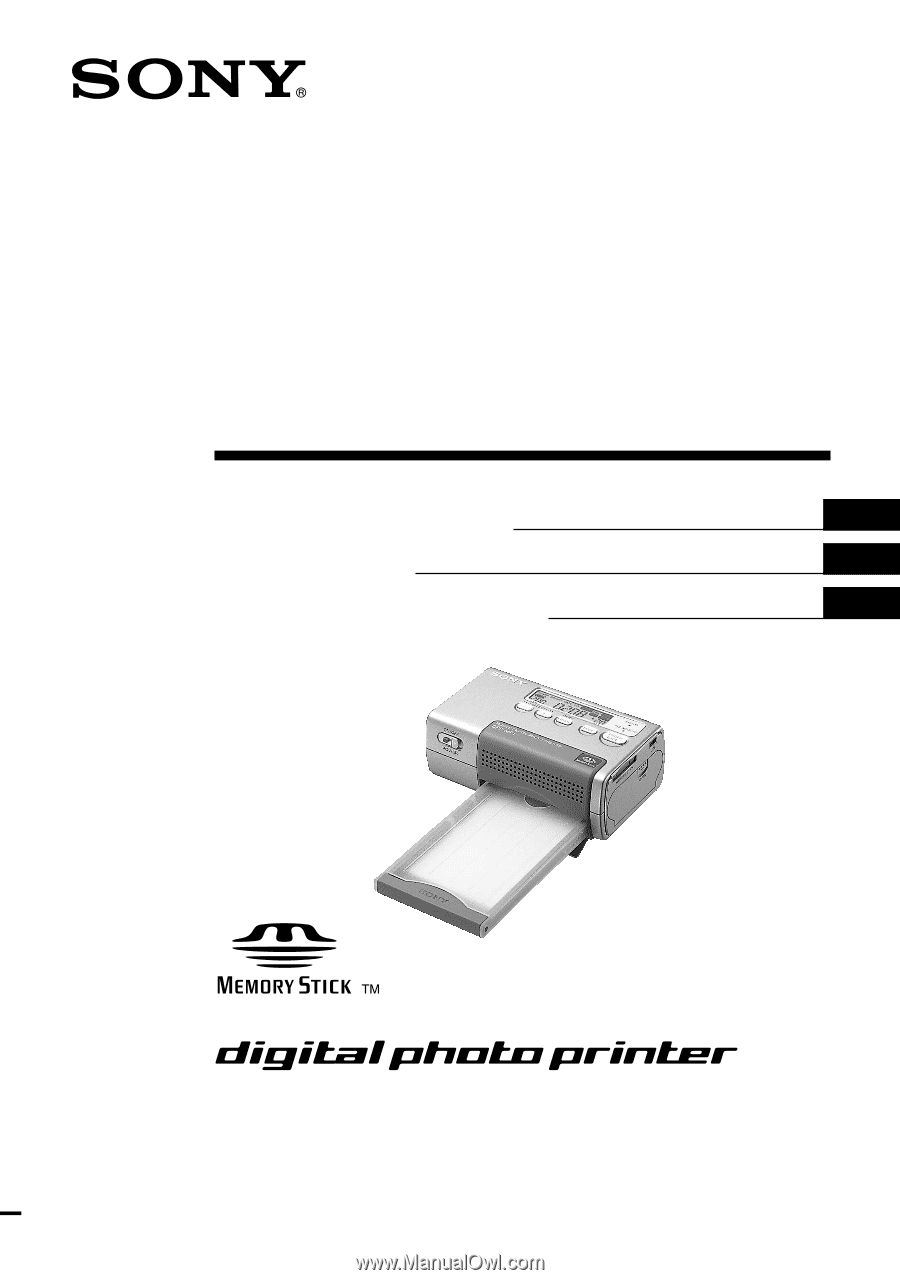
3-206-255-12(1) Digital Photo Printer Operating Instructions GB Mode d'emploi FR Manual de instrucciones ES DPP-MP1 2001 Sony Corporation - Sony DPP-MP1 | Operating Instructions - Page 2
Center (BIC) at 1-800-686-SONY (7669) or Write to: Sony Customer Information Services Center 6900-29 Daniels Parkway, PMB 330 Fort Myers, Florida 33912 Declaration of Conformity Trade Name: SONY Model No.: DPP-MP1 Responsible Party: Sony Electronics Inc. Address: 680 Kinderkamack Road - Sony DPP-MP1 | Operating Instructions - Page 3
settings 21 PC Interface Kit 23 Preparation 23 Printing 24 Others 25 Precautions 25 Print Cartridge Storage Precautions . 26 Print Paper Storage Precautions ....... 26 "Memory Stick 27 Image Files and File Names 28 Troubleshooting 29 Warranty and Service 33 Specifications 33 GB 3 GB - Sony DPP-MP1 | Operating Instructions - Page 4
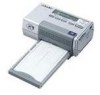
The Digital Photo Printer DPP-MP1 makes it easy to produce attractive prints from digital images stored on a "Memory Stick", for example with a Sony CyberShot camera or Handycam camcorder. Simple printing of images with Print Mark Images that were assigned a Print Mark on a Sony CyberShot digital - Sony DPP-MP1 | Operating Instructions - Page 5
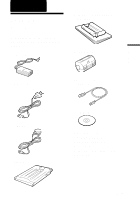
size color printing pack (SVM-24CS) • Clamp filter (3) • Power cord - U.S.A. and Canada - Europe • Paper tray • PC interface kit - USB cable - CD-ROM • Carrying pouch (1) • Operating Instructions (1) • Owner registration card (1) • Warranty (1) • Sony End User Software License Agreement (1) 5 GB - Sony DPP-MP1 | Operating Instructions - Page 6
pack is required. Printing pack Application SVM-24CS Photo paper 12-pack × 2 / print cartridge for 24 prints Note • Be sure to use only the dedicated printing packs for this unit. • Do not try to reinsert used print paper or print cartridges. Otherwise paper jam or malfunction can occur. 6 GB - Sony DPP-MP1 | Operating Instructions - Page 7
of Parts For detailed information, refer to the pages shown in brackets. 5 6 789 0qaqsqd 1 234 1 Power switch (pages 15, 19) 2 Paper tray 3 Paper tray insertion door (page 12) 4 Ventilation openings 5 Display (page 8) 6 SELECT (-/+) buttons 7 ENTER/OPTION button 8 DPOF button (page 16) 9 PRINT - Sony DPP-MP1 | Operating Instructions - Page 8
qf qg qh qf Paper exit slot qg DC 12V connector (page 9) qh Battery terminal cover Display 1 2 3 45 6 SHARP BRIGHT DATE FIT MULTI 2 4 8 USB TIFF DPOF 7 8 90 1 Battery capacity indicator 2 Print setting display (page 22) 3 USB cable connection indicator 4 DPOF indicator (page 16) 5 ERROR - Sony DPP-MP1 | Operating Instructions - Page 9
unit is connected to a PC with an USB cable, the auto power-off function is disabled. Battery Kit (option) The separately available Battery Kit MPA-BT1A can be used to power the unit. MPA-BT1A DPP-MP1 For information on how to mount the Battery Kit in the unit, refer to the documentation of the - Sony DPP-MP1 | Operating Instructions - Page 10
2 Loading the Print Cartridge The print cartridge is supplied as part of the printing pack (page 6). Mount it in the unit as shown below. 1 Slide the latch of the door down 1 to open the print cartridge door 2. 1 2 2 Remove the ribbon reel stopper from the print cartridge. 3 Push the print - Sony DPP-MP1 | Operating Instructions - Page 11
, rotate the spool of the cartridge in the direction shown by the arrow to take up the slack. 1 Open the cover of the paper tray. cover of the paper tray Preparations Caution The interior of the unit can become hot. Do not put your fingers or other objects into the print cartridge - Sony DPP-MP1 | Operating Instructions - Page 12
ribbon, print quality may be degraded. • Be sure to use only the dedicated print paper for this unit. Otherwise malfunction can occur. • Do not fold or crease the print paper. Otherwise malfunction can occur. Push the paper tray all the way in, until it audibly snaps into place. When printing is - Sony DPP-MP1 | Operating Instructions - Page 13
Preparations 4 Inserting the "Memory Stick" 2 Pull out the "Memory Stick". Insert a "Memory Stick" into the unit as shown below. Be sure to push the "Memory Stick" all the way in, until it audibly snaps into place. "Memory Stick" MS ACCESS indicator Insert with cutoff section facing left and - Sony DPP-MP1 | Operating Instructions - Page 14
Print cartridge door Notes • Place the unit on a flat, level surface for printing. If there is for example a raised section or a wall behind the unit, paper jams can occur. • Before starting to print, make sure that there are no obstructions behind the unit which could block the smooth exit of the - Sony DPP-MP1 | Operating Instructions - Page 15
printing of images with Print Mark 1 35 2 This unit supports DPOF (Digital Print Order Format) which enables bulk printing of images on a "Memory Stick" to which a Print Mark has been assigned, for example with a Sony CyberShot digital camera or Handycam camcorder. Assigning a Print Mark 1 Insert - Sony DPP-MP1 | Operating Instructions - Page 16
, the indication "PRINT" is shown on the display. 6 Remove the printed paper. If you have specified several prints, remove the prints one by one after they are finished . 7 Fold the edges of the paper and remove them along the perforated lines. Turning the power off • - Sony DPP-MP1 | Operating Instructions - Page 17
" flashes on the display. To continue the current operation, load print paper or replace the print cartridge without turning the unit off. Press the a Print Mark image that has been set with the digital camera can be changed on the DPP-MP1. To do this, perform the operation described below after - Sony DPP-MP1 | Operating Instructions - Page 18
the "Memory Stick". Direct-Select Printing Images stored on a "Memory Stick" can be selected at the DPP-MP1 for printing. Selecting an image 1 Insert the "Memory Stick" in the Sony CyberShot digital camera or Handycam camcorder. 2 Verify the folder number and file number of the image that you want - Sony DPP-MP1 | Operating Instructions - Page 19
Printing 3, 4, 5 7 1 4, 5 2 2 Insert the "Memory Stick" into the DPP-MP1. The file with the highest number is indicated. Printing 1 Push down the power switch and slide it to the right, to turn the unit on. - Sony DPP-MP1 | Operating Instructions - Page 20
the indication "PRINT" is shown on the display. 8 Remove the printed paper. If you have specified several prints, remove the prints one by one after they are finished. 9 Fold the edges of the paper and remove them along the perforated lines. Turning the power off • - Sony DPP-MP1 | Operating Instructions - Page 21
Print settings You can select various settings for the image before printing. 1 Hold down the ENTER button for at least 2 seconds. The print settings mode is activated, and the indication "SHARP" flashes on the display. 2 Use the SELECT (-/+) buttons until the desired setting item flashes on the - Sony DPP-MP1 | Operating Instructions - Page 22
at which the image file was stored. Note If a date was inserted with the Sony CyberShot digital camera or Handycam camcorder, the date will be printed twice. x OFF The image same image are printed on one paper. You can select division into 2, 4, or 8 segments. x OFF Division is not carried - Sony DPP-MP1 | Operating Instructions - Page 23
. • Windows 2000/ME/98/98SE • Mac OS 8.6/9.0/9.1 Preparation Install the printer driver. To print from your computer, you must install the DPP-MP1 printer driver on your computer from the "digital photo printer for DPP-MP1" CD-ROM. Refer to the Installation Guide for printer driver installation. The - Sony DPP-MP1 | Operating Instructions - Page 24
USB cable, print settings are made from the computer. For the print settings, see Installation Guide included on the "digital photo printer for DPP-MP1" CDROM. 3 Print from your image processing software. Note When the DPP-MP1 is connected by USB cable, all controls other than the power switch are - Sony DPP-MP1 | Operating Instructions - Page 25
roughly. • To reduce the risk of electrical shock, always unplug the printer from the electrical outlet before cleaning and servicing the printer. On installation • Avoid placing the printer in a location subject to: - vibration - high humidity - excessive dust - direct sunlight - extremely high - Sony DPP-MP1 | Operating Instructions - Page 26
finish. On restrictions on duplication If duplicating documents with the printer, pay special attention to the following: • Duplication of banknotes it to the original packing bag or another suitable container. Print Paper Storage Precautions • Avoid exposure to high temperatures or humidity, high - Sony DPP-MP1 | Operating Instructions - Page 27
disassemble or modify the "Memory Stick". • Protect the "Memory Stick" from water and moisture. • A Memory Stick formatted in a PC may not work in the DPP-MP1. "Memory Stick", , "Magic Gate Memory Stick", and are trademarks of Sony Corporation. " " is a trademark of Sony Corporation. 27 GB - Sony DPP-MP1 | Operating Instructions - Page 28
Image Files and File Names The DPP-MP1 can print image files that are in JPEG format and TIFF format. Image files created with a Sony CyberShot digital camera or Handycam camcorder are stored on the "Memory Stick" according to certain conventions. For example, when you take still images with the - Sony DPP-MP1 | Operating Instructions - Page 29
the points listed in this troubleshooting guide. If the problem persists, contact your supplier, an authorized Sony service station, or a Sony Technical Information Center. When you are using a computer, you should also consult the documentation of the software. Symptom Cause/Remedy Unit does - Sony DPP-MP1 | Operating Instructions - Page 30
duplicate file numbers. c Image cannot be printed due to a problem with the image file number. • The image has a Print in the table below. Message WAIT RIBON PAPER Meaning • Printing was stopped. c The then goes out. • The temperature inside the printer is too high, and printing has been - Sony DPP-MP1 | Operating Instructions - Page 31
" was not properly formatted. c A Memory Stick formatted in a PC may not work in the DPP-MP1. Use a Memory Stick formatted in a Sony CyberShot digital camera or Handycam camcorder. • A "Memory Stick" of a type not supported by the DPPMP1 was inserted, or the "Memory Stick" is defective. c Insert - Sony DPP-MP1 | Operating Instructions - Page 32
damage and malfunction. Always turn power to the unit off, wait a moment, and then turn the unit on again, so that the paper will be automatically ejected. If you still cannot remove the paper, contact your supplier, an authorized Sony service station, or a Sony Technical Information Center. 32 GB - Sony DPP-MP1 | Operating Instructions - Page 33
. For details, contact your supplier or an authorized Sony service station. When requesting service, please supply the following information. - Model name: DPP-MP1 - Detailed description of problem - Date of purchase Specifications Print Method Dye sublimation thermal printing (YMC + overcoat) Print - Sony DPP-MP1 | Operating Instructions - Page 34
AC adapter/power cord Paper tray Carrying pouch Card size color printing pack (SVM-24CS) Clamp filter USB cable CD-ROM Operating Instructions Owner registration card Warranty Sony End User Software License Agreement 1) Some special file formats may not be supported. 2) DCF (Design rule for - Sony DPP-MP1 | Operating Instructions - Page 35
- Sony DPP-MP1 | Operating Instructions - Page 36
AVERTISSEMENT Pour prévenir tout risque d'incendie ou d'électrocution, garder cet appareil à l'abri de la pluie et de l'humidité. Pour prévenir tout risque d'électrocution, ne pas ouvrir le boîtier. Confier l'entretien de cet appareil exclusivement à un personnel qualifié. Pour les utilisateurs au - Sony DPP-MP1 | Operating Instructions - Page 37
Table des matières Caractéristiques 4 Avant l'utilisation 5 Accessoires fournis 5 A propos du pack d'impression .......... 6 Nomenclature 7 Préparatifs 9 1 Raccordement de l'alimentation .. 9 2 Chargement de la cartouche d'impression 10 3 Chargement du papier d'impression 11 4 Insertion du " - Sony DPP-MP1 | Operating Instructions - Page 38
34. 1) DPOF = Digital Print Order Format Impression par sélection directe Les images fixes prises avec un appareil photo numérique CyberShot ou un camescope Handycam Sony et enregistrées sur un "Memory Stick" peuvent être imprimées directement sur la DPP-MP1. Compacte et légère La DPP-MP1 est une - Sony DPP-MP1 | Operating Instructions - Page 39
(3) • Cordon d'alimentation - Etats-Unis et Canada - Europe • Cassette de papier • Lot d'interface PC - Câble USB - CD-ROM • Pochette de transport (1) • Guide d'installation (1) • Carte d'enregistrement du propriétaire (1) • Garantie (1) • Contrat de licence de logiciel pour utilisateur final - Sony DPP-MP1 | Operating Instructions - Page 40
avec cet appareil, vous devez vous procurer un pack d'impression. Pack Application d'impression SVM-24CS 2 packs de 12 papiers photo/cartouche d'impression pour 24 impressions Remarques • Veillez à utiliser exclusivement les packs d'impression spécialement conçus pour l'appareil. • N'essayez - Sony DPP-MP1 | Operating Instructions - Page 41
Avant l'utilisation Nomenclature Pour les informations détaillées, reportez-vous aux pages indiquées entre parenthèses. 5 6 789 0qaqsqd 1 234 1 Interrupteur d'alimentation (pages 15, 19) 2 Cassette papier 3 Volet d'insertion de la cassette papier (page 12) 4 Orifices de ventilation 5 Afficheur ( - Sony DPP-MP1 | Operating Instructions - Page 42
qf qg qh q fFente de sortie du papier q gConnecteur DC 12 V (page 9) qhCouvercle de borne de pile Afficheur 1 2 3 45 6 SHARP BRIGHT DATE FIT MULTI 2 4 8 USB TIFF DPOF 7 8 90 1 Indicateur de charge des piles 2 Affichage des paramètres d'impression (page 22) 3 Indicateur de connexion de câble - Sony DPP-MP1 | Operating Instructions - Page 43
hors tension automatique est désactivée. Kit de piles (option) Vous pouvez alimenter l'appareil avec le kit de piles MPA-BT1A disponible séparément. MPA-BT1A DPP-MP1 Pour les informations sur la façon de monter le kit de piles dans l'appareil, reportez-vous au mode d'emploi du kit de piles. 9 FR - Sony DPP-MP1 | Operating Instructions - Page 44
2 Chargement de la cartouche d'impression La cartouche d'impression fait partie du pack d'impression (page 6). Montez-la dans l'appareil comme indiqué ci-dessous. 1 Glissez le verrou du volet vers le bas 1 pour ouvrir le volet de la cartouche d'impression 2. 1 2 Retirez la butée de la bobine de - Sony DPP-MP1 | Operating Instructions - Page 45
Préparatifs 2 Saisissez le bouton de dégagement de la cartouche et tirez sur la cartouche vide pour la sortir. Puis insérez la cartouche neuve. Afficheur 3 Chargement du papier d'impression Le papier d'impression fait partie du pack d'impression (page 6). Insérez-le dans l'appareil comme indiqué - Sony DPP-MP1 | Operating Instructions - Page 46
Vous pouvez insérer un maximum de 12 papiers d'impression (1 pack) à la fois. Remarque Ne déchirez pas le papier le long les lignes perforées avant l'impression. 3 Refermez le couvercle de la cassette papier. Remarque Si le papier d'impression n'est pas chargé correctement, vous ne pourrez pas - Sony DPP-MP1 | Operating Instructions - Page 47
Préparatifs 4 Insertion du "Memory Stick" 2 Tirez sur le "Memory Stick". Insérez le "Memory Stick" dans l'appareil comme indiqué ci-dessous. Enfoncez le "Memory Stick" à fond dans l'appareil jusqu'à ce que vous l'entendiez se mettre en place dans un déclic. "Memory Stick" Indicateur MS ACCESS Ins - Sony DPP-MP1 | Operating Instructions - Page 48
Impression Fonctionnement pendant l'impression Le papier d'impression se déplace d'avant en arrière Pendant l'impression, le papier d'impression effectue quatre passages d'avant en arrière entre la fente de sortie du papier et le dessus de la cassette papier. Lorsque l'impression est terminée, le - Sony DPP-MP1 | Operating Instructions - Page 49
Vérifiez qu'un repère d'impression ( ) est affiché avec l'image sur l'écran LCD de l'appareil photo numérique CyberShot ou du camescope Handycam Sony. L'appareil supporte le format DPOF (Digital Print Order Format) qui permet une impression en vrac d'images d'un "Memory Stick" auxquelles un repère - Sony DPP-MP1 | Operating Instructions - Page 50
Remarque Ne retirez pas ou n'insérez pas la cartouche d'impression pendant que l'indication "SETUP" clignote sur l'afficheur. 2 Insérez le "Memory Stick" dans l'appareil. Le numéro de fichier le plus élevé d'une image avec repère d'impression s'affiche. (Numéro de dossier) Nombre de copies Numéro - Sony DPP-MP1 | Operating Instructions - Page 51
impression Si le papier vient à manquer pendant l'impression, l'indication "PAPER" clignote sur l'afficheur. Si le ruban de la cartouche d' pour une image avec repère d'impression réglé avec l'appareil photo numérique sur la DPP-MP1. Pour cela, effectuez l'opération décrite cidessous après l'étape - Sony DPP-MP1 | Operating Instructions - Page 52
et les numéros de fichier, reportez-vous à la page 30. Sélection d'une image 1 Insérez le "Memory Stick" dans l'appareil photo numérique CyberShot ou le camescope Handycam Sony. 2 Vérifiez le numéro de dossier et le numéro de fichier de l'image que vous voulez imprimer sur l'écran LCD de - Sony DPP-MP1 | Operating Instructions - Page 53
Impression 3, 4, 5 7 1 4, 5 2 2 Insérez le "Memory Stick" dans la DPP-MP1. Le fichier ayant le numéro le plus élevé est indiqué. 1 Appuyez sur l'interrupteur d'alimentation et glissez-le vers la droite pour mettre l'appareil sous - Sony DPP-MP1 | Operating Instructions - Page 54
ou le ruban de la cartouche d'impression viennent à manquer pendant l'impression Si le papier vient à manquer pendant l'impression, l'indication "PAPER" clignote sur l'afficheur. Si le ruban de la cartouche d'impression vient à manquer, l'indication "RIBON" clignote sur l'afficheur. Pour poursuivre - Sony DPP-MP1 | Operating Instructions - Page 55
Paramètres d'impression Vous pouvez régler différents paramètres d'image avant l'impression. 1 Maintenez la touche ENTER enfoncée pendant au moins 2 secondes. Le mode de réglage des paramètres d'impression est activé, et l'indication "SHARP" clignote sur l'afficheur. 2 Utilisez les touches SELECT - Sony DPP-MP1 | Operating Instructions - Page 56
sont tirées de la date à laquelle le fichier d'image a été enregistré. Remarque Si vous avez enregistré une date avec l'appareil photo numérique CyberShot ou le camescope Handycam Sony, la date s'imprimera deux fois. x OFF L'image s'imprime sans date. Remarque La date enregistrée avec l'appareil - Sony DPP-MP1 | Operating Instructions - Page 57
le CD-ROM "digital photo printer for DPP-MP1". Pour l'installation du pilote d'imprimante, reportez-vous au Guide d'installation. Le Guide d'installation se trouve dans le CD-ROM "digital photo printer for DPP-MP1" sous forme de fichier PDF. Double-cliquez sur le fichier Driver(French).pdf qui se - Sony DPP-MP1 | Operating Instructions - Page 58
. Pour le réglage des paramètres d'impression, reportezvous au Guide d'installation contenu dans le CD-ROM "digital photo printer for DPP-MP1". 3 Effectuez l'impression depuis votre logiciel de traitement d'image. Remarque Lorsque la DPP-MP1 est raccordée via le câble USB, toutes les commandes sont - Sony DPP-MP1 | Operating Instructions - Page 59
. • Pour réduire tout risque de choc électrique, débranchez toujours l'imprimante de la prise secteur avant un nettoyage ou un entretien. Installation • Evitez d'installer l'imprimante dans un endroit soumis à : - des vibrations - une forte humidité - une poussière excessive - la lumière du soleil - Sony DPP-MP1 | Operating Instructions - Page 60
Nettoyage Nettoyez le coffret, le panneau et les commandes avec un chiffon doux et sec, ou un chiffon doux légèrement humecté d'une solution détergente douce. N'utilisez aucun solvant d'aucune sorte, par exemple alcool ou benzine, qui pourrait endommager les finitions. Restrictions à la copie - Sony DPP-MP1 | Operating Instructions - Page 61
tout autre conteneur approprié. "Memory Stick" Le "Memory Stick" est un support de stockage de grande capacité à base de circuits imprimés compact et ne fonctionne pas dans la DPP-MP1. "Memory Stick", , "Magic Gate Memory Stick" et sont des marques de Sony Corporation. " " est une marque de - Sony DPP-MP1 | Operating Instructions - Page 62
Les fichiers d'image et les noms de fichier La DPP-MP1 est capable d'imprimer des fichiers d'image au format JPEG et au format TIFF. Les fichiers d'image créés sur un appareil photo numérique CyberShot ou un camescope Handycam Sony s'enregistrent sur le "Memory Stick" en respectant certaines - Sony DPP-MP1 | Operating Instructions - Page 63
guide de dépannage. Si le problème persiste, contactez votre magasin, un service après-vente Sony ou un centre d'information technique Sony. sont pas compatibles avec la DPP-MP1. c Les fichiers d'image dont le format de fichier n'est pas compatible avec la DPP-MP1 peuvent s'afficher sur un ordinateur - Sony DPP-MP1 | Operating Instructions - Page 64
Affichage d'erreur du numéro de dossier/numéro de fichier Si un tiret [-] s'affiche entre la zone s'affichage du numéro de dossier/numéro de fichier lorsque vous sélectionnez un numéro de dossier ou un numéro de fichier ou pendant l'impression d'une image avec repère d'impression, consultez les - Sony DPP-MP1 | Operating Instructions - Page 65
Message RIBON PAPER NO MS NO IMAGE NO ORDER CAN'T PRINT Signification • La cartouche d' re d'impression qui puisse être imprimée sur la DPP-MP1. c Assignez un repère d'impression avec un appareil photo numérique CyberShot ou un camescope Handycam Sony (page 15). • Vous avez essayé d'imprimer - Sony DPP-MP1 | Operating Instructions - Page 66
ERROR allumé) PAPER (+ indicateur ERROR DPP-MP1. Utilisez un "Memory Stick" formaté sur un appareil photo numérique CyberShot ou un camescope Handycam Sony. • Vous avez inséré un "Memory Stick" d'un type non supporté par la DPP-MP1 service après-vente Sony ou un centre d'information technique - Sony DPP-MP1 | Operating Instructions - Page 67
nécessaires au maintien des fonctions de l'imprimante photo numérique pendant une période d'au moins service après-vente Sony ou un centre d'information technique Sony. Lorsque vous demandez que l'on répare l'imprimante, veuillez fournir les informations suivantes : - Nom du modèle : DPP-MP1 - Sony DPP-MP1 | Operating Instructions - Page 68
papier) 1) Certains formats de fichier spéciaux peuvent ne pas être supportés. 2) DCF (Design Rule for Camera File System) est une norme Electronic Industry Development Association) qui garantit la compatibilité entre les appareils photo numériques, les imprimantes et les autres périphériques. 3) - Sony DPP-MP1 | Operating Instructions - Page 69
de cartes couleur (SVM-24CS) Filtre à fixation rapide Câble USB CD-ROM Guide d'installation Carte d'enregistrement du propriétaire Garantie Contrat de licence de logiciel pour utilisateur final Sony La conception et les spécifications sont sujettes à modifications sans préavis. Accessoires - Sony DPP-MP1 | Operating Instructions - Page 70
Nombre del producto: Impresora de fotos digitales Modelo: DPP-MP1 AVISO Para evitar el riesgo de incendios y electrocución, no exponga la unidad a la lluvia ni a la humedad. Para evitar descargas eléctricas, no abra la - Sony DPP-MP1 | Operating Instructions - Page 71
Índice Características 4 Antes de usar 5 Accesorios suministrados 5 Acerca del paquete de imprimir ......... 6 Nombres de las partes 7 Preparativos 9 1 Conexión de la alimentación ........ 9 2 Colocación del cartucho de imprimir 10 3 Carga del papel de imprimir ...... 11 4 Inserción del " - Sony DPP-MP1 | Operating Instructions - Page 72
mediante selección directa Las imágenes fijas tomadas con una cámara digital CyberShot o videocámara Handycam Sony y almacenadas en un "Memory Stick" se pueden imprimir directamente en la DPP-MP1. Compacta y ligera La DPP-MP1 es una impresora compacta y ligera que mide aproximadamente 66 × 39 × 111 - Sony DPP-MP1 | Operating Instructions - Page 73
de interfaz para PC - Cable USB - CD-ROM • Bolso de transporte (1) • Guía de instalacíon (1) • Tarjeta de registro del propietario (1) • Garantía (1) • Contrato de licencia de software Sony para usuario final (1) 5 ES - Sony DPP-MP1 | Operating Instructions - Page 74
Acerca del paquete de imprimir Para imprimir con esta unidad se requiere el uso de un paquete de imprimir exclusivo. Paquete de imprimir SVM-24CS Aplicación 2 paquetes de 12 hojas de papel para fotos/cartucho de imprimir para 24 copias Notas • Asegúrese de utilizar solamente los paquetes de - Sony DPP-MP1 | Operating Instructions - Page 75
Antes de usar Nombres de las partes Para ver información detallada, consulte las páginas mostradas entre paréntesis. 5 6 789 0qaqsqd 1 234 1 Interruptor de alimentación (páginas 15, 19) 2 Bandeja de papel 3 Tapa de inserción de la bandeja de papel (página 12) 4 Aberturas de ventilación 5 - Sony DPP-MP1 | Operating Instructions - Page 76
qf qg qh q fRanura de salida de papel q gConector DC 12V (página 9) qhTapa del terminal de pila Visualizador 1 2 3 45 6 SHARP BRIGHT DATE FIT MULTI 2 4 8 USB TIFF DPOF 7 8 90 1 Indicador de potencia de las pilas 2 Visualización de ajustes para imprimir (página 22) 3 Indicador de conexión - Sony DPP-MP1 | Operating Instructions - Page 77
ón de la alimentación Preparativos 1 Cable de alimentación 2 Toma de CA 2 Adaptador de CA 1 Conecte el adaptador de CA al conector DC 12V de la DPP-MP1. 2 Conecte el cable de alimentación al adaptador de CA y a una toma de CA. Función de apagado automático La unidad se apagará automáticamente - Sony DPP-MP1 | Operating Instructions - Page 78
2 Colocación del cartucho de imprimir 2 Retire el retén del carrete de cinta del cartucho de imprimir. El cartucho de imprimir se suministra como parte del paquete de imprimir (página 6). Colóquelo en la unidad como se muestra abajo. 1 Deslice hacia abajo el cierre de la tapa 1 para abrir la tapa - Sony DPP-MP1 | Operating Instructions - Page 79
Preparativos 2 Agarre el asidero de extracción del cartucho y saque el cartucho viejo. Después inserte el cartucho nuevo. Visualizador Asidero de extracción 3 Carga del papel de imprimir El papel de imprimir se suministra como parte del paquete de imprimir (página 6). Colóquelo en la unidad como - Sony DPP-MP1 | Operating Instructions - Page 80
Puede insertar un máximo de 12 hojas de impresión (1 paquete) de una vez. Nota No separe a lo largo de las líneas perforadas antes de imprimir. 3 Cierre la tapa de la bandeja de papel. Nota Si el papel de imprimir no está bien cargado, no se podrá cerrar la bandeja de papel. Asegúrese de que la tapa - Sony DPP-MP1 | Operating Instructions - Page 81
Preparativos 4 Inserción del "Memory Stick" 2 Extraiga el "Memory Stick". Inserte un "Memory Stick" en la unidad como se muestra abajo. Asegúrese de empujar el "Memory Stick" a tope, hasta que encaje en su sitio produciendo un sonido. "Memory Stick" Indicador MS ACCESS Inserte con el lado - Sony DPP-MP1 | Operating Instructions - Page 82
Impresión Operación durante la impresión El papel de imprimir se mueve hacia atrás y hacia delante Durante la impresión, el papel de imprimir pasa cuatro veces hacia atrás y hacia delante entre la ranura de salida de papel y la parte superior de la bandeja de papel. Cuando se completa la impresión, - Sony DPP-MP1 | Operating Instructions - Page 83
de imágenes para imprimir" o "Asignación de marcas de impresión" o similar. 4 Verifique que en el visualizador LCD de la cámara digital CyberShot o la videocámara Handycam Sony se muestra una marca de imprimir ( ). Impresión de un grupo de imágenes con marcas de impresión 1 35 2 1 Empuje hacia - Sony DPP-MP1 | Operating Instructions - Page 84
2 Inserte el "Memory Stick" en la unidad. Se mostrará el número de archivo más alto para una imagen con marca de imprimir. (Número de carpeta) Número de duplicados Número de archivo Si se inserta un "Memory Stick" que solamente tenga una carpeta, no se mostrará el número de carpeta. 3 Pulse el - Sony DPP-MP1 | Operating Instructions - Page 85
se queda sin papel mientras se imprime, parpadeará la indicación "PAPER" en el visualizador. Si se termina la cinta del cartucho de con marca de imprimir que haya sido puesto con la cámara digital se puede cambiar en la DPP-MP1. Para cambiarlo, realice la operación descrita abajo después del - Sony DPP-MP1 | Operating Instructions - Page 86
Stick" se puede seleccionar en la DPP-MP1 para imprimirlas. Para seleccionar una imagen Para ver información sobre números de carpetas y números de archivos, consulte la página 30. 1 Inserte el "Memory Stick" en la cámara digital CyberShot o videocámara Handycam Sony. 2 Verifique en el LCD de la - Sony DPP-MP1 | Operating Instructions - Page 87
Impresión 3, 4, 5 7 1 4, 5 2 2 Inserte el "Memory Stick" en la DPP-MP1. Se indicará el archivo que tenga el número más alto. 1 Empuje hacia dentro el interruptor de alimentación y deslícelo hacia la derecha para encender la unidad. - Sony DPP-MP1 | Operating Instructions - Page 88
5 Pulse repetidamente los botones SELECT (-/+) para seleccionar el número de duplicados, y pulse el botón ENTER. • Se parará el parpadeo y la visualización se mantendrá encendida. • Para seleccionar de nuevo imágenes para imprimir, empiece otra vez con la selección del número de carpeta. 6 Haga los - Sony DPP-MP1 | Operating Instructions - Page 89
o se termina la cinta del cartucho de imprimir mientras se imprime Si la unidad se queda sin papel mientras se imprime, parpadeará la indicación "PAPER" en el visualizador. Si se termina la cinta del cartucho de imprimir, parpadeará la indicación "RIBON" en el visualizador. Para continuar la operaci - Sony DPP-MP1 | Operating Instructions - Page 90
, la fecha se imprimirá dos veces. x OFF La imagen se imprime sin fecha. Nota Una fecha insertada con la cámara digital CyberShot o videocámara Handycam Sony puede exceder el rango imprimible y podrá ser recortada. ON La imagen cambia de escala para que pueda entrar entera en el papel y no sea - Sony DPP-MP1 | Operating Instructions - Page 91
desde el CD-ROM "digital photo printer for DPP-MP1". Con Windows, haga doble clic en el archivo ar500esp.exe en la carpeta "Acrobat" - "Spanish". Con Macintosh, instálelo haciendo doble clic en el Acrobat Reader Installer. Conecte a su ordenador. 1 Conecte la DPP-MP1 a su ordenador utilizando el - Sony DPP-MP1 | Operating Instructions - Page 92
conocer los ajustes para imprimir, consulte la Guía de instalación incluida en el CDROM "digital photo printer for DPP-MP1. 3 Imprima desde su software de procesamiento de imágenes. Nota Cuando conecte la DPP-MP1 con el cable USB, se anularán todos sus controles excepto el interruptor de alimentaci - Sony DPP-MP1 | Operating Instructions - Page 93
Otros Otros Precauciones Seguridad • Utilice la impresora solamente con 12 V CC. • Tenga cuidado de no poner ni dejar caer ningún objeto pesado encima del cable de alimentación, ni dañarlo de cualquier forma. No utilice nunca esta impresora con el cable de alimentación dañado. • Si cae algún objeto - Sony DPP-MP1 | Operating Instructions - Page 94
Limpieza Limpie la carcasa, el panel y los controles con un paño suave y seco, o con un paño ligeramente humedecido con una solución de detergente suave. No utilice ningún tipo de disolventes, tales como alcohol o bencina, que pueden dañar el acabado. Restricciones en la duplicación Si duplica - Sony DPP-MP1 | Operating Instructions - Page 95
tecnología para protección contra el copiado conocido como Magic Gate*. La DPP-MP1 es compatible con ambos tipos de "Memory Stick". * Magic Gate PC podrá no funcionar en la DPP-MP1. "Memory Stick", , "Magic Gate Memory Stick", y son marcas comerciales de Sony Corporation. " " es una marca comercial - Sony DPP-MP1 | Operating Instructions - Page 96
Archivos de imágenes y nombres de archivos La DPP-MP1 puede imprimir archivos de imágenes que estén en formato JPEG y formato TIFF. Los archivos de imágenes creados con una cámara digital CyberShot o videocámara Handycam Sony se almacenan en el "Memory Stick" de acuerdo con ciertas pautas. Por - Sony DPP-MP1 | Operating Instructions - Page 97
Sony o centro de información técnica Sony autorizado. Cuando esté utilizando un ordenador, también deberá consultar la documentación del software genes no son compatibles con la DPP-MP1. c Los archivos de imágenes cuyos formatos no sean compatibles con la DPP-MP1 podrán visualizarse en un ordenador - Sony DPP-MP1 | Operating Instructions - Page 98
Visualización de error de número de carpeta/número de archivo Cuando aparezca un guión [-] en el área de visualización del número de carpeta/ número de archivo al seleccionar un número de carpeta o número de archivo o mientras se imprime una imagen con marca de imprimir, podrá encontrar los remedios - Sony DPP-MP1 | Operating Instructions - Page 99
Mensaje RIBON PAPER NO MS NO IMAGE NO ORDER CAN'T PRINT Significado • No hay insertado un la DPP-MP1. c Ponga la marca de imprimir con una cámara digital CyberShot o videocámara Handycam Sony (página 15). • Se ha intentado imprimir un archivo de imagen en un formato incompatible. c En la DPP-MP1 no - Sony DPP-MP1 | Operating Instructions - Page 100
ERROR MS ERROR RIBON (+ indicador ERROR encendido) PAPER (+ indicador ERROR encendido) ERROR (+ indicador ERROR la DPP-MP1. Utilice un "Memory Stick" formateado en una cámara digital CyberShot o videocámara Handycam Sony. • Se ha insertado un "Memory Stick" de un tipo no compatible con la DPP-MP1, - Sony DPP-MP1 | Operating Instructions - Page 101
manual. Si el problema persiste, póngase en contacto con su distribuidor, o con una estación de servicio Sony o centro de información técnica Sony ón de servicio Sony autorizada. Cuando solicite servicio, le rogamos que suministre la siguiente información. - Número de modelo : DPP-MP1 - Descripción - Sony DPP-MP1 | Operating Instructions - Page 102
Especificaciones Método de impresión Impresión térmica de coloreado por sublimación (YMC + sobrecapa) Resolución de impresión 307 × 307 ppp Gradaciones Procesado de imagen YMC utilizando 8 bits/256 gradaciones por color para aprox. 16,77 millones de colores/píxel. Tamaño de copia 81,6 (H) × 50 (V) - Sony DPP-MP1 | Operating Instructions - Page 103
Filtro-abrazadera Kit de interfaz para PC Guía de instalacíon Tarjeta de registro del usuario Garantía Contrato de licencia de software Sony para usuario final El diseño y las especificaciones están sujetos a cambios sin previo aviso. Accesorios opcionales Paquete de impression a color del tama - Sony DPP-MP1 | Operating Instructions - Page 104
Printed in Japan
-
 1
1 -
 2
2 -
 3
3 -
 4
4 -
 5
5 -
 6
6 -
 7
7 -
8
-
9
-
10
-
11
-
12
-
13
-
14
-
15
-
16
-
17
-
18
-
19
-
20
-
21
-
22
-
23
-
24
-
25
-
26
-
27
-
28
-
29
-
30
-
31
-
32
-
33
-
34
-
35
-
36
-
37
-
38
-
39
-
40
-
41
-
42
-
43
-
44
-
45
-
46
-
47
-
48
-
49
-
50
-
51
-
52
-
53
-
54
-
55
-
56
-
57
-
58
-
59
-
60
-
61
-
62
-
63
-
64
-
65
-
66
-
67
-
68
-
69
-
70
-
71
-
72
-
73
-
74
-
75
-
76
-
77
-
78
-
79
-
80
-
81
-
82
-
83
-
84
-
85
-
86
-
87
-
88
-
89
-
90
-
91
-
92
-
93
-
94
-
95
-
96
-
97
-
98
-
99
-
100
-
101
-
102
-
103
-
104
 |
 |
3-206-255-
12
(1)
2001 Sony Corporation
Digital Photo
Printer
DPP-MP1
Operating Instructions
Mode d’emploi
Manual de instrucciones
FR
ES
GB