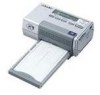
Sony DPP-MP1 Operating Instructions - Page 16
Insert the Memory Stick into, Press the PRINT/STOP
 |
UPC - 027242594371
View all Sony DPP-MP1 manuals
Add to My Manuals
Save this manual to your list of manuals |
Page 16 highlights
2 Insert the "Memory Stick" into the unit. The highest file number for an image with Print Mark is shown. (Folder number) Number of duplicates File number If a "Memory Stick" that has only one folder is inserted, the folder number is not shown. 3 Press the DPOF button. The unit enters the DPOF mode, and the indication "DPOF" appears on the display. The total number of specified prints is shown on the display for about 1 second. The folder number, file number, and number of duplicates for the first image with a Print Mark appear on the display. If only one folder is available, no folder number is shown. DPOF 5 Press the PRINT/STOP button to start printing. During printing, the indication "PRINT" is shown on the display. 6 Remove the printed paper. If you have specified several prints, remove the prints one by one after they are finished. 7 Fold the edges of the paper and remove them along the perforated lines. Turning the power off • Push down the power switch and slide it to the left until the indication on the display disappears. • Even if you do not use the power switch, the unit will automatically turn itself off after about 3 minutes (auto power-off function). In this condition, you can use the SELECT (-/+) buttons to check the folder numbers, file numbers, and number of duplicates for the images with Print Mark. 4 Make the print settings as required. You can make settings for image quality, print format, etc. For details, see "Print Settings" on page 21. 16 GB
-
 1
1 -
2
-
3
-
4
-
5
-
6
-
7
-
8
-
9
-
10
-
 11
11 -
 12
12 -
 13
13 -
 14
14 -
 15
15 -
 16
16 -
 17
17 -
 18
18 -
 19
19 -
 20
20 -
 21
21 -
22
-
23
-
24
-
25
-
26
-
27
-
28
-
29
-
30
-
31
-
32
-
33
-
34
-
35
-
36
-
37
-
38
-
39
-
40
-
41
-
42
-
43
-
44
-
45
-
46
-
47
-
48
-
49
-
50
-
51
-
52
-
53
-
54
-
55
-
56
-
57
-
58
-
59
-
60
-
61
-
62
-
63
-
64
-
65
-
66
-
67
-
68
-
69
-
70
-
71
-
72
-
73
-
74
-
75
-
76
-
77
-
78
-
79
-
80
-
81
-
82
-
83
-
84
-
85
-
86
-
87
-
88
-
89
-
90
-
91
-
92
-
93
-
94
-
95
-
96
-
97
-
98
-
99
-
100
-
101
-
102
-
103
-
104
 |
 |
