Sony DSC T33 Operating Instructions - Page 93
destINatIoN folder, Not showN, WINdows XP AutoPlay wIzard, WINdows XP
 |
UPC - 027242670877
View all Sony DSC T33 manuals
Add to My Manuals
Save this manual to your list of manuals |
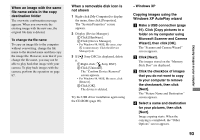
Page 93 highlights
When an image with the same file name exists in the copy destination folder The overwrite confirmation message appears. When you overwrite the existing image with the new one, the original file data is deleted. To change the file name To copy an image file to the computer without overwriting, change the file name to the desired name and then copy the image file. However, note that if you change the file name, you may not be able to play back that image with your camera. To play back images with the camera, perform the operation on page 97. When a removable disk icon is not shown 1 Right-click [My Computer] to display the menu, then click [Properties]. The "System Properties" screen appears. 2 Display [Device Manager]. Click [Hardware]. Click [Device Manager]. • For Windows 98, 98SE, Me users, step is unnecessary. Click the [Device Manager] tab. 3 If [ Sony DSC] is displayed, delete it. Right-click [ Sony DSC]. Click [Uninstall]. The "Confirm Device Removal" screen appears. • For Windows 98, 98SE, Me users, click [Remove]. Click [OK]. The device is deleted. Try the USB driver installation again using the CD-ROM (page 90). - Windows XP Copying images using the Windows XP AutoPlay wizard Make a USB connection (page 91). Click [Copy pictures to a folder on my computer using Microsoft Scanner and Camera Wizard], then click [OK]. The "Scanner and Camera Wizard" screen appears. Click [Next]. The images stored on the "Memory Stick Duo" are displayed. Click the checkbox of images that you do not want to copy to your computer to remove the checkmark, then click [Next]. The "Picture Name and Destination" screen appears. Select a name and destination for your pictures, then click [Next]. Image copying starts. When the copying is completed, the "Other Options" screen appears. 93 Enjoying images on your computer
-
 1
1 -
2
-
3
-
4
-
5
-
6
-
7
-
8
-
9
-
10
-
11
-
12
-
13
-
14
-
15
-
16
-
17
-
18
-
19
-
20
-
21
-
22
-
23
-
24
-
25
-
26
-
27
-
28
-
29
-
30
-
31
-
32
-
33
-
34
-
35
-
36
-
37
-
38
-
39
-
40
-
41
-
42
-
43
-
44
-
45
-
46
-
47
-
48
-
49
-
50
-
51
-
52
-
53
-
54
-
55
-
56
-
57
-
58
-
59
-
60
-
61
-
62
-
63
-
64
-
65
-
66
-
67
-
68
-
69
-
70
-
71
-
72
-
73
-
74
-
75
-
76
-
77
-
78
-
79
-
80
-
81
-
82
-
83
-
84
-
85
-
86
-
87
-
 88
88 -
 89
89 -
 90
90 -
 91
91 -
 92
92 -
 93
93 -
 94
94 -
 95
95 -
 96
96 -
 97
97 -
 98
98 -
99
-
100
-
101
-
102
-
103
-
104
-
105
-
106
-
107
-
108
-
109
-
110
-
111
-
112
-
113
-
114
-
115
-
116
-
117
-
118
-
119
-
120
-
121
-
122
-
123
-
124
-
125
-
126
-
127
-
128
-
129
-
130
-
131
-
132
-
133
-
134
-
135
-
136
-
137
-
138
-
139
-
140
-
141
-
142
-
143
-
144
 |
 |
