Sony DSCP31 Operating Instructions - Page 80
Copying movies to your computer, For Windows 98, 98SE - usb driver
 |
UPC - 027242603325
View all Sony DSCP31 manuals
Add to My Manuals
Save this manual to your list of manuals |
Page 80 highlights
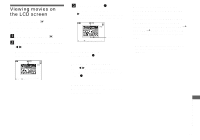
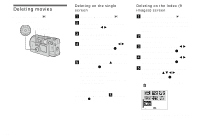
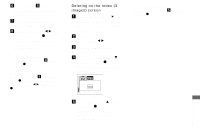
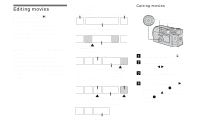
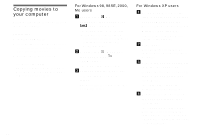
Copying movies to your computer Follow the steps below to copy movies you shot to your computer. Preparations 1 Install the USB driver. 2 Insert the "Memory Stick" on which the movies are stored, into your camera. Then, turn on the camera. 3 Connect the camera to your PC. • For details, see page 44. • Step 1 is unnecessary when your OS is Windows XP, Mac OS 9.1, Mac OS 9.2, or Mac OS X(v10.0/v10.1). For Windows 98, 98SE, 2000, Me users a Double-click "My Computer," then double-click "Removable Disk." The contents of the "Memory Stick" inserted into your camera appear. • This section describes an example of copying movies into the "My Documents" folder. b Double-click "MSSONY," then double-click "MOML0001." The "MOML0001" folder opens. c Drag and drop the movie files into the "My Documents" folder. The movie files are copied to the "My Documents" folder. For Windows XP users a On the Copy Wizard screen, click "Copy images to a folder on the computer. Use the Microsoft Scanner and Camera Wizard.", then click O.K. The "Scanner and Camera Wizard starting.." screen appears. b Click "Next." All of the images recorded in the "Memory Stick" will be displayed on the screen. c Click to remove the checkmark from the checkboxes of images that you do not want to copy to the computer, then click "Next." The "Image names and Copy destination" screen is displayed. d Designate the image names and copy destination, then click "Next." The copying of your images begins. When the copying is finished, the "Other Options" screen is displayed. • Please select "My Documents" as the copy destination. 80
-
 1
1 -
2
-
3
-
4
-
5
-
6
-
7
-
8
-
9
-
10
-
11
-
12
-
13
-
14
-
15
-
16
-
17
-
18
-
19
-
20
-
21
-
22
-
23
-
24
-
25
-
26
-
27
-
28
-
29
-
30
-
31
-
32
-
33
-
34
-
35
-
36
-
37
-
38
-
39
-
40
-
41
-
42
-
43
-
44
-
45
-
46
-
47
-
48
-
49
-
50
-
51
-
52
-
53
-
54
-
55
-
56
-
57
-
58
-
59
-
60
-
61
-
62
-
63
-
64
-
65
-
66
-
67
-
68
-
69
-
70
-
71
-
72
-
73
-
74
-
 75
75 -
 76
76 -
 77
77 -
 78
78 -
 79
79 -
 80
80 -
 81
81 -
 82
82 -
 83
83 -
 84
84 -
 85
85 -
86
-
87
-
88
-
89
-
90
-
91
-
92
-
93
-
94
-
95
-
96
-
97
-
98
-
99
-
100
-
101
-
102
-
103
-
104
-
105
-
106
-
107
-
108
 |
 |