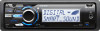
Sony DSX-MS60 Operating Instructions
Sony DSX-MS60 Manual
 |
UPC - 027242807037
View all Sony DSX-MS60 manuals
Add to My Manuals
Save this manual to your list of manuals |
Sony DSX-MS60 manual content summary:
- Sony DSX-MS60 | Operating Instructions - Page 1
d'emploi FR Manual de instrucciones ES Owner's Record The model and serial numbers are located on the bottom of the unit. Record the serial number in the space provided below. Refer to these numbers whenever you call upon your Sony dealer regarding this product. Model No. DSX-MS60 Serial No. To - Sony DSX-MS60 | Operating Instructions - Page 2
been tested and found to comply with the limits for a Class B digital device, pursuant to Part 15 of the FCC Rules. These limits are designed to provide reasonable protection against harmful interference in a residential installation. This equipment generates, uses, and can radiate radio frequency - Sony DSX-MS60 | Operating Instructions - Page 3
replaced by qualified service staff MPEG Layer-3 audio coding technology and patents Sony dealer for details on the satellite radio tuner module. "SAT Radio," "SAT Radio Ready," the SAT Radio and SAT Radio Ready logos and all related marks are trademarks of Sirius XM Radio Inc. and XM Satellite Radio - Sony DSX-MS60 | Operating Instructions - Page 4
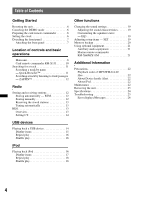
21 Auxiliary audio equipment 21 Marine remote commander RM-X60M/X11M 21 Additional Information Precautions 22 Playback order of MP3/WMA/AAC files 22 About Device Inside Alert 22 About iPod 22 Maintenance 22 Removing the unit 23 Specifications 24 Troubleshooting 25 Error displays/Messages - Sony DSX-MS60 | Operating Instructions - Page 5
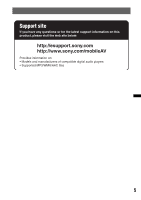
Support site If you have any questions or for the latest support information on this product, please visit the web site below: http://esupport.sony.com http://www.sony.com/mobileAV Provides information on: • Models and manufacturers of compatible digital audio players • Supported MP3/WMA/AAC files 5 - Sony DSX-MS60 | Operating Instructions - Page 6
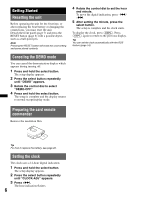
the unit Before operating the unit for the first time, or after replacing the boat battery or changing the connections, you must reset the unit. Detach remote commander Remove the insulation film. Tip For how to replace the battery, see page 22. Setting the clock The clock uses a 12-hour digital - Sony DSX-MS60 | Operating Instructions - Page 7
caution alarm will sound for a few seconds. The alarm will only sound if the built-in amplifier is used. 1 Press and hold (SOURCE/OFF). The unit is turned off. 2 Press (OPEN). The front panel is flipped down. 3 Slide the front panel to the right, then gently pull out the left end - Sony DSX-MS60 | Operating Instructions - Page 8
of controls and basic operations Main unit Front panel removed 8 This section contains instructions on the location of controls and basic operations. For details, see the respective pages. A SOURCE/OFF button*1 Press to turn on the power/change the source (Radio/USB/AUX). Press for 1 second to - Sony DSX-MS60 | Operating Instructions - Page 9
rotate); select setup items (press and rotate). F Receptor for the card remote commander G Display window H OPEN button page 7 I AUX input jack radio category. M Frequency select switch (located on the bottom of the unit) See "Frequency select switch" in the supplied installation/connections manual. - Sony DSX-MS60 | Operating Instructions - Page 10
receive stored stations (press); store stations (press and hold). *1 If an HD Radio Radio tuner band or SAT tuner band. *2 This button has a tactile dot. Note If the unit is turned off and the display disappears, it cannot be operated with the card remote commander unless (SOURCE/OFF) on the unit - Sony DSX-MS60 | Operating Instructions - Page 11
in a category, you can search the desired item quickly. 1 Press +> in Quick-BrowZer mode. The following display appears. (BACK) +>/-. 1 Press (BROWSE). The unit enters the Quick-BrowZer mode, and the list of search categories appears. 2 Rotate the control dial to select the desired search category - Sony DSX-MS60 | Operating Instructions - Page 12
confirms a track to playback. Radio Storing and receiving stations Caution When tuning in stations while driving, use Best Tuning Memory (BTM) to The unit stores stations in order of frequency in the preset list. A beep sounds when the setting is stored. Storing manually 1 While receiving the - Sony DSX-MS60 | Operating Instructions - Page 13
Overview FM stations with Radio Data System (RDS) service send inaudible digital information along with the regular radio program signal. Display items 3 Press the select button to receive the station. The display returns to normal reception mode. (with the card remote commander) 1 Select the band - Sony DSX-MS60 | Operating Instructions - Page 14
CT function may not work even though an RDS station is being received. • There might be a difference between the time set by the CT function and the actual time. USB devices For details on the compatibility of your USB device, visit the support site. Support site http://esupport.sony.com http://www - Sony DSX-MS60 | Operating Instructions - Page 15
users, use of the optional adaptor XA-50WM is recommended. It is designed for use with this unit only, and should not be used with the other USB devices. • This unit installation position, detach the front panel and open the TUNE TRAY manually visit the support site. • DRM (Digital Rights Management) - Sony DSX-MS60 | Operating Instructions - Page 16
site. In these Operating Instructions, "iPod" is used as a general reference for the iPod functions on the iPod, unless otherwise specified by the text or illustrations. Support site http://esupport.sony.com http://www.sony.com/mobileAV Notes • Do not place a cellular phone or a device with wireless - Sony DSX-MS60 | Operating Instructions - Page 17
users, use the supplied adaptor XA-50IP. It is designed for use with this unit only, and should not be used with the other USB devices. • This unit because of the console shape at the installation position, detach the front panel and open the TUNE TRAY manually. For how to detach the front panel - Sony DSX-MS60 | Operating Instructions - Page 18
Tip When album/podcast/genre/artist/playlist is changed, its item number appears momentarily. Note Some letters stored in iPod may not be displayed correctly. After 3 seconds, the setting is complete. To return to normal play mode, select "OFF." Repeat play 1 During playback, press and hold the - Sony DSX-MS60 | Operating Instructions - Page 19
Other functions Changing the sound settings Adjusting the sound characteristics 1 Press the select button repeatedly until the desired item appears. 2 Rotate the control dial to adjust the selected item. 3 Press (BACK). The setting is complete and the display returns to normal reception/play mode. - Sony DSX-MS60 | Operating Instructions - Page 20
SUB-OUT" (subwoofer), "REAR-OUT" (power amplifier). DEMO (Demonstration) Activates the demonstration clear view of the display, suitable for the installed viewing angle. The contrast level is adjustable in (page 12) *1 When the unit is turned off. *2 When FM is received. *3 When the audio output is - Sony DSX-MS60 | Operating Instructions - Page 21
page 19). GP/ALBM -/+ SOURCE The following controls on the marine remote commander require a different operation from the unit. • VOLUME (VOL) +/- button(s) The same as the control dial on the unit. • GP/ALBM -/+ button(s) Radio: To receive stored stations. USB: To skip albums. • MUTING button To - Sony DSX-MS60 | Operating Instructions - Page 22
you have any questions or problems concerning your unit that are not covered in this manual, consult your nearest Sony dealer. Maintenance Replacing the lithium battery of the card remote commander Under normal conditions, the battery will last approximately 1 year. (The service life may be shorter - Sony DSX-MS60 | Operating Instructions - Page 23
sure to observe the correct polarity when installing the battery. • Do not hold the power connection and replace the fuse. If the fuse blows again after replacement, there may be an internal malfunction. In such a case, consult your nearest Sony dealer. Fuse (10 A) Cleaning the connectors The unit - Sony DSX-MS60 | Operating Instructions - Page 24
4 oz) Supplied accessories*: Card remote commander: RM-X151 USB connector for iPod XA-50IP Parts for installation and connections (1 set) Optional accessories/equipment*: Marine remote commander: RM-X60M, RM-X11M BUS cable (supplied with an RCA pin cord): Source selector: XA-C40 HD Radio™ tuner: XT - Sony DSX-MS60 | Operating Instructions - Page 25
problem is not solved, visit the following support site. Support site http://esupport.sony.com http://www.sony.com/mobileAV General No power is being supplied to the unit. • Check the connection or fuse. • If the unit is turned off and the display disappears, it cannot be operated with the remote - Sony DSX-MS60 | Operating Instructions - Page 26
See the installation/connections manual of this model radio channel into a preset failed. t Be sure to receive the channel that you want to store, then try it again. HUB NO SUPRT (HUB Not Support) USB hub is not supported on this unit display, consult your nearest Sony dealer. OVERLOAD USB device - Sony DSX-MS60 | Operating Instructions - Page 27
- Sony DSX-MS60 | Operating Instructions - Page 28
installation et de raccordement fourni. Avis à l'intention des clients : les informations suivantes s'appliquent uniquement aux appareils vendus dans des pays qui appliquent les directives de l'Union Européenne Le fabricant de ce produit est Sony d'un service technique qualifi Digital Corp. 2 - Sony DSX-MS60 | Operating Instructions - Page 29
marques associées sont des marques de commerce de Sirius XM Radio Inc. et de XM Satellite Radio Inc. ZAPPIN et Quick-BrowZer sont des marques de commerce de Sony Corporation. « WALKMAN » et le logo « WALKMAN » sont des marques déposées de Sony Corporation. Windows Media est une marque déposée ou une - Sony DSX-MS60 | Operating Instructions - Page 30
l'horloge 6 Retrait de la façade 7 Installation de la façade 7 Emplacement des commandes écoutant des passages de plages - ZAPPIN 12 Radio Mémorisation et réception des stations 12 Mémorisation 21 Appareil audio auxiliaire 21 Télécommande marine RM-X60M/X11M 22 Informations complémentaires - Sony DSX-MS60 | Operating Instructions - Page 31
ou si vous souhaitez consulter les dernières informations d'assistance sur ce produit, visitez les sites Web suivants : http://esupport.sony.com http://www.sony.com/mobileAV Fournissent des informations sur : • Les modèles et les fabricants de lecteurs audio numériques compatibles • Les fichiers - Sony DSX-MS60 | Operating Instructions - Page 32
Préparation Réinitialisation de l'appareil Avant la première mise en service de l'appareil ou après avoir remplacé la batterie du bateau ou modifié les raccordements, vous devez réinitialiser l'appareil. Retirez la façade (page 7), puis appuyez - Sony DSX-MS60 | Operating Instructions - Page 33
, puis tirez doucement vers vous l'extrémité gauche de la façade. Installation de la façade Placez l'orifice A de la façade sur la tige B OFF) de l'appareil pour le faire fonctionner. Remarque Ne posez rien sur la face interne de la façade. Remarques • N'exercez pas de pression excessive sur - Sony DSX-MS60 | Operating Instructions - Page 34
base Appareil principal Sans la façade 8 Cette section contient les instructions relatives à l'emplacement des commandes et aux opérations de base. (BROWSE)*2 page 11, 13 Permet d'établir une liste des fréquences (Radio) ; de passer en mode QuickBrowZer™ (USB). C Touche PAUSE Permet d'interrompre - Sony DSX-MS60 | Operating Instructions - Page 35
12, 19 Permet de retourner à l'affichage précédent/ de sélectionner la bande radio (FM/AM). K Touche ZAP/SHUF page 12, 16, 19 Permet de passer en à la section « Sélecteur de fréquence » du manuel d'installation/connexions fourni. N Touche DSPL (affichage)/SCRL (défilement) page 13, - Sony DSX-MS60 | Operating Instructions - Page 36
« SR ») apparaît dans la fenêtre d'affichage. De plus, si vous appuyez sur la touche (MODE), vous pouvez commuter la bande du récepteur HD Radio ou la bande du récepteur SAT. *2 Cette touche comporte un point tactile. Remarque Si vous éteignez l'appareil et que l'affichage disparaît, vous ne pourrez - Sony DSX-MS60 | Operating Instructions - Page 37
Recherche d'une plage Recherche d'une plage par nom - Quick-BrowZer™ Vous pouvez facilement rechercher une plage par catégorie sur un périphérique USB. Molette de réglage/ (BROWSE) touche de sélection Recherche d'éléments par saut - Mode Jump Lorsqu'une catégorie contient de nombreux éléments, vous - Sony DSX-MS60 | Operating Instructions - Page 38
sur +>/-. en mode ZAPPIN pour sauter une plage. • Lorsque vous appuyez sur (BACK), la lecture d'une plage est également confirmée. Radio Mémorisation et réception des stations Attention Pour syntoniser des stations pendant que vous conduisez, utilisez la fonction de mémorisation des meilleurs - Sony DSX-MS60 | Operating Instructions - Page 39
stations présélectionnées s'affiche. 2 Tournez la molette de réglage jusqu'à ce que la station souhaitée s'affiche. RDS Aperçu Les stations de radio FM dotées des services RDS (Système de radiocommunication de données) transmettent des données numériques inaudibles en plus du signal d'émission de - Sony DSX-MS60 | Operating Instructions - Page 40
USB Pour plus de détails sur la compatibilité de votre périphérique USB, visitez notre site d'assistance. Sites d'assistance http://esupport.sony.com http://www.sony.com/mobileAV • Vous pouvez utiliser des périphériques USB de type MSC (stockage de masse) et MTP (protocole de transfert des médias - Sony DSX-MS60 | Operating Instructions - Page 41
le bateau, par exemple. • Si la façade ne s'ouvre pas entièrement en raison de la forme de la console ou de la position d'installation, retirez la façade et ouvrez le TUNE TRAY manuellement. Pour savoir comment retirer la façade, consultez la page 7. • Il est extrêmement dangereux - Sony DSX-MS60 | Operating Instructions - Page 42
• Selon la quantité de données enregistrées, la lecture peut mettre quelques instants à démarrer. • La lecture de fichiers DRM (gestion des droits numériques) peut être impossible. • Pendant la lecture ou l'avance/le retour rapide dans un fichier MP3/WMA/AAC VBR (débit binaire variable), le temps de - Sony DSX-MS60 | Operating Instructions - Page 43
générale pour des fonctions iPod sur les iPod, sauf mention contraire dans le texte ou les illustrations. Sites d'assistance http://esupport.sony.com http://www.sony.com/mobileAV Remarques • Ne placez pas de téléphone cellulaire ou d'appareil avec fonctions de communication sans fil sur le TUNE TRAY - Sony DSX-MS60 | Operating Instructions - Page 44
le bateau, par exemple. • Si la façade ne s'ouvre pas entièrement en raison de la forme de la console ou de la position d'installation, retirez la façade et ouvrez le TUNE TRAY manuellement. Pour savoir comment retirer la façade, consultez la 18 page 7. • Il est extrêmement - Sony DSX-MS60 | Operating Instructions - Page 45
Sélectionnez REPEAT-TRK REPEAT-ALB REPEAT-PCS REPEAT-ART REPEAT-PLY REPEAT-GNR Pour lire une plage en boucle. un album en boucle. une émission baladodiffusée en boucle. un artiste en boucle. une liste de lecture en boucle. un genre en boucle. Pour retourner au mode de lecture normal, sélectionnez - Sony DSX-MS60 | Operating Instructions - Page 46
Personnalisation de la courbe de l'égaliseur - EQ3 L'option « CUSTOM » de EQ3 vous permet d'effectuer vos propres réglages d'égaliseur. 1 Sélectionnez une source, puis appuyez plusieurs fois sur la touche de sélection pour sélectionner « EQ3 ». 2 Tournez la molette de réglage pour sélectionner « - Sony DSX-MS60 | Operating Instructions - Page 47
LOCAL (Mode de recherche locale) - « ON » : pour syntoniser uniquement les stations dont les signaux sont puissants. - « OFF » : pour syntoniser une réception normale. MONO*2 (Mode monaural) Permet de sélectionner le mode de réception monaural pour améliorer la réception FM faible : « ON », « OFF ». - Sony DSX-MS60 | Operating Instructions - Page 48
, « DEVICE INSIDE » s'affiche. Les commandes suivantes de la télécommande marine requièrent un fonctionnement différent de l'appareil. • Touche(s) VOLUME ( la molette de réglage de l'appareil. • Touche(s) GP/ALBM -/+ Radio : Permettent de capter les stations enregistrées. USB : Permettent de sauter - Sony DSX-MS60 | Operating Instructions - Page 49
dans ce mode d'emploi, contactez votre détaillant Sony. Entretien Remplacement de la pile au lithium de la bon contact. • Veillez à respecter la polarité lors de l'installation de la pile. • Ne tenez pas la pile avec entre l'appareil et la façade sont sales. Pour éviter cette situation, retirez la - Sony DSX-MS60 | Operating Instructions - Page 50
appareil en dehors de son support. 24 Caractéristiques techniques Radio FM Plage de syntonisation : Commandes de tonalité : Graves : ±10 dB à 60 Hz (XPLOD) Médiums : ±10 dB à CC (masse négative) Dimensions : environ 178 × 50 × 180 mm (7 1/8 × 2 × 7 1/8 po) (l/h/p) Dimensions de montage : environ - Sony DSX-MS60 | Operating Instructions - Page 51
l'installation et aux raccordements (1 jeu) Accessoires/appareils en option* : Télécommande marine Radio™ : XT-100HD Adaptateur XA-50WM pour Walkman * Les accessoires/appareils autres que de la télécommande marine Sites d'assistance http://esupport.sony.com http://www.sony.com/mobileAV Généralités - Sony DSX-MS60 | Operating Instructions - Page 52
que l'affichage apparaisse. • Les connecteurs sont sales (page 23). La fonction arrêt automatique la fonction DSO peut avoir un effet indésirable. Réception radio Impossible de capter des stations. Le son est parasité. . t Reportez-vous au manuel d'installation/ raccordement de ce modèle pour - Sony DSX-MS60 | Operating Instructions - Page 53
Il se peut que l'appareil soit défectueux. t Vérifiez le raccordement. Si le message d'erreur ne disparaît pas de l'affichage, contactez votre détaillant Sony le plus proche. OVERLOAD Le périphérique USB est saturé. t Débranchez le périphérique USB, puis changez la source en appuyant sur (SOURCE - Sony DSX-MS60 | Operating Instructions - Page 54
. Para realizar la instalación y las conexiones, consulte el manual de instalación y de conexiones suministrado. Aviso para los clientes representante autorizado para EMC y seguridad en el producto es Sony Deutschland GmbH, Hedelfinger Strasse 61, 70327 Stuttgart, Alemania. Para Digital Corp. 2 - Sony DSX-MS60 | Operating Instructions - Page 55
, póngase en contacto con el distribuidor Sony autorizado más cercano. "SAT Radio", "SAT Radio Ready", los logotipos de SAT Radio, SAT Radio Ready y todas las marcas relacionadas son marcas comerciales de Sirius XM Radio Inc. y XM Satellite Radio Inc. ZAPPIN y Quick-BrowZer son marcas comerciales - Sony DSX-MS60 | Operating Instructions - Page 56
de una pista por nombre - Quick-BrowZer 11 Búsqueda de una pista por segmentos - ZAPPIN 12 Radio Almacenamiento y recepción de emisoras . . . 12 Almacenamiento automático - BTM . . . . 12 Almacenamiento manual 12 Recepción de las emisoras almacenadas. . . 13 Sintonización automática 13 RDS 13 - Sony DSX-MS60 | Operating Instructions - Page 57
técnico en línea Para resolver cualquier duda u obtener la información más reciente sobre el soporte técnico de este producto, visite el siguiente sitio Web: http://esupport.sony.com http://www.sony.com/mobileAV Proporciona información acerca de: • Modelos y fabricantes de reproductores de audio - Sony DSX-MS60 | Operating Instructions - Page 58
3 Presione +>. La indicación de la hora parpadea. 4 Gire el selector de control para ajustar la hora y los minutos. Para mover la indicación digital, presione -./+>. 5 Una vez ajustados los minutos, presione el botón de selección. El ajuste se completa y el reloj se pone en funcionamiento. Presione - Sony DSX-MS60 | Operating Instructions - Page 59
Extracción del panel frontal Es posible extraer el panel frontal de la unidad para evitar que la roben. Alarma de precaución Si gira el interruptor de la llave de encendido hasta la posición OFF sin haber extraído el panel frontal, la alarma de precaución sonará durante unos segundos. La alarma - Sony DSX-MS60 | Operating Instructions - Page 60
PAUSE Para pausar la reproducción. Para cancelar esta función, vuelva a presionarlo. D Botones + >/- . Radio: Para sintonizar emisoras en forma automática (presionar); para localizar una emisora en forma manual (mantener presionado). USB: Para omitir pistas (presionar); para omitir pistas en forma - Sony DSX-MS60 | Operating Instructions - Page 61
MODE*1 página 11, 12, 19 Para volver a la pantalla anterior o seleccionar la banda de radio (FM/AM). K Botón ZAP/SHUF página 12, 16, 18 Para acceder al modo ZAPPIN™ ía radio SAT. M Selector de frecuencias (ubicado en la parte inferior de la unidad) Consulte "Selector de frecuencias" en el manual de - Sony DSX-MS60 | Operating Instructions - Page 62
SOURCE) el dispositivo conectado ("HD", "XM" o "SR") aparecerá en la pantalla. Además, si presiona (MODE), podrá cambiar la banda del sintonizador de HD Radio o la banda del sintonizador SAT. *2 Este botón tiene un punto sensible al tacto. Nota Si la unidad está apagada y desaparece la indicación de - Sony DSX-MS60 | Operating Instructions - Page 63
Búsqueda de una pista Búsqueda de una pista por nombre - Quick-BrowZer™ Puede buscar una pista fácilmente en un dispositivo USB por categorías. Selector de control/ (BROWSE) botón de selección Búsqueda por omisión de elementos - modo de Omisión Cuando varios elementos se encuentran dentro de una - Sony DSX-MS60 | Operating Instructions - Page 64
un clic y se inicia el segmento siguiente. Pista Partes de cada pista que se reproducen en el modo se va a reproducir, presione (BACK). Radio Almacenamiento y recepción de emisoras Precaución emite un pitido al almacenar el ajuste. Almacenamiento manual 1 Cuando reciba la emisora que desea almacenar - Sony DSX-MS60 | Operating Instructions - Page 65
de radio FM que tienen el servicio de Sistema de datos de radio (RDS) envían información digital inaudible junto a la señal habitual del programa de radio. ajustar la frecuencia deseada con mayor precisión (sintonización manual). A Banda de radio, función, frecuencia, número de presintonía B Nombre - Sony DSX-MS60 | Operating Instructions - Page 66
compatibilidad del dispositivo USB, visite el sitio web de soporte técnico. Sitio Web de soporte técnico en línea http://esupport.sony.com http://www.sony.com/mobileAV • Es posible utilizar dispositivos USB de almacenamiento masivo (MSC) y de protocolo de transferencia multimedia (MTP) que cumplan - Sony DSX-MS60 | Operating Instructions - Page 67
por completo por la forma de la consola en la posición de instalación, desconéctelo y abra la bandeja TUNE TRAY en forma manual. Para obtener más información acerca de cómo extraer el panel frontal, consulte la página 7. • Es extremadamente peligroso conectar o extraer el dispositivo USB mientras - Sony DSX-MS60 | Operating Instructions - Page 68
del iPod en el iPod, salvo que el texto o las ilustraciones especifiquen lo contrario. Sitio Web de soporte técnico en línea http://esupport.sony.com http://www.sony.com/mobileAV Notas • No coloque un teléfono celular o un dispositivo con funciones de comunicación inalámbrica en la TUNE TRAY, ya que - Sony DSX-MS60 | Operating Instructions - Page 69
no se abre por completo por la forma de la consola en la posición de instalación, desconéctelo y abra la bandeja TUNE TRAY en forma manual. Para obtener más información acerca de cómo extraer el panel frontal, consulte la página 7. • Es extremadamente peligroso conectar o extraer el iPod mientras se - Sony DSX-MS60 | Operating Instructions - Page 70
Elementos de la pantalla Reproducción aleatoria 1 Durante la reproducción, mantenga presionado (ZAP/SHUF). La mitad inferior de la pantalla comenzará a parpadear. 2 Presione (ZAP/SHUF) varias veces hasta que aparezca el ajuste deseado. A Fuente, nombre de la pista, nombre del artista, nombre del á - Sony DSX-MS60 | Operating Instructions - Page 71
Otras funciones Cambio de los ajustes de sonido Ajuste de las características de sonido 1 Presione el botón de selección varias veces hasta que aparezca el elemento deseado. 2 Gire el selector de control para ajustar el elemento seleccionado. 3 Presione (BACK). El ajuste finaliza y la pantalla - Sony DSX-MS60 | Operating Instructions - Page 72
Nota Los elementos que se muestran en pantalla variarán en función de la fuente y del ajuste. Se pueden ajustar los elementos siguientes (consulte la referencia de página para obtener más información): CLOCK-ADJ (Ajuste del reloj) (página 6) CT (Hora del reloj) Activa la función CT: "ON", "OFF" (pá - Sony DSX-MS60 | Operating Instructions - Page 73
una operación diferente a los de la unidad. • Botones VOLUME (VOL) +/- Igual que el selector de control de la unidad. • Botones GP/ALBM -/+ (s) Radio: Para recibir emisoras almacenadas. USB: Para omitir álbumes. • Botón MUTING Para atenuar el sonido. (Funciona igual que (ATT) en el control remoto de - Sony DSX-MS60 | Operating Instructions - Page 74
regulatorios. Si desea realizar alguna consulta o solucionar algún problema relativo a la unidad que no se trate en este manual, póngase en contacto con el distribuidor Sony más cercano. Mantenimiento Sustitución de la pila de litio del control remoto de tarjeta En condiciones normales, la pila dura - Sony DSX-MS60 | Operating Instructions - Page 75
falla de funcionamiento interno. En tal caso, consulte con el distribuidor Sony más cercano. Fusible (10 A) Limpieza de los conectores Es posible de las llaves de liberación para extraer la unidad. Unidad principal Parte posterior del panel frontal Notas • Por razones de seguridad, apague el - Sony DSX-MS60 | Operating Instructions - Page 76
estéreo) Conector de entrada de señal USB Controles de tono: Graves: ±10 dB a 60 Hz (XPLOD) Medios: ±10 dB a 1 kHz (XPLOD) Agudos: ±10 dB a 10 cable con terminales RCA): Selector de fuente: XA-C40 Sintonizador de HD Radio™: XT-100HD Adaptador de Walkman XA-50WM * Los accesorios y equipos distintos - Sony DSX-MS60 | Operating Instructions - Page 77
en línea http://esupport.sony.com http://www.sony.com/mobileAV Generales La unidad puede no producir el efecto deseado. Recepción de radio No es posible recibir las emisoras. Hay ruidos que de emisión es demasiado débil. t Use la sintonización manual. Durante la recepción de FM, la indicación "ST" - Sony DSX-MS60 | Operating Instructions - Page 78
amplificadores es incorrecta. t Consulte el manual de instalación/conexiones de este modelo para SAT, se produjo un error al almacenar una emisora de radio SAT en un número de presintonía. t Asegúrese pantalla, póngase en contacto con el distribuidor Sony más cercano. OVERLOAD El dispositivo USB est - Sony DSX-MS60 | Operating Instructions - Page 79
- Sony DSX-MS60 | Operating Instructions - Page 80
have any questions/problems regarding this product, try the following: 1 Read Troubleshooting in these Operating Instructions. 2 Reset the unit. Note: Stored data may be erased. 3 Please contact (U.S.A. only); Call 1-800-222-7669 URL http://www.SONY.com http://www.sony.net/ Sony Corporation Printed
-
 1
1 -
 2
2 -
 3
3 -
 4
4 -
 5
5 -
 6
6 -
 7
7 -
8
-
9
-
10
-
11
-
12
-
13
-
14
-
15
-
16
-
17
-
18
-
19
-
20
-
21
-
22
-
23
-
24
-
25
-
26
-
27
-
28
-
29
-
30
-
31
-
32
-
33
-
34
-
35
-
36
-
37
-
38
-
39
-
40
-
41
-
42
-
43
-
44
-
45
-
46
-
47
-
48
-
49
-
50
-
51
-
52
-
53
-
54
-
55
-
56
-
57
-
58
-
59
-
60
-
61
-
62
-
63
-
64
-
65
-
66
-
67
-
68
-
69
-
70
-
71
-
72
-
73
-
74
-
75
-
76
-
77
-
78
-
79
-
80
 |
 |
©2010 Sony Corporation
Operating Instructions
Mode d’emploi
Manual de instrucciones
Owner’s Record
The model and serial numbers are located on the bottom of the unit.
Record the serial number in the space provided below.
Refer to these numbers whenever you call upon your Sony dealer regarding this product.
Model No. DSX-MS60
Serial No.
To cancel the demonstration (DEMO) display, see page 6.
Pour annuler l’affichage de démonstration (DEMO), reportez-vous à la page 6.
Para cancelar la pantalla de demostración (DEMO), consulte la página 6.
FR
US
4-264-353-
11
(1)
DSX-MS60
ES
FM/AM
Digital Media Player