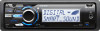
Sony DSX-MS60 Operating Instructions - Page 9
Device Inside Alert LED, ZAP/SHUF button - installation
 |
UPC - 027242807037
View all Sony DSX-MS60 manuals
Add to My Manuals
Save this manual to your list of manuals |
Page 9 highlights
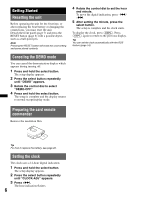
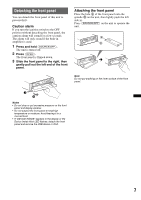
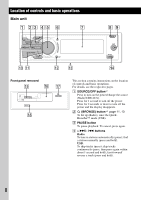
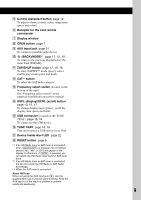
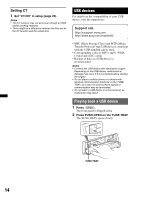
E Control dial/select button page 19 To adjust volume (rotate); select setup items (press and rotate). F Receptor for the card remote commander G Display window H OPEN button page 7 I AUX input jack page 21 To connect a portable audio device. J (BACK)/MODE*1 page 11, 12, 19 To return to the previous display/select the radio band (FM/AM). K ZAP/SHUF button page 12, 16, 18 To enter ZAPPIN™ mode (press); select shuffle play mode (press and hold). L CAT*3 button To select the SAT radio category. M Frequency select switch (located on the bottom of the unit) See "Frequency select switch" in the supplied installation/connections manual. N DSPL (display)/SCRL (scroll) button page 13, 15, 17 To change display items (press); scroll the display item (press and hold). O USB connector (located on the TUNE TRAY) page 15, 16 To connect to the USB device. P TUNE TRAY page 14, 16 Tray unit to place a USB device or an iPod. Q Device Inside Alert LED page 22 R RESET button page 6 *1 If an HD Radio tuner or SAT tuner is connected: when (SOURCE/OFF) is pressed, the connected device ("HD," "XM" or "SR") will appear in the display. Furthermore, if (MODE) is pressed, you can switch the HD Radio tuner band or SAT tuner band. *2 If an HD Radio tuner or SAT tuner is connected: the list will include the HD Radio or SAT Radio accordingly. *3 When the SAT tuner is connected. About AUX cap When not using the AUX input jack (9), use the supplied AUX cap to prevent water entering. Keep the AUX cap out of the reach of children to prevent accidental swallowing. 9
-
 1
1 -
2
-
3
-
 4
4 -
 5
5 -
 6
6 -
 7
7 -
 8
8 -
 9
9 -
 10
10 -
 11
11 -
 12
12 -
 13
13 -
 14
14 -
15
-
16
-
17
-
18
-
19
-
20
-
21
-
22
-
23
-
24
-
25
-
26
-
27
-
28
-
29
-
30
-
31
-
32
-
33
-
34
-
35
-
36
-
37
-
38
-
39
-
40
-
41
-
42
-
43
-
44
-
45
-
46
-
47
-
48
-
49
-
50
-
51
-
52
-
53
-
54
-
55
-
56
-
57
-
58
-
59
-
60
-
61
-
62
-
63
-
64
-
65
-
66
-
67
-
68
-
69
-
70
-
71
-
72
-
73
-
74
-
75
-
76
-
77
-
78
-
79
-
80
 |
 |
