Sony HDR-AS30V Handbook - Page 59
Viewing images, GPS HDR-AS30V only, Computers - b gps
 |
View all Sony HDR-AS30V manuals
Add to My Manuals
Save this manual to your list of manuals |
Page 59 highlights
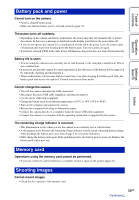
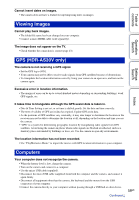
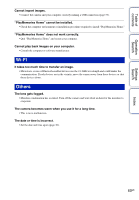
Cannot insert dates on images. • The camera does not have a feature for superimposing dates on images. Table of contents Viewing images Cannot play back images. • The folder/file name has been changed on your computer. • Connect a micro HDMI cable (sold separately). The image does not appear on the TV. • Check whether the connection is correct (page 43). Operation Search Settings Search Index GPS (HDR-AS30V only) The camera is not receiving a GPS signal. • Set the GPS log to [ON]. • Your camera may not be able to receive radio signals from GPS satellites because of obstructions. • To triangulate the location information correctly, bring your camera to an open area, and turn on the camera again. Excessive error in location information. • The margin of error can be up to several-hundred meters depending on surrounding buildings, weak GPS signals, etc. It takes time to triangulate although the GPS assist data is taken in. • Date & Time Setting is not set, or set time is shifted greatly. Set the date and time correctly. • The term of validity of GPS assist data has expired. Update GPS assist data. • As the positions of GPS satellites vary constantly, it may take longer to determine the location or the receiver may not be able to determine the location at all, depending on the location and time you use the camera. • "GPS" is a system for determining geographic location by triangulating radio signals from GPS satellites. Avoid using the camera in places where radio signals are blocked or reflected, such as a shadowy place surrounded by buildings or trees, etc. Use the camera in open sky environments. The location information has not been recorded. • Use "PlayMemories Home" to import the movies with GPS location information to your computer. Computers Your computer does not recognize the camera. • When the battery level is low, charge the camera. • Turn on the camera and connect to a computer. • Use the micro USB cable (supplied). • Disconnect the micro USB cable (supplied) from both the computer and the camera, and connect it again firmly. • Disconnect all equipment other than the camera, the keyboard and the mouse from the USB connectors of your computer. • Connect the camera directly to your computer without passing through a USB hub or other device. Continued r 59GB
-
 1
1 -
2
-
3
-
4
-
5
-
6
-
7
-
8
-
9
-
10
-
11
-
12
-
13
-
14
-
15
-
16
-
17
-
18
-
19
-
20
-
21
-
22
-
23
-
24
-
25
-
26
-
27
-
28
-
29
-
30
-
31
-
32
-
33
-
34
-
35
-
36
-
37
-
38
-
39
-
40
-
41
-
42
-
43
-
44
-
45
-
46
-
47
-
48
-
49
-
50
-
51
-
52
-
53
-
 54
54 -
 55
55 -
 56
56 -
 57
57 -
 58
58 -
 59
59 -
 60
60 -
 61
61 -
 62
62 -
 63
63 -
 64
64 -
65
-
66
-
67
-
68
-
69
-
70
-
71
-
72
-
73
 |
 |