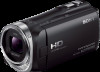
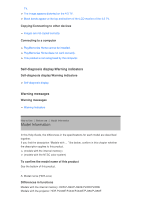
Sony HDR-CX330 User Manual - Page 13
Parts and controls back/bottom, Screen indicators
 |
View all Sony HDR-CX330 manuals
Add to My Manuals
Save this manual to your list of manuals |
Page 13 highlights
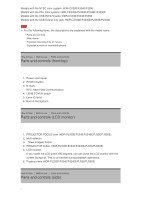
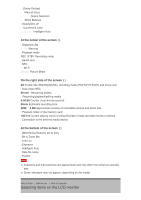
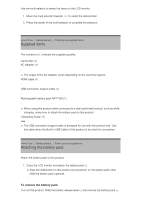
1. Speaker 2. Memory card slot 3. Memory card access lamp While the lamp is lit or flashing, this product is reading or writing data. 4. HDMI OUT jack 5. PROJECTOR IN jack (HDR-PJ330E/PJ340/PJ340E/PJ350/PJ350E) How to Use Before use Parts and controls Parts and controls (back/bottom) 1. POWER/CHG (charge) lamp 2. START/STOP button 3. Battery pack 4. DC IN jack 5. Loop for a shoulder belt 6. Multi/Micro USB Terminal Supports Micro USB compatible devices. This terminal does not support VMC-AVM1 Adaptor Cable (sold separately). You cannot use accessories via an A/V Remote Connector. 7. Grip belt 8. Built-in USB Cable 9. Tripod receptacle Attach a tripod (sold separately: the length of the screw must be less than 5.5 mm (7/32 in.)). Depending on the specifications of the tripod, this product may not attach in the proper direction. 10. BATT (battery) release lever To fasten the grip belt How to Use Before use Screen indicators Screen indicators The following indicators appear when you change the settings. On the left side of the screen ( ) MENU button Self-timer recording [Airplane Mode] set to [On] Fader [Face Detection] set to [Off]
-
 1
1 -
2
-
3
-
4
-
5
-
6
-
7
-
 8
8 -
 9
9 -
 10
10 -
 11
11 -
 12
12 -
 13
13 -
 14
14 -
 15
15 -
 16
16 -
 17
17 -
 18
18 -
19
-
20
-
21
-
22
-
23
-
24
-
25
-
26
-
27
-
28
-
29
-
30
-
31
-
32
-
33
-
34
-
35
-
36
-
37
-
38
-
39
-
40
-
41
-
42
-
43
-
44
-
45
-
46
-
47
-
48
-
49
-
50
-
51
-
52
-
53
-
54
-
55
-
56
-
57
-
58
-
59
-
60
-
61
-
62
-
63
-
64
-
65
-
66
-
67
-
68
-
69
-
70
-
71
-
72
-
73
-
74
-
75
-
76
-
77
-
78
-
79
-
80
-
81
-
82
-
83
-
84
-
85
-
86
-
87
-
88
-
89
-
90
-
91
-
92
-
93
-
94
-
95
-
96
-
97
-
98
-
99
-
100
-
101
-
102
-
103
-
104
-
105
-
106
-
107
-
108
-
109
-
110
-
111
-
112
-
113
-
114
 |
 |
